3-40 Commissioning – Initial Steps
FlexFit – Linkageless Control – Revision 1.0
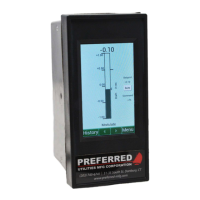
PREFERRED
UTILITIES MFG CORPORATION
CC
OO
MM
MM
II
SS
SS
II
OO
NN
II
NN
GG
Initial Steps
WARNING
The commissioning engineer must read these instructions carefully and be
certain they fully understand this product’s requirements and the application
as it applies to the specic red equipment being retrotted or installed. Failure
to follow these instructions could result in damage to the product and/or a haz-
ardous condition. Check the ratings given in these instructions to ensure that
this product is suitable for the intended application. After installation is com-
plete, check that the actual operation of this product is as it is intended.
These instructions follow the basic sequence recommended for a complete and successful startup of the FlexFit, including the
tuning and nal commissioning functions. The ame safeguard and combustion control are commissioned simultaneously by this
procedure.
Before proceeding further, ensure that the FlexFit and all the eld devices have been properly installed and that all electrical
wiring has been completed.
Close the hand valves on the gas and oil piping trains to ensure fuel is not inadvertently introduced into the furnace. Ensure
that the AC power supply is properly installed. Ensure that the burner On/Off switch is in the off position. Ensure all eld wires have
been terminated to prevent electrical shorts to ground, which will result in damage to the FlexFit. Turn on the AC power supply and
observe the LCD display.
If the touchpad display is blinking and there is a warning message "Parameter Mismatch!, Copy FF -> Backup, Copy Backup ->
FF", move the cursor to "Copy FF -> Backup" and press the ENTER button. The commissioning and parameter data is only stored
on the FlexFit primary EEPROM until you exit the commission mode. Then it is automatically backed up to the backup EEPROM. If
power is disconnected during commissioning, the LCD will blink and display the "Parameter Mismatch" message. In most instances,
you will want to copy the FF conguration to the Backup conguration.
Operating the FlexFit
Button Functions
BACK – returns to the previous screen in the display loop
NEXT – advances to the following screen in the display loop
Pressing BACK and NEXT simultaneously displays the home screen in the display loop. Pressing BACK and NEXT simulta-
neously a second time displays the previously viewed screen before jumping to the home screen. To make an operating screen the
home screen, press and hold BACK and NEXT until the screen blinks.
RESET – resets the burner after a lockout
ALARM SILENCE – ALARM SILENCE deenergizes the alarm relay and makes the LCD stop blinking. Press and hold ALARM
SILENCE for 5 seconds to cause the LCD to display the alarm history screen.
Hint
The BACK and NEXT
feature can make it
very easy to jump back
and forth between two
different screens.