Technical Bulletin PAGE: 2/4
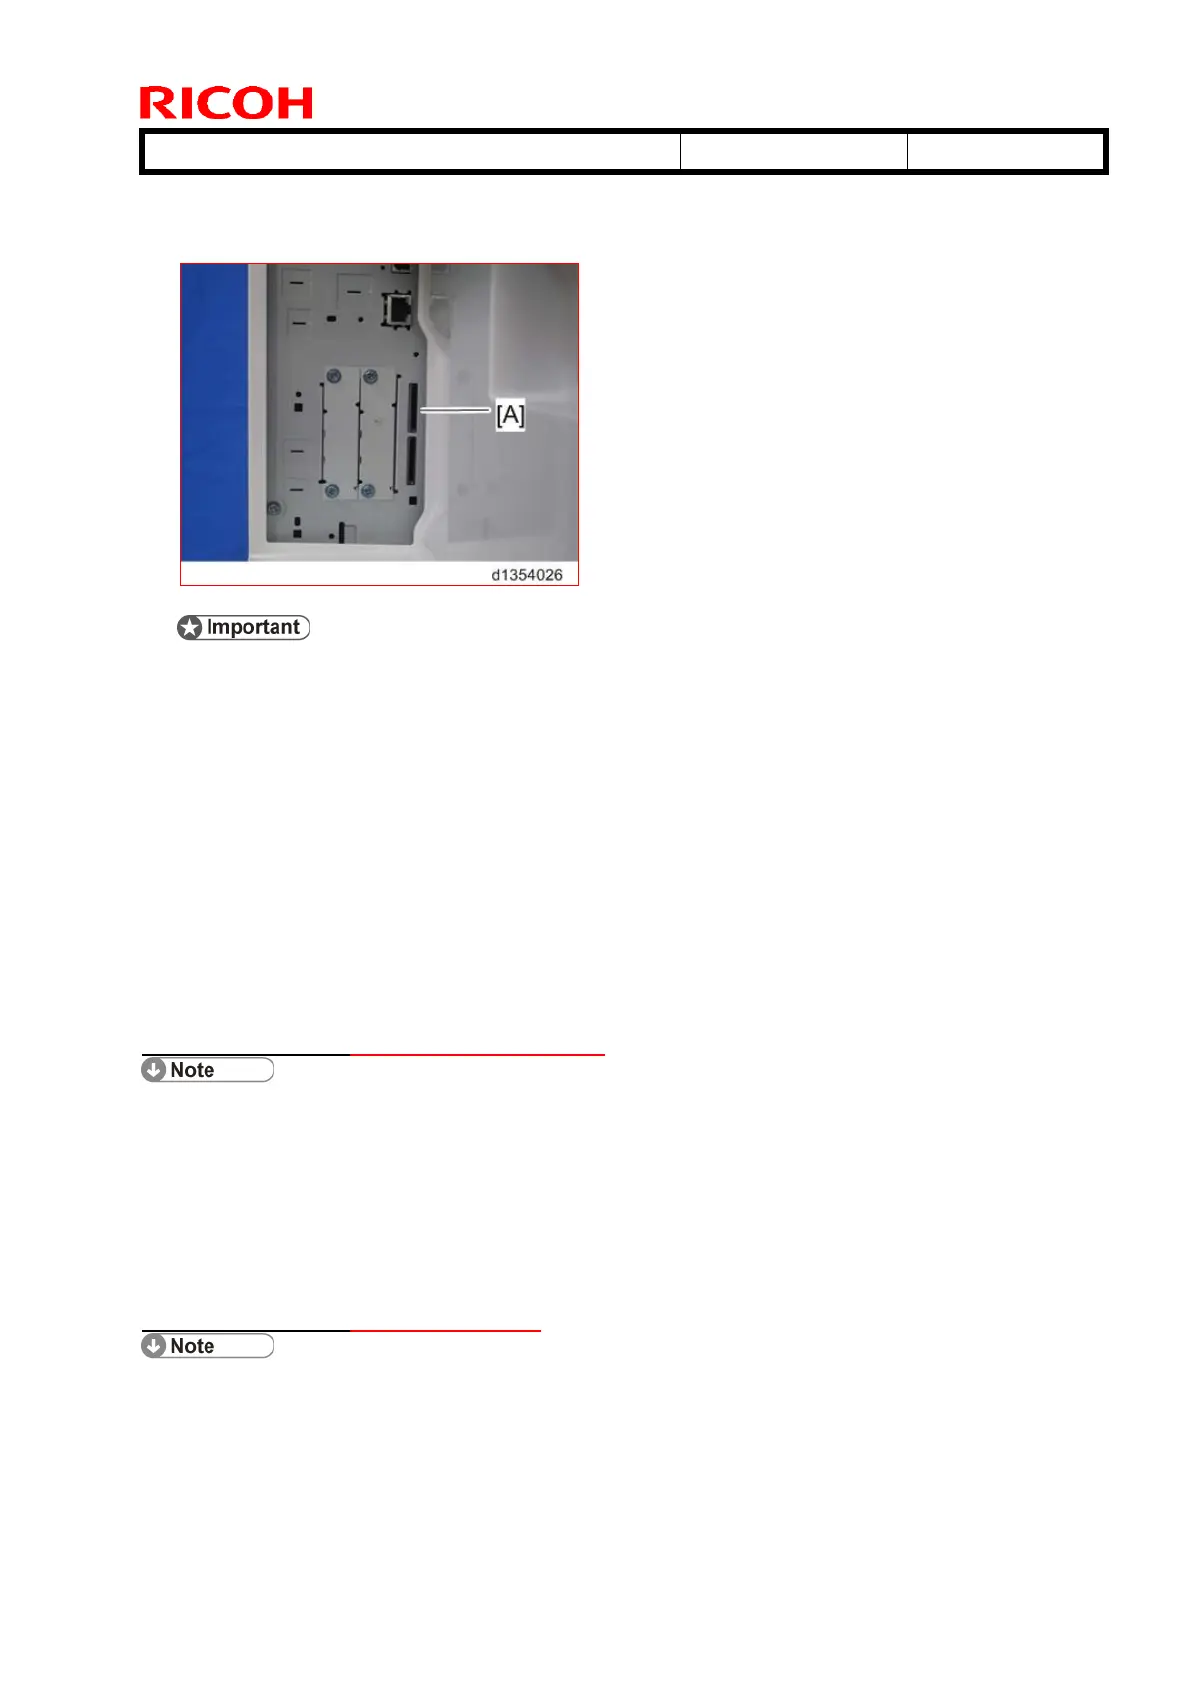
2. With its label turned away toward the front of the machine, insert the Fax Connection
Unit SD card into the upper slot (Slot 1) [A]. Push it in until you hear it click and lock in
place.
If another SD card is already inserted in Slot 1 [A], insert the SD card for the Fax
Connection Unit into Slot 2 (lower slot), and then do Steps 3 through 6 to merge the
two cards. If you do not need to merge the cards, skip Steps 3 through 6 and go
directly to Step 7.
3. Plug in, and then turn on the machine.
4. Move the Fax Connection Unit Type B application from the SD card in SD slot 2 (lower)
to the SD card in SD slot 1 (upper) with SP5-873-001.
5. Turn off the machine.
6. Remove the SD card from SD slot 2 (lower), and then keep it in a predetermined place
(see “SD Card Appli Move” in the manual for the main frame).
7. Attach the SD-card slot cover, and then turn on the machine (1 screw)
8. Make sure that the machine can recognize the option.
2. Registering the Client-side Machine(s)
Up to six machines can be registered as Client-side Machines.
On the Remote Machine:
1. Press the [User Tools/Counter] key on the operation panel
2. Press [Administrator Tools].
3. Press [Program / Change / Delete Remote Machine].
4. Enter the IP address or host name of the Client-side Machines and press [Set].
3. Registering the Remote Machine
Only one machine can be registered as the Remote Machine.
On the Client-side Machine(s):
1. Press the [User Tools/Counter] key on the operation panel
2. Press [Administrator Tools].



 To Next Page