Preparing to Print (Computer Side)
45
Basic Operation
3
Select [RISO A2 Series], and then click [Next].
The following procedure shows how to create a Standard TCP/IP Port.
(1) Select [Create a new port], and then [Standard TCP/IP Port].
(2) Click [Create].
The [Add Standard TCP/IP Printer Port Wizard] dialog box appears.
(3) Click [Next].
(4) Enter the IP address of your printer, and then click [Next].
The Port name will be entered automatically.
(5) Select [Custom], and then click [Settings].
(6) Select [LPR] for [Protocol], input “lp” as the [Queue Name] under [LPR settings], and then place a
checkmark in the [LPR Byte Counting Enabled] checkbox.
(7) Click [OK].
(8) Click [Next].
(9) Click [Finish].
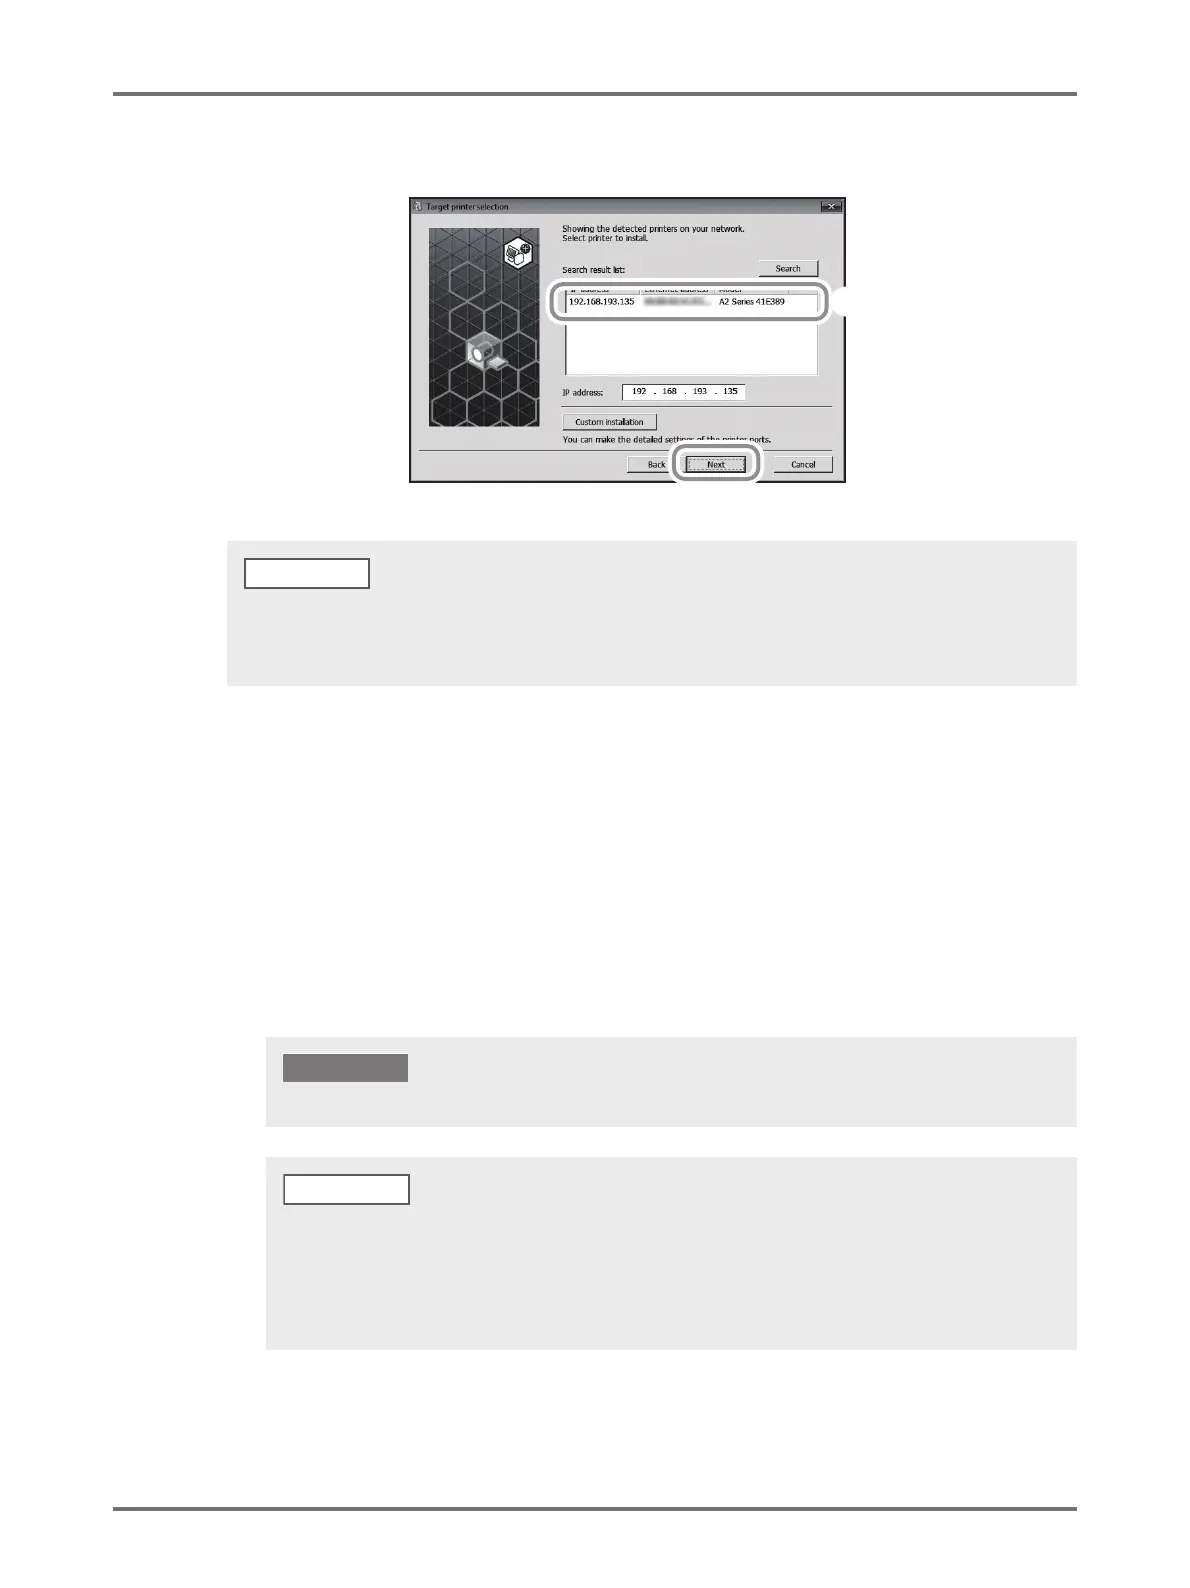
• You can also enter the IP address manually.
• When you set a transmission system or port optionally, click [Custom installation], and then select an existing port or
create a new port.
Images may not print properly if [LPR Byte Counting Enabled] is not selected.
IMPORTANT!
• This installation procedure is for when a RISO Network Card (above mentioned) is used. When connecting to a
commercial print server etc. on a network, refer to the instruction manual provided by the manufacturer.
• After the LPR function is added, the computer requires restarting. Therefore, be sure to store the necessary data
in the computer before carrying out the operation. Follow your Windows XP/Windows Vista/Windows 7/Windows
8/Windows 8.1 instruction manual or Help for details.
NOTE