4-87
FACSIMILE►OTHERS FUNCTION
2
Enter the destination fax number.
• Entering a destination number using the numeric keys ►page 4-13
• Retrieving a destination from an address book ►page 4-14
• Using a search number to retrieve a destination ►page 4-17
• Retrieving a destination from a global address book ►page 4-18
• Using a transmission log to resend ►page 4-20
3
Tap the [Others] key, and tap the [Erase] key.
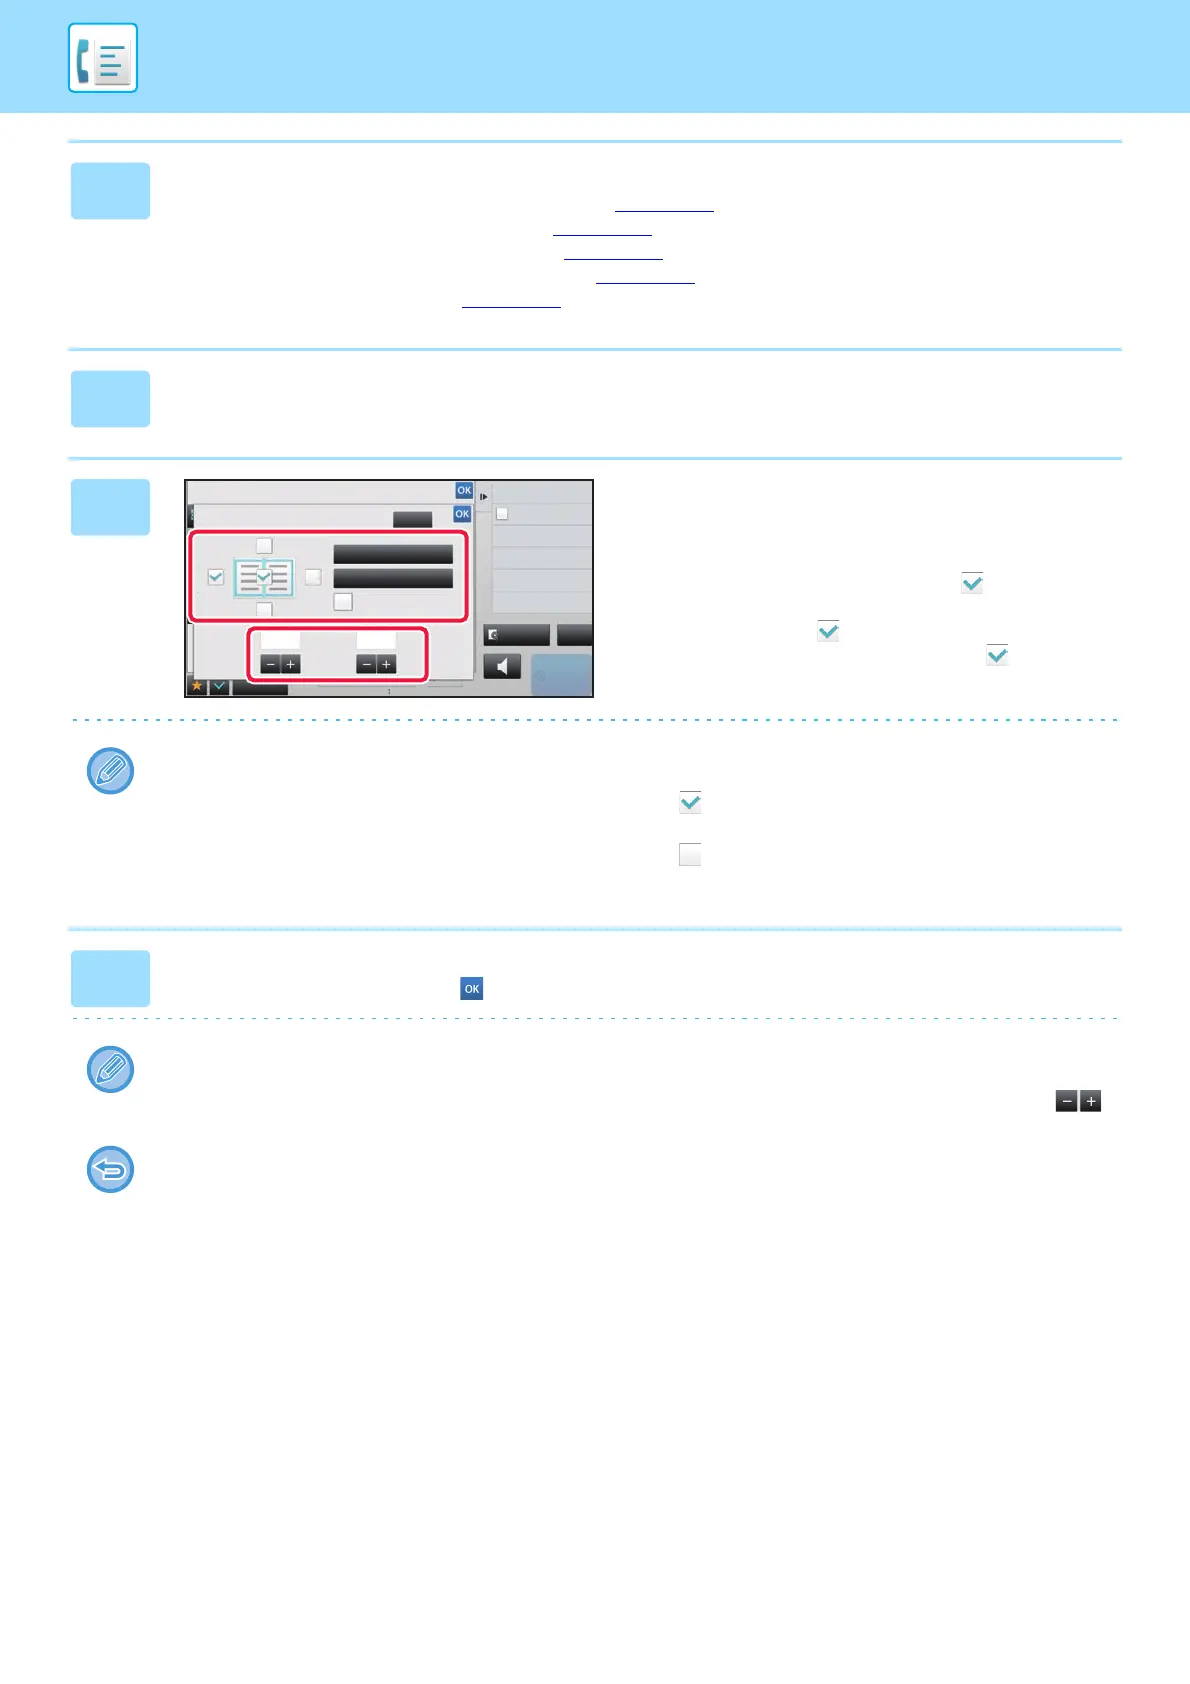
4
Tap the checkbox of the edge that you
wish to erase, and specify the erase
position.
Check that he tapped checkbox is set to . If the [Specify
Frame] key is tapped, the [Up], [Down], [Left], and [Right]
checkboxes are set to . If the [Specify Frame+Centre]
key is tapped, all the checkboxes are set to .
Specify the erase edge on the reverse side when erasing edges of one to three sides of Up, Down, Left, and Right on
the front side to scan a 2-sided original.
• If the [Reverse erase position of back face] checkbox is set to , the edge in the position opposite to the erased
edge on the front side will be erased.
• If the [Reverse erase position of back face] checkbox is set to , the edge in the same position as on the front side
will be erased.
5
Specify the erase width.
After the settings are completed, tap and [Back] keys in sequence.
• Tap the numeric value display indicating the margin shift area on the front side or reverse side, and enter the area
using the numeric keys.
• To quickly set the area, first specify a value close to the desired value by the numeric keys, then adjust it with .
To cancel the erase setting:
Tap the [Clear] key.
Back
Clear
Others
Reverse erase position of
back face
Up
Down
10 10
Left Right
Centre Outer Frame
(0 ~ 20)
mm
(0 ~ 20)
mm
Exposure
Specify Send Exposure
Resolution
Change Original Resolution
N-Up
Put Multiple Pages in A Page
reception memory
Speaker
Start
Erase
Outer Frame
Specify Frame+Centre
CA
Preview
100%
 Loading...