MX-3114N ADJUSTMENTS AND SETTINGS 5 – 70
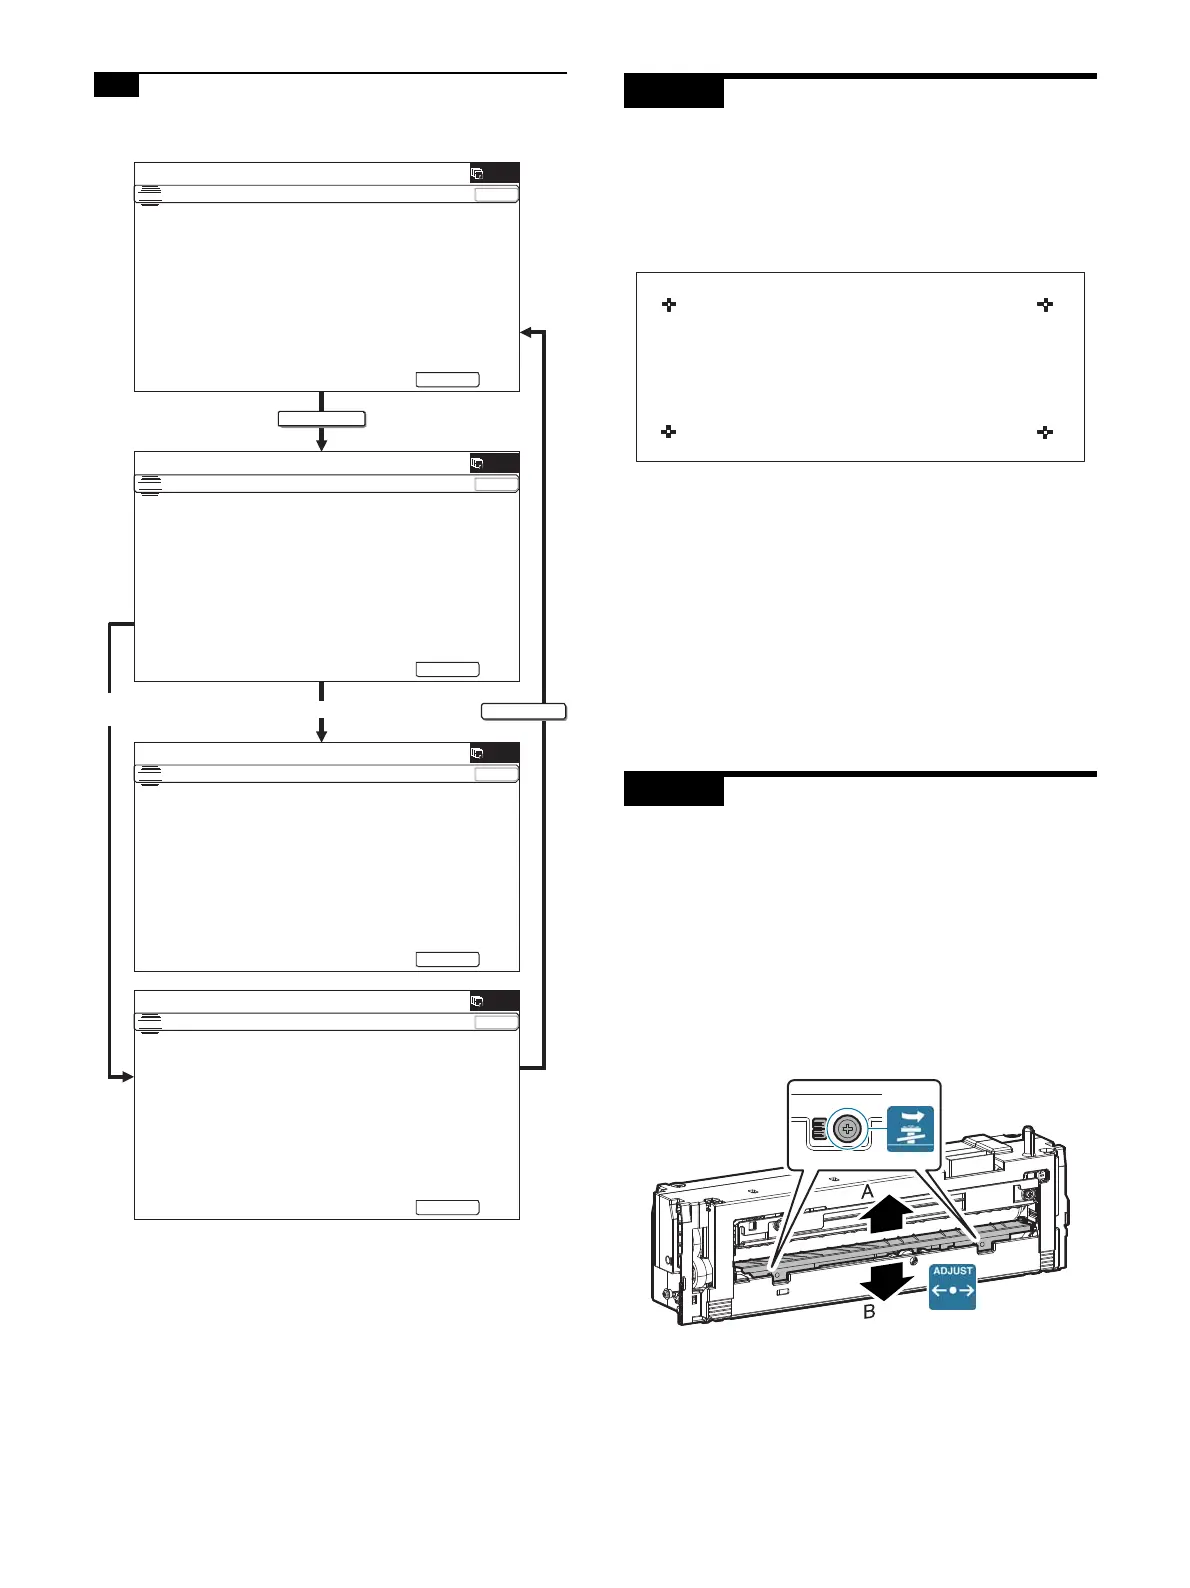
12-B Adjust the sensitivity of the original size
sensor
1) Enter the SIM41-2 mode.
2) Execute the sensor adjustment without document.
With the document cover open, without placing a document on
the table glass, press [EXECUTE] key.
3) Place A3 (11" x 17") paper on the document table and press
[EXECUTE] key.
If the adjustment is completed normally, "DOCUMENT SIZE
PHOTO SENSOR LEVEL IS ADJUESTED" is displayed.
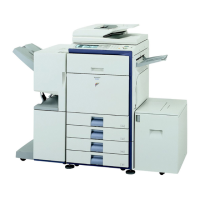
ADJ 13 Touch panel coordinate setting
This adjustment must be performed in the following cases:
* The operation panel has been replaced.
* U2 trouble has occurred.
* The scanner control PWB has been replaced.
* The EEPROM on the scanner control PWB has been replaced.
1) Enter the SIM 65-1 mode.
2) Precisely press the cross mark points (4 positions).
When the cross mark is pressed precisely, a buzzer sounds
and the display is reversed. When all the four points are
pressed and the touch panel adjustment is completed, the dis-
play returns to the simulation sub number entry screen.
In case of an error, the display returns to the entry screen
again.
Check to confirm that there is no shift between the display
frame and the detection position when the touch panel is
pressed.
* When pressing the touch panel, never use a sharp tip (such
as a needle or a pin).
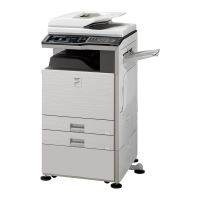
ADJ 14 Fusing paper guide position
adjustment
Normally there is no need to perform this adjustment. In the follow-
ing cases, perform this adjustment.
* When a paper jam occurs in the fusing section.
* When wrinkles are made on paper in the fusing section.
* When an image deflection or an image blur is generated in the
paper rear edge section.
1) Loosen the fusing paper guide fixing screws on the two posi-
tions in the front/rear frame direction.
2) Use the fusing paper guide position scale as the reference to
shift the paper guide in the arrow direction A or B.
The standard fixing position is at two scales in direction B from
the marking scale center. However, the position may be varied
depending on the situation.
* When a wrinkle is made on paper, change the position in the
error direction A.
* When an image deflection or unclear image is generated in
the lead edge area of paper, change the position in the
arrow direction B.
Adjustment completed
EXECUTE
Adjustment
failed
EXECUTE
'2&80(176,=(3+2726(16256(783
:,7+7+(25,*,1$/&29(523(1'7851217+((;(&87(
.(<:,7+7+(25,*,1$/217+(25,*,1$/7$%/(
'2&80(176,=(3+2726(16256(783
6(7$1$6,=(h&23<3$3(5217+(25,*,1$/7$%/(
$1':,7+7+(2&23(1'7851217+((;(&87(.(<
'2&80(176,=(3+2726(16256(783
'2&80(176,=(3+2726(1625/(9(/,6$'-867('
'2&80(176,=(3+2726(16256(783
3+2726(1625(5525326,7,21
3'3'3'3'3'3'3'