MX-3114N DISASSEMBLY AND ASSEMBLY 10 – 60
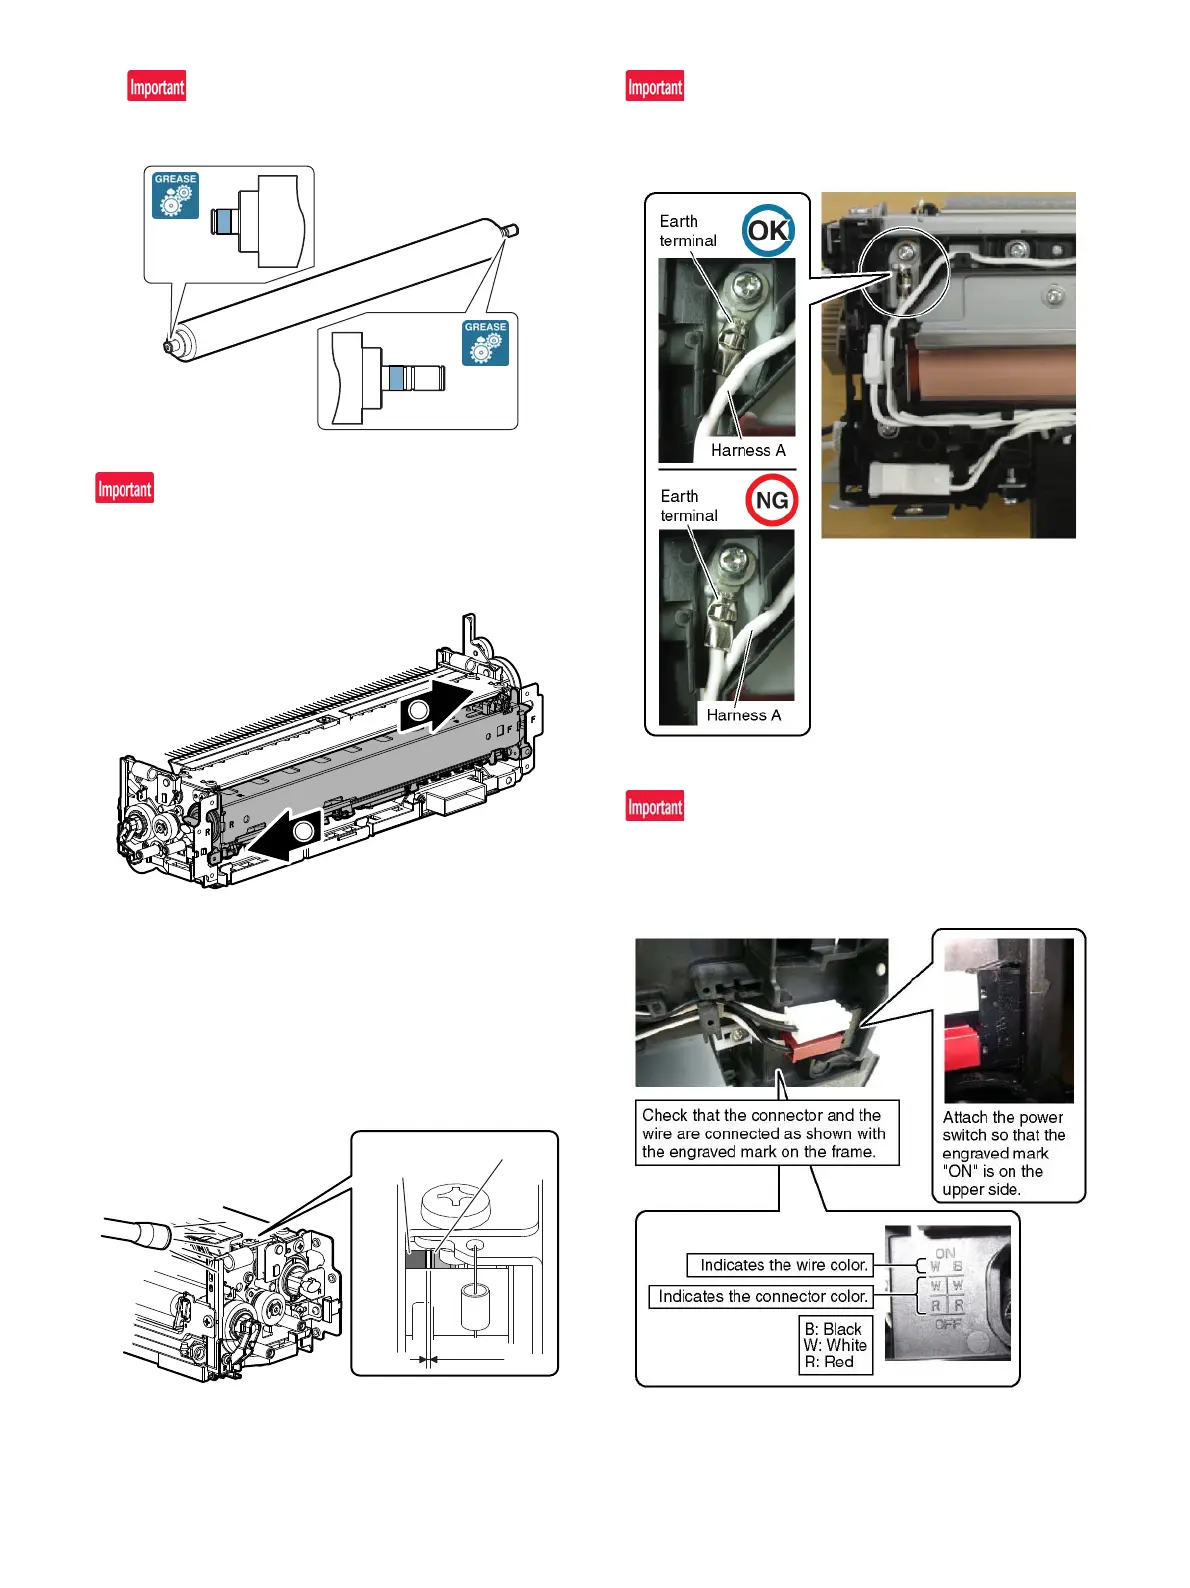
When replacing the fusing roller, apply grease (JFE552) to the
shaft section.
When attaching the fusing pressure spring, perform the following
procedures.
1) Slide the fusing belt unit to the front side, then to the rear side.
2) Attach the pressure spring, and connect the fusing heater lamp
connector.
3) Shine a light through the clearance between the rear side of
the fusing unit and the frame to confirm that there is a clear-
ance between the fusing belt and the belt guide collar.
If there is a clearance between the fusing belt and the belt
guide collar, black color on the surface of the fusing roller (F1)
can be seen. It serves as a criterion of the judgment for pres-
ence of a clearance.
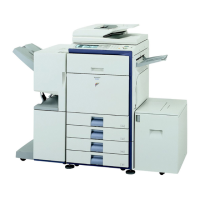
When processing the fusing unit harness, note the following.
If the harness is improperly processed, short-circuit may occur.
Harness A should be passed over the earth terminal.
For connection of the power switch connector, follow the proce-
dures below.
Be sure to identify the colors and connecting directions of the con-
nector and the wire.
Clearance
Fusing belt
Belt guide collar