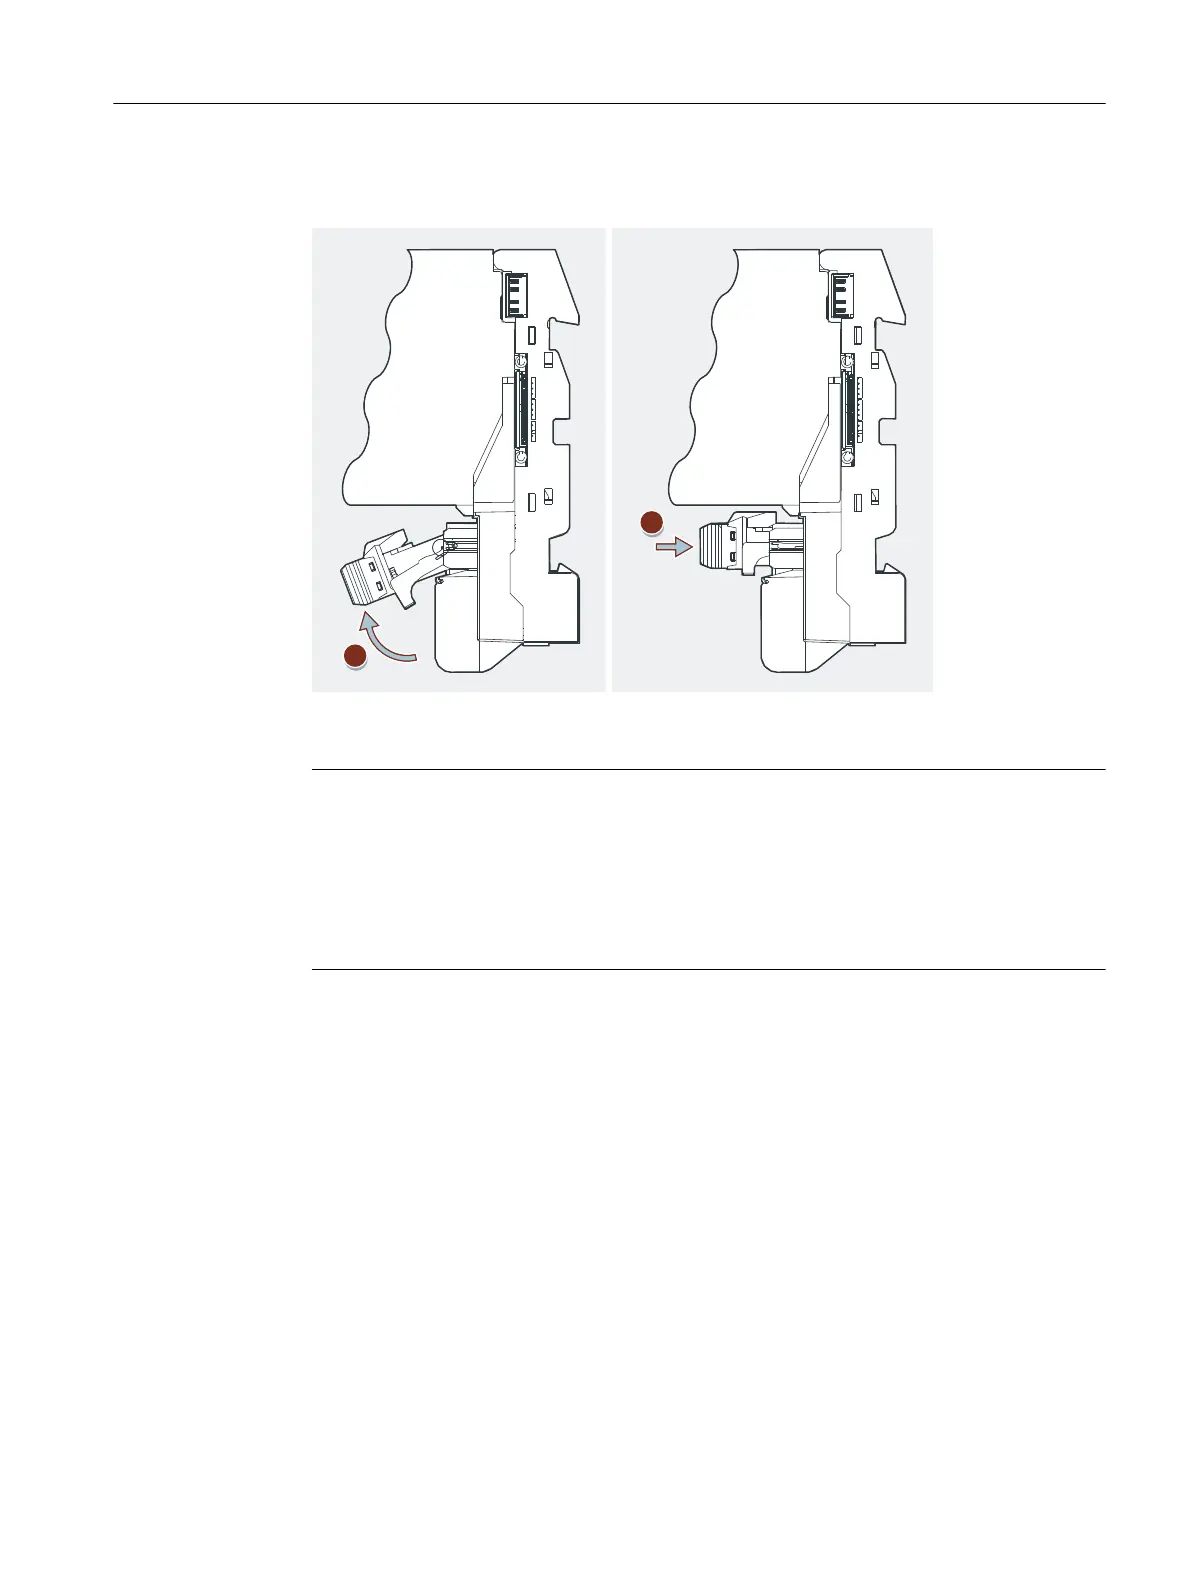
6. Swing the Ex d disconnecting plug back into the horizontal position and push it in backwards
to the end stop. Pay attention that the locking lever is ush with the plug and is engaged.
7. Label the electronic module using the labeling strips provided and reinsert the labeling strips
into the electronic module.
Note
If a gap (of an electronic module ET 200iSP) occurs due to the 2 DO Relay UC60V/2A
conguration, the following rules apply:
• The gap is located at the last slot of the ET 200iSP: insert the slot cover (or a reserve
module as of product version 3 or later) in this gap.
• The gap is located at another slot (for the electronic module 2 DO Relay UC60V/2A): insert
a reserve module (as of product version 3) in this gap.
Uninstalling electronic modules 2 DO Relay UC60V/2A
1. Follow steps 1 to 3, see Installing and labeling electronic modules 2 DO Relay UC60V/2A.
2. Use the screwdriver to operate the catch on the underside of the electronic module.
3. Swing the electronic module upwards.
4. Remove the module from the bearing position of the terminal module.
Wiring
6.5 Inserting and labeling the power supply, interface module, and electronic modules
ET 200iSP
Operating Instructions, 11/2022, A5E00247483-AK 149