7.4 ACCESS TO THE BOTTOM COMPARTMENT
To gain access to the bottom compartment, proceed as
follows:
1) turn off the master switch and detach all the connection
wires to the machine.
2) remove the 2 swarf collection trays.
3) turn the machine over onto its right-hand side.
4) loosenthe8xingscrews(U3)onthebottomplateand
remove.
Fig. 75
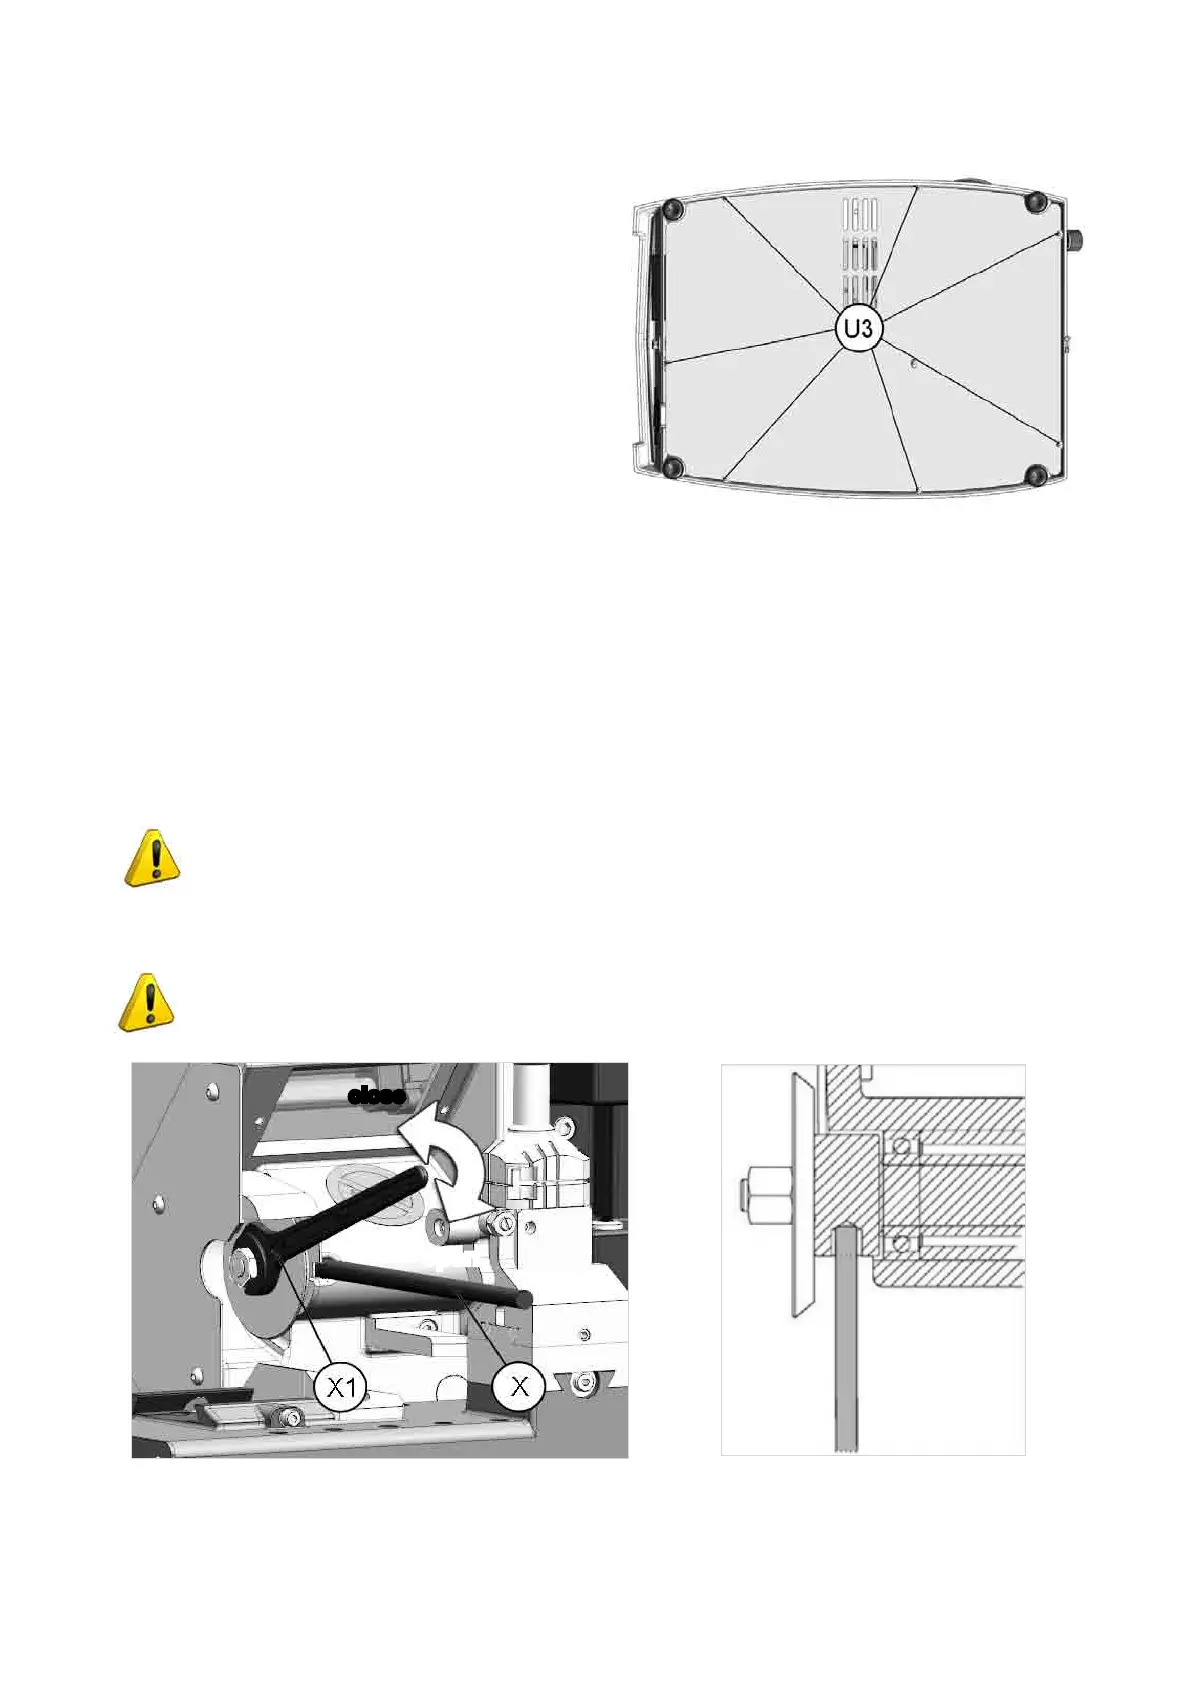
7.5 CUTTER REPLACEMENT
1) Zero the carriage movements (from the main menu press SHIFT+STOP)
2) Disconnect the key-cutting machine from the power supply.
3) Raise the safety shield.
4) Loosen the screw (D2) and pull out the clamp to the left (Ch. 4.6); (if it is an automatic clamp, see Ch. 4.7).
5) Fit the cutter release rod (X) provided, into the special hole (Fig. 76).
6) Loosen the cutter locking nut using the 14 mm wrench (X1).
ATTENTION: the thread is left-handed.
7) Replace the cutter; lock the nut and remove the rod.
8) Put back the clamp unit, pushing all the way in to the right. Tighten the screw (D2).
ATTENTION: when replacing a worn cutter with a new one or with a re-sharpened cutter
consult the Ch. 5.7 [4] Calibrations.
Fig. 76
open
close
Operating Manual UC199
Copyright Silca 2012
73