Fig. 101
7.16 CLOCK BATTERY REPLACEMENT
1) turn off the machine and disconnect from the power supply.
2) gain access to the bottom compartment (Ch. 7.4).
3) loosenthe6boardxingnuts(Y1)diinordertoreachthebattery(Ch.7.9).
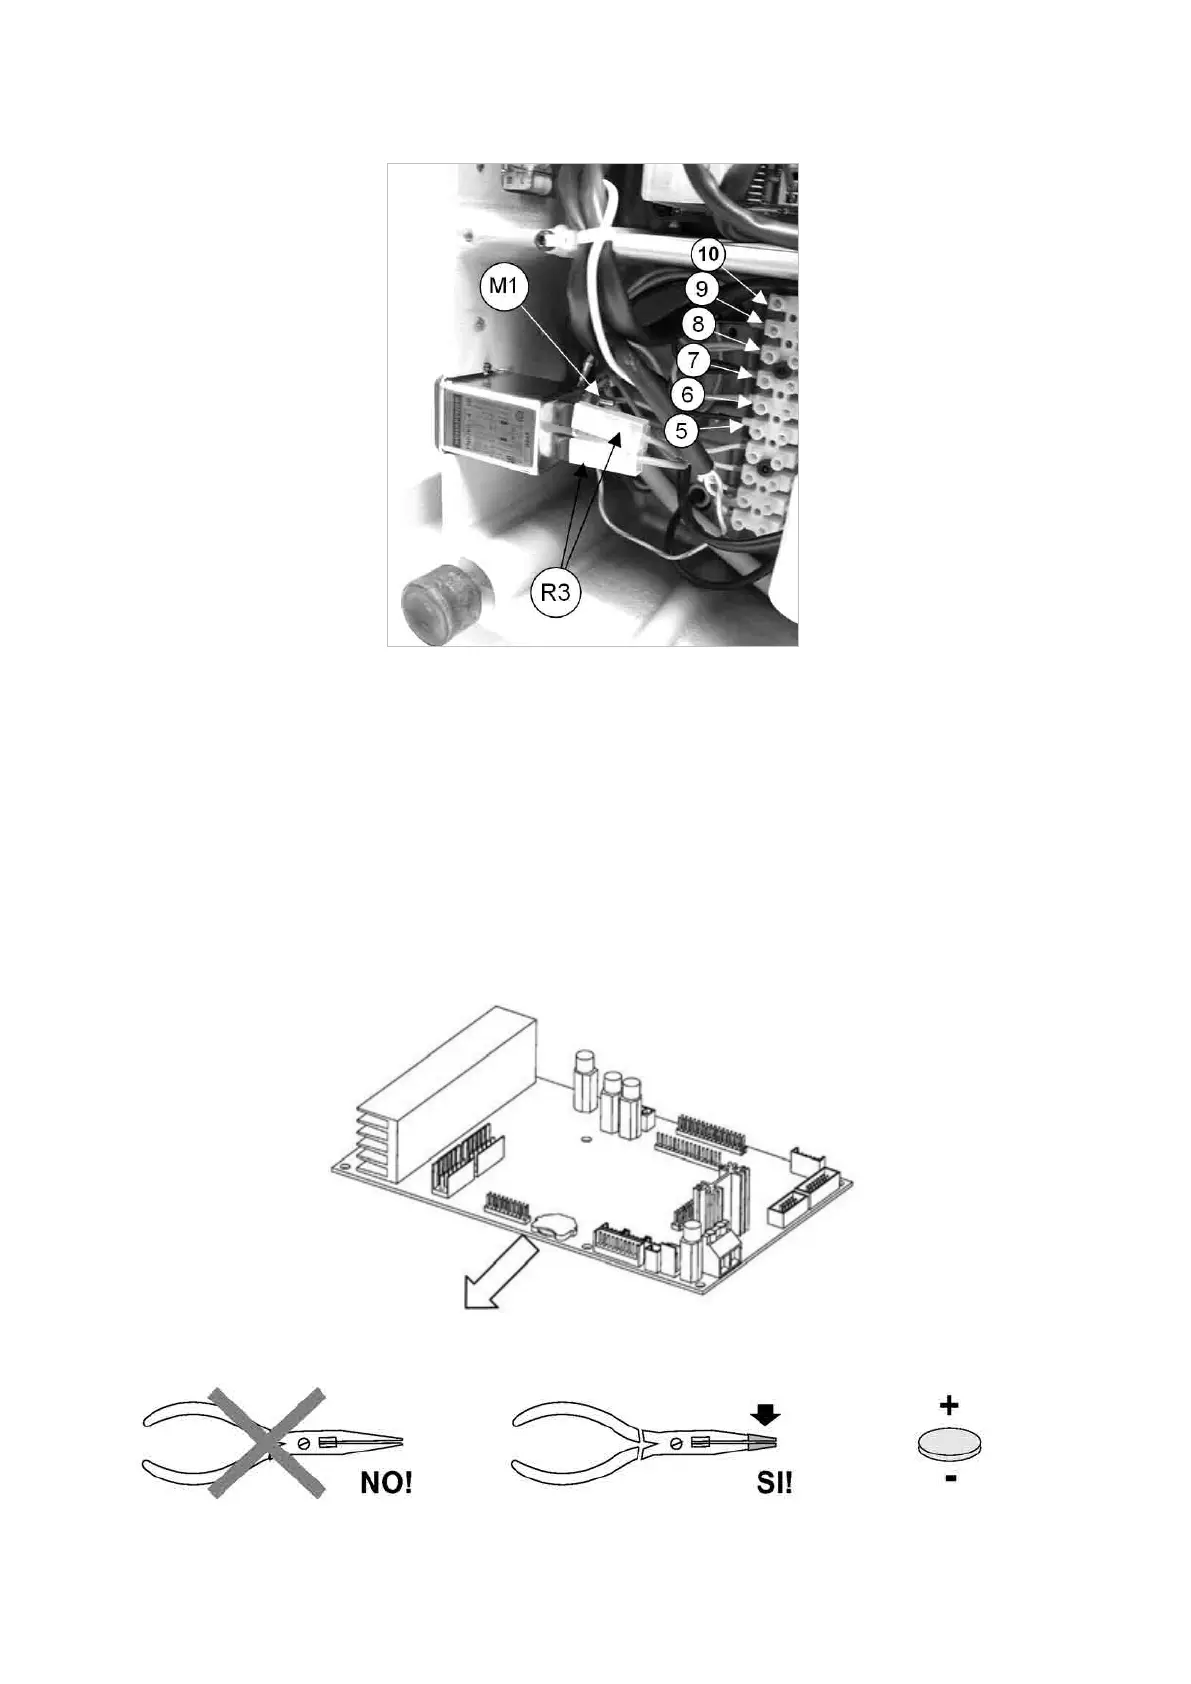
4) useinsulatedlong-nosedplierstoremovetheatbattery(
Fig. 102
), or push out from the back.
5) use insulated long-nosed pliers to insert the new battery into its seat, paying attention to the poles (Fig. 103).
6) secure the board by tightening the 4 nuts.
7) repeat the above operations in reverse order to gain access to the bottom compartment.
Fig. 102
Fig. 103
insulated points
with adhesive tape
Operating Manual UC199
Copyright Silca 2012
86