4.8 CHANGING CUTTING TOOL
1) Zero the carriage movements (from the main menu press SHIFT+STOP).
2) Turn off the power to the key-cutting machine.
3) Raise the safety shield.
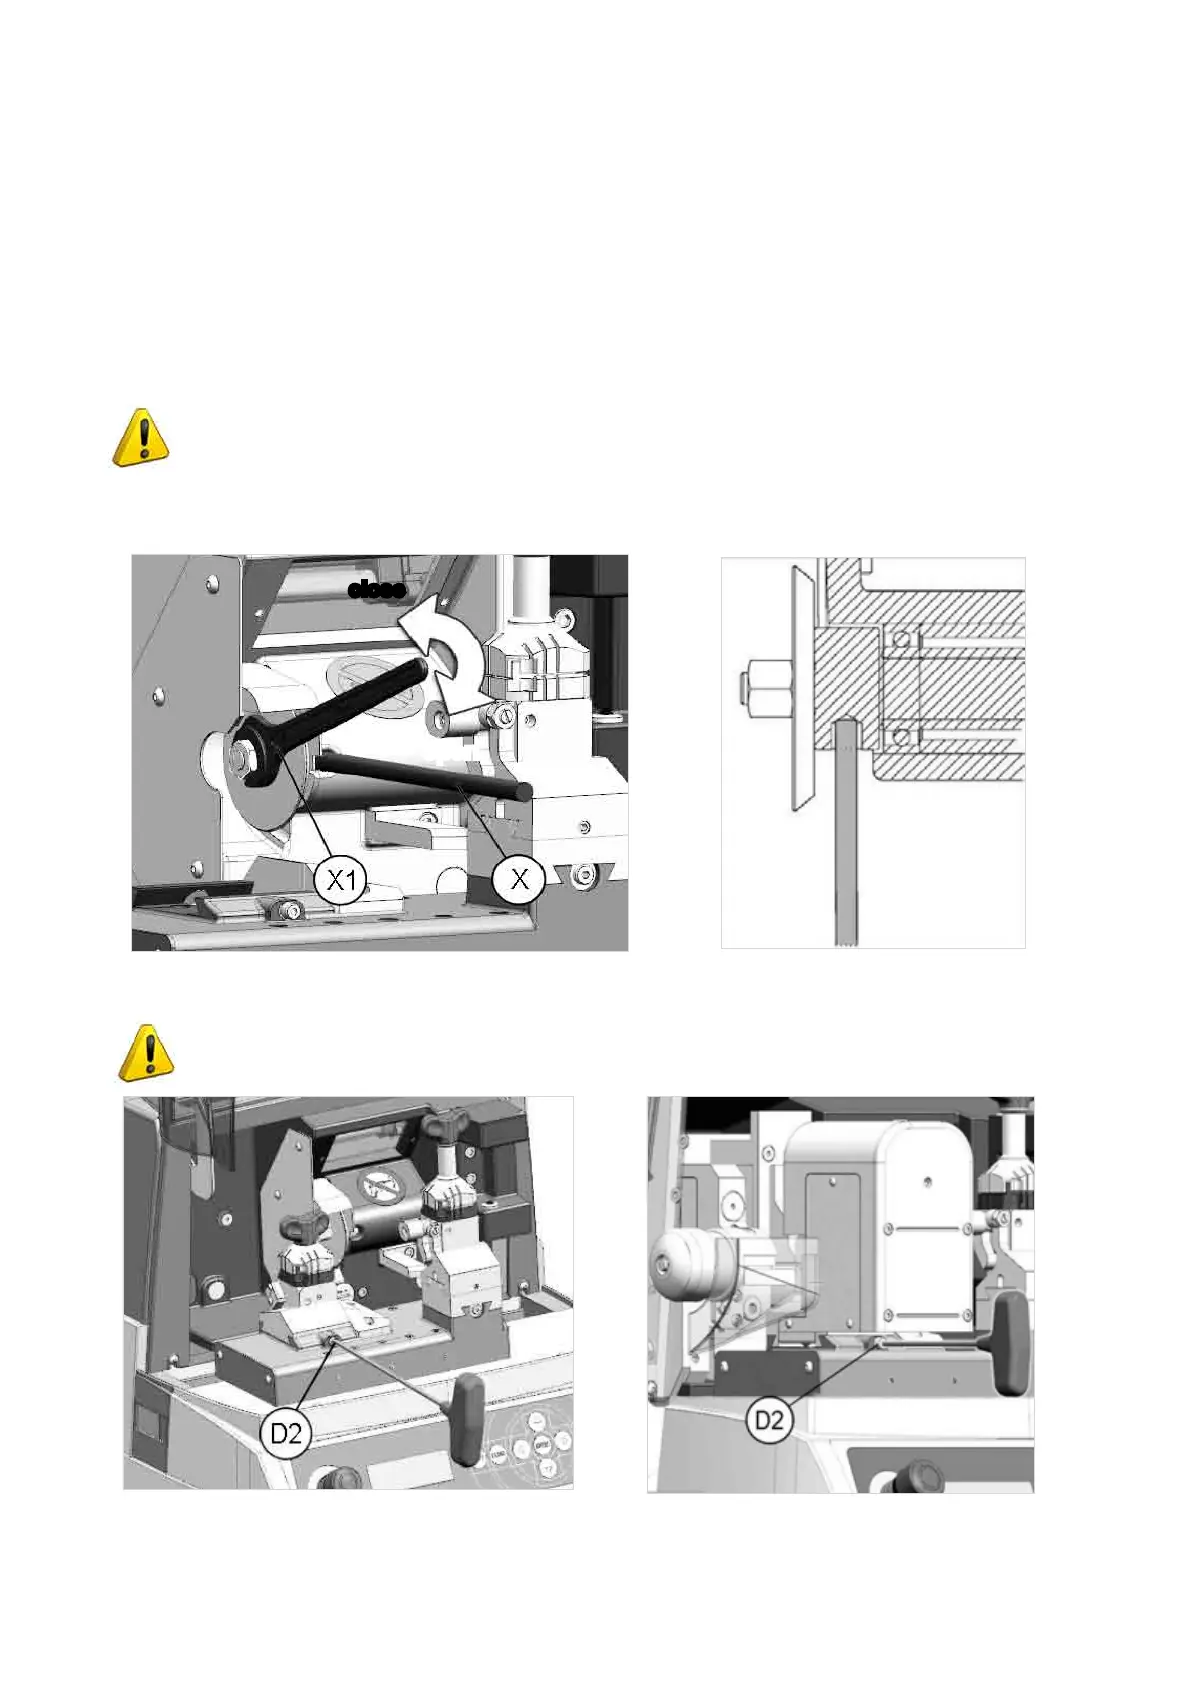
4) Loosen the screw (D2) (Fig. 38), pull out the clamp to the left and remove (see Ch.
4.7
for the automatic
clamp).
5) Fitthecutterreleaserod(X)providedintothespecialhole(ifanewcutterisbeingttedtoreplaceaworn
one, or in order to sharpen the cutting edge (Fig. 37).
6) Use the 14 mm wrench (X1) to loosen the cutter locking nut.
ATTENTION: the thread is left-handed.
7) Replace the cutter, tighten the nut and remove the rod from the hole.
8) Fit the clamp unit and push all the way in to the right. Tighten the screw (D2).
Fig. 37
ATTENTION: ifanewcutterisbeingttedtoreplaceawornone,orinordertosharpenthe
cutting edge, see Ch. 5.7 [4] Calibrations.
Fig. 38
open
close
Operating Manual UC199
Copyright Silca 2012
26