WITHOUT LOADER UNIT INSTALLED
Proceed as follows:
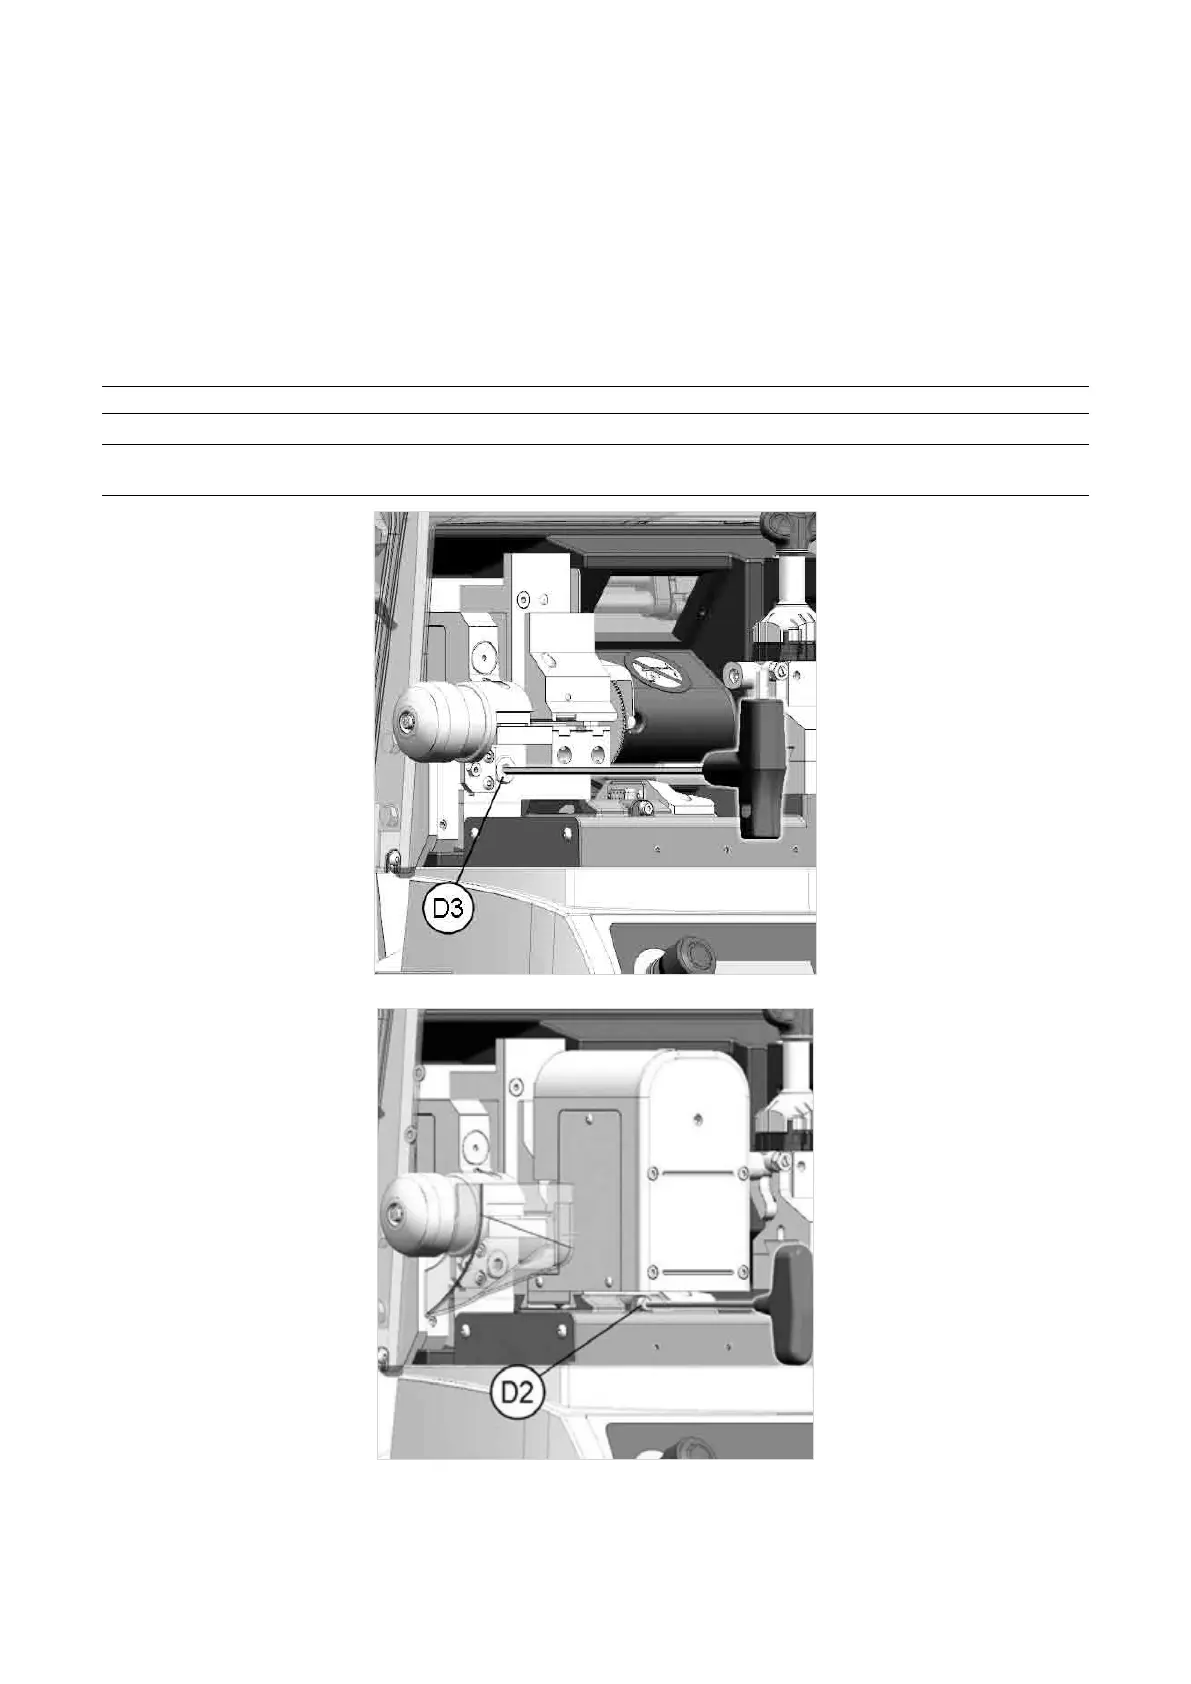
1) Remove the standard cutting clamp: loosen the screw (D2) and pull out the clamp to the left (Fig. 32).
2) Fittheloader:Removethecover/protection(S1)(Fig.34)ontheserialinputttedtotheloaderseat.Please
keep the protection for future use. Fit the loader, pushing it all the way in, then tighten the screw (D3) with the
(long) hex wrench provided.
3) FittheAutomaticClamp:ttheautomaticclampintothespecialdovetailrunner,pushingtotherightuntilit
stops, then tighten the screw (D2) (Fig. 36).
NOTE: please note that the automatic clamp can be tted only after the loader has been inserted.
NOTE: the mechanical loader cannot be used when operating the key-cutting machine with the
standard 4 sided clamp.
Fig. 35
Fig. 36
Operating Manual UC199
Copyright Silca 2012
25