141
SJ6826RT, SJ6832RT
213560ABA
General Section 5 – Procedures
Red LED
Green LED
Red LED
Green LED
Red LED
Green LED
16. The green LED then ashes and the red LED
stays on for 2 seconds indicating the switch is
verifying the new zero position.
17. The green LED stays on continuously indicating
the switch is ready for normal operation.
18. Turn main power disconnect switch off.
19. Push in all emergency stop buttons.
20. Remove wheel chocks.
Reprogramming Existing Tilt Switch
Follow this procedure to reprogram an existing tilt
switch. Reprogramming the switch records a new zero
position.
1. Park aerial platform on a rm level surface.
2. Fully lower the platform. Reprogramming the
switch learns
3. Chock or block wheels to keep the aerial
platform from rolling forward or backward.
NOTE
The tilt switch circuit is only powered when
controls are powered up
4. Turn main power disconnect switch on.
5. Select Off–Lift–Drive key switch to Lift position or
Drive position.
6. Pull out all emergency stop buttons.
7. Verify switch is powered. The red and green LED
indicator lights should be ashing.
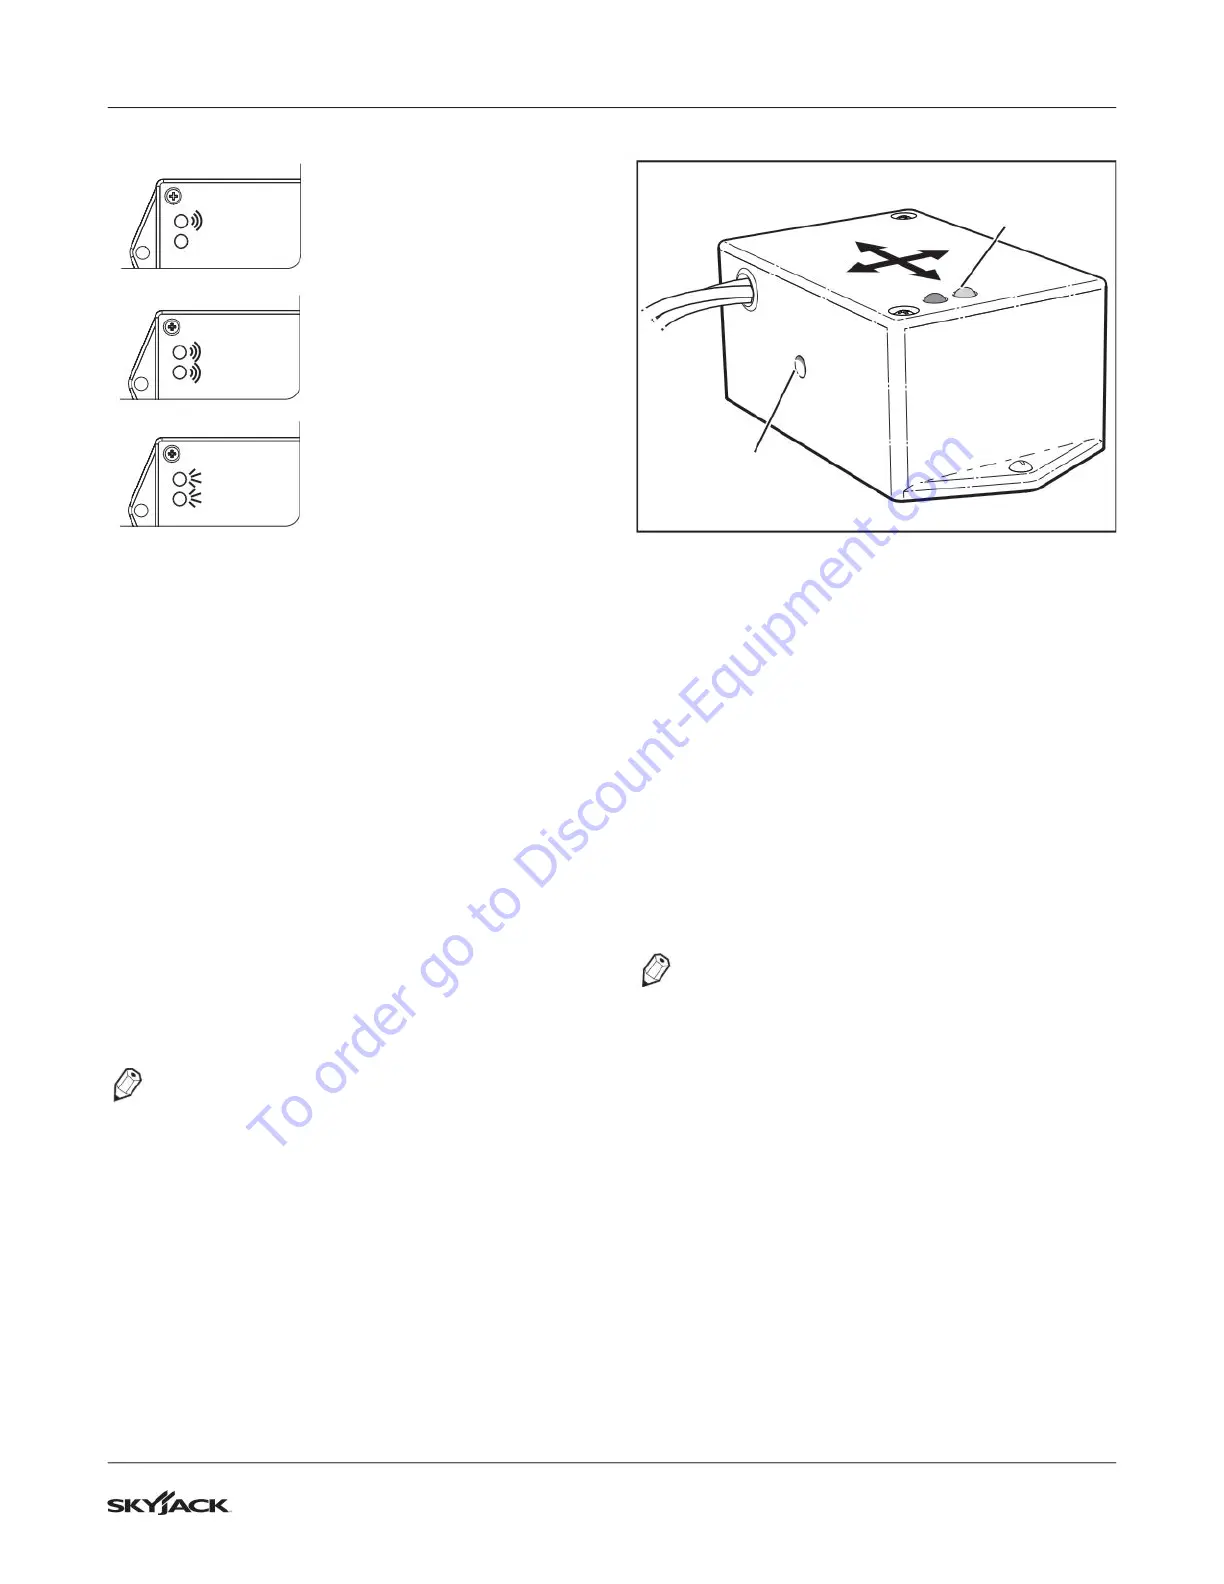
8. On the back side of the switch, press and hold
the Set-up button for 3 seconds.
M62332AA
LED Indicator
Lights
Set-up Button
9. Both LEDs turn off, then begin ashing for a 5
second period.
10. During this 5 second period, press and release
the Set-up button 3 times.
11. The red LED then ashes for 4 seconds during a
stabilization period.
12. Both LEDs then ash for 1 second indicating the
switch is learning the new zero position. When
both LEDs are on continuously, it indicates the
switch learned the new zero position.
13. The green LED then ashes and the red LED
stays on for 2 seconds indicating the switch is
verifying the new zero position.
14. The green LED stays on continuously indicating
the switch is ready for normal operation.
NOTE
If the Set-up button is not pressed 3 times during
Step 10, the switch exits the program mode and
returns to normal operation using the previous
zero point
15. Turn main power disconnect switch off.
16. Push in all emergency stop buttons.
17. Remove wheel chocks.
To order go to Discount-Equipment.com