MV-32/64 Multiviewer www.snellgroup.com Operation
Issue 1 Rev 11 Page 35 © 2014 Snell Limited
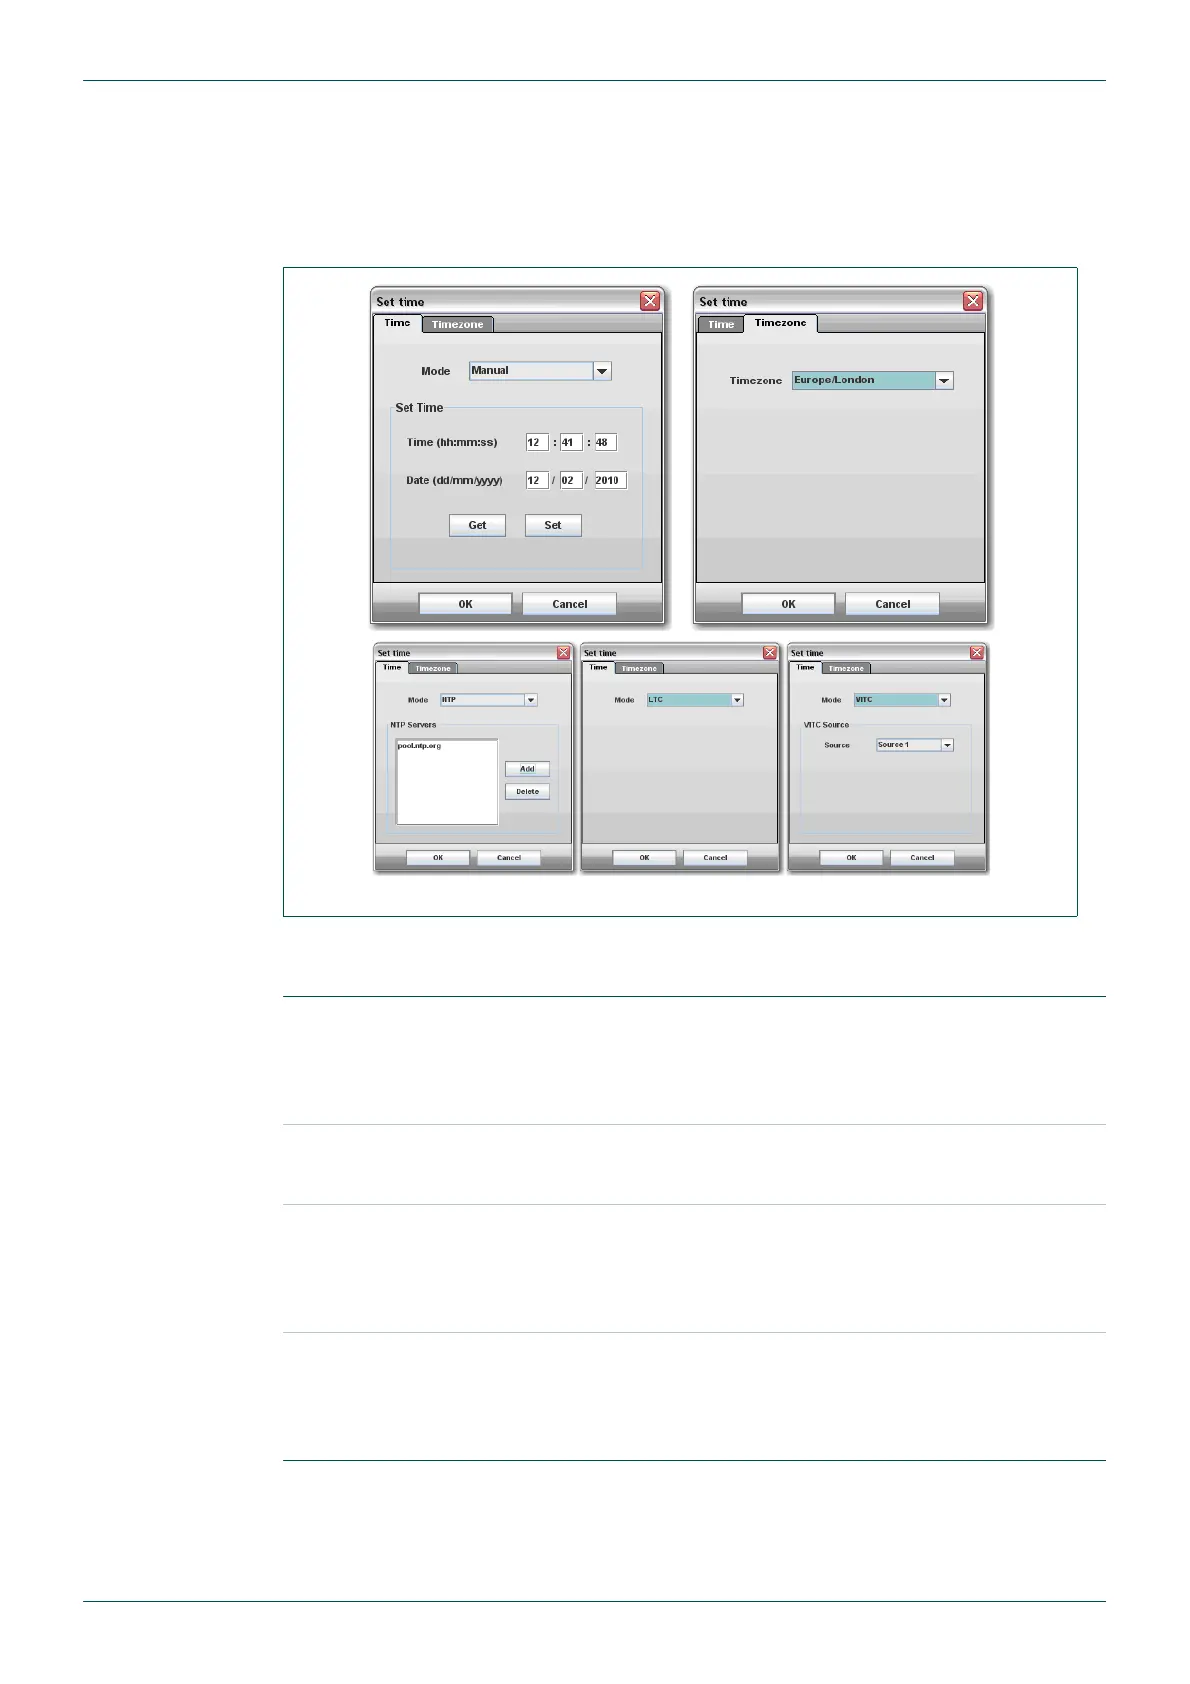
4.5 Set Time
Clock/date display data can be derived from several sources; the system clock, NTP
synchronisation, LTC, or VITC from a chosen SDI input. The clock source is set by going to
the Set Time item in the Module menu. Here there are two tabs, Timezone and Time. The
timezone should be set to the appropriate region before adjusting the clock.
To set the clock source, go to the Time tab and select the desired source - Manual, NTP, LTC
or VITC. The setup procedures for each mode are:
Fig 20. Set Time.
Manual
In this mode the time and date of the system clock will be shown and
can be adjusted. Press the Get button to show the current time. To
adjust the time enter the new time and date in the appropriate fields
and then press the Set button. A battery on the CPU board ensures
that time data is retained should the unit be powered down.
NTP
In this mode the time is sourced from an NTP server (or multiple NTP
servers can be entered). Press the Add button to add a new server,
and enter the host name or IP address of the new server.
LTC
In this mode the time is sourced from the LTC input on the rear of the
frame. There is nothing to setup here; there just needs to be LTC
present for this to work properly. If no LTC is present then the system
clock will be used. (If LTC is present but later disappears then the
clock will continue advancing without any discontinuity).
VITC
Here the time can come from VITC that is present on any SDI input.
Select the chosen SDI source number that contains VITC. If no VITC
is present then the system clock will be used. (If VITC is present but
later disappears then the clock will continue advancing without any
discontinuity).
Table 11. Set Time