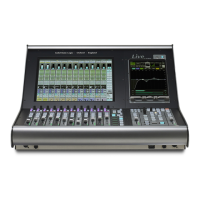
Starting a Mix
OK, let’s start mixing! Locate to the start of the track. Store this point in one of the
TC1-5 timecode stores, if you haven’t already done so (see Section 3).
We’ll assume you are going to mix with the fader motors on. Check that the MOTORS
ON/OFF button on the front panel is lit. We also assume that you are in ‘Insert Mixing
On’ mode; check that the INSERT MIXING ON button is lit (see Page 5-33 for more on
Insert Mixing).
Note that when the mix system is enabled, if any previous automation settings have
not been cleared in the Project File Settings pop-up, these settings will be restored to
the console. This may have the alarming effect of destroying the basic fader balance
you have just set up! To avoid this, hit the CLEAR AUTO button, before you enable the
automation, to clear the automation RAM; you will be asked to confirm your request
(see opposite) so hit the OK button. This function is replicated by Clear Data in the
Automation menu.
Select Automation in the MIX-DESK menu and stab on Auto Modes. Alternatively
press the AUTO MODES button on the front panel. The resultant pop up (see lower
screen opposite) enables you to choose the type of automation mode, eg. Overwrite,
Rollback, Rollback/Join etc., for different types of automated controls.
First select the control group, Large Faders etc., then select the mode; the pop-up will
reflect your choice. The pop-up can be driven from the front panel cursor keys – the
up/down keys cycle through Large Faders, Small Faders, Group Faders etc. and the
left/right keys advance the current mode through Overwrite, Rollback,
Rollback/Join etc. Note that the Auxes selection covers the EQ In/Out, Insert In/Out,
Cue Stereo On/Off, and FX1-6 On/Off.
If this is your first attempt at a J Series automated mix, we recommend you select
Overwrite for faders and cuts and Static for all the other automated switches.
Finally, enable the mix system by either pressing the AUTO button on the front panel
or stabbing on Enable in the Automation menu. When you do this, the AUTO button
on the front panel will flash to indicate that new mix data has been written to RAM.
As this is a first pass, fader levels and object settings are stored by the computer to
define the mix start time. Note also that the current Auto Modes are now displayed in
a narrow strip above the status bar (see opposite). To change the current mode for any
group of controls, stab on the appropriate box (LF, LC etc) to call up the Auto Modes
pop-up (see above).
As soon as the mix system is enabled, the Large and Small Faders, Group Faders and
Master Fader, will indicate that they are selected to Absolute status (red status LEDs
lit). When faders are selected to Absolute they are ready to write new mix data. In
other words, the moves you make will be recorded by the computer and the position
of the fader is the actual level you are writing to the mix. As you will see later, this is
not necessarily true of Trim status.
The Mix System
5-27
20.8.96