Wave User Manual 27
Version 4
6.5.1.1 From Menu
To enable a gate, simply select the gate from the menu. Note that Gate X stands for
Gate 1, Gate 2, Gate 3, or Gate 4. Press GX Enabled to change its value to Yes.
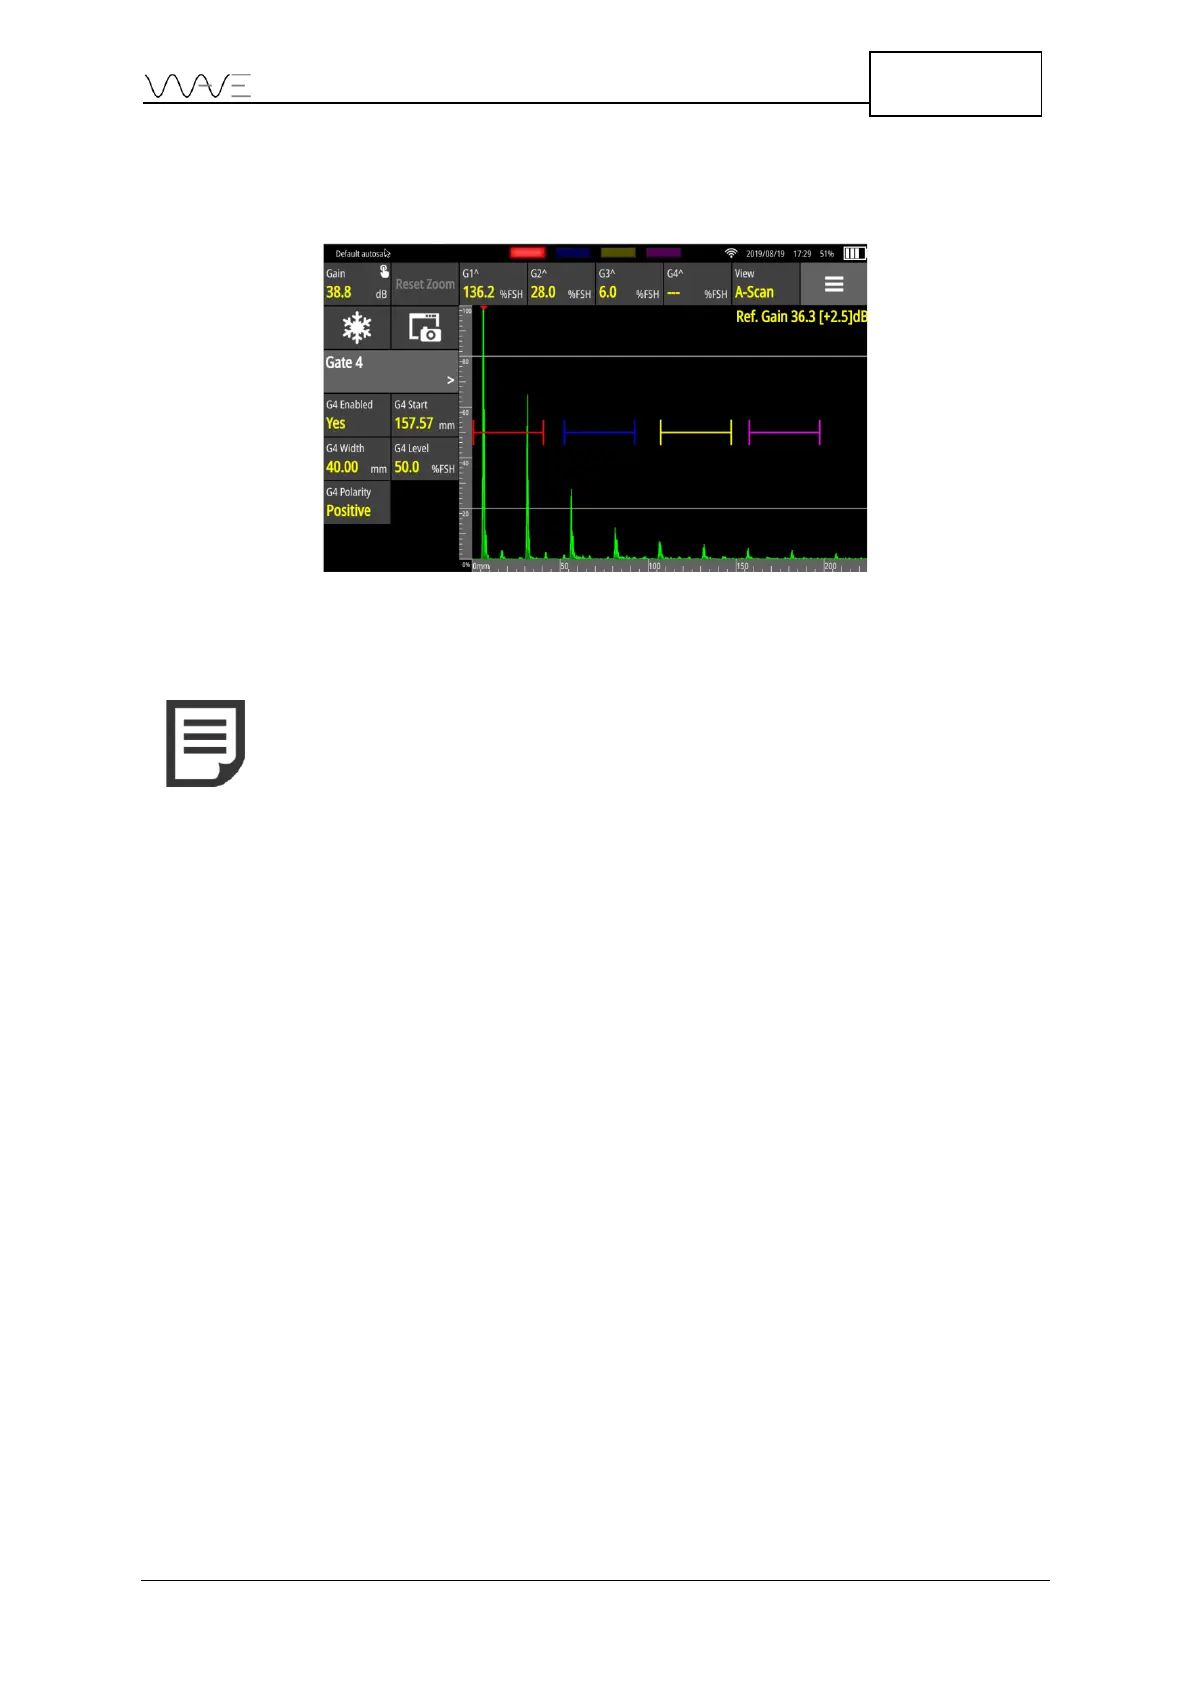
Figure 19 – Gate colours
6.5.1.2 Directly Clicking on the Gate of Interest
While on the A-Scan view mode, you can set a gate by directly clicking on the gate of
interest. Once you click on the gate, it will appear a double arrow on each corner of the
gate and a cross in the centre. At the same time, it will enable the corresponding gate in
the Menu. You can set the starting point and the length of the gate by clicking on the
arrows, respectively. By clicking on the centre cross, you can set the height and the
position (X-axis) of the gate.
While in Scan Plan view mode, you can set a gate by directly clicking on the gate of
interest. Once you click on the gate, the Menu will change to the corresponding gate; you
can then set gate parameters (gate enabling, gate start, gate width, gate level and gate
polarity) according to their needs.
6.5.2 Moving Gates and Changing Gate Properties
Each gate has properties: Gate Start, Gate Width, Gate Level and Gate Polarity. To
change any gate related parameter, first select the desired gate from the Gate menu then
simply modify the parameter values.
You can press a gate and move it around by dragging it to a new position. When you do
so, the gate is “selected” and appears bold. Also, the proper gate menu is then
automatically selected, allowing to easily change gate parameters.