5-38 Sun Fire T2000 Server Service Manual • July 2007
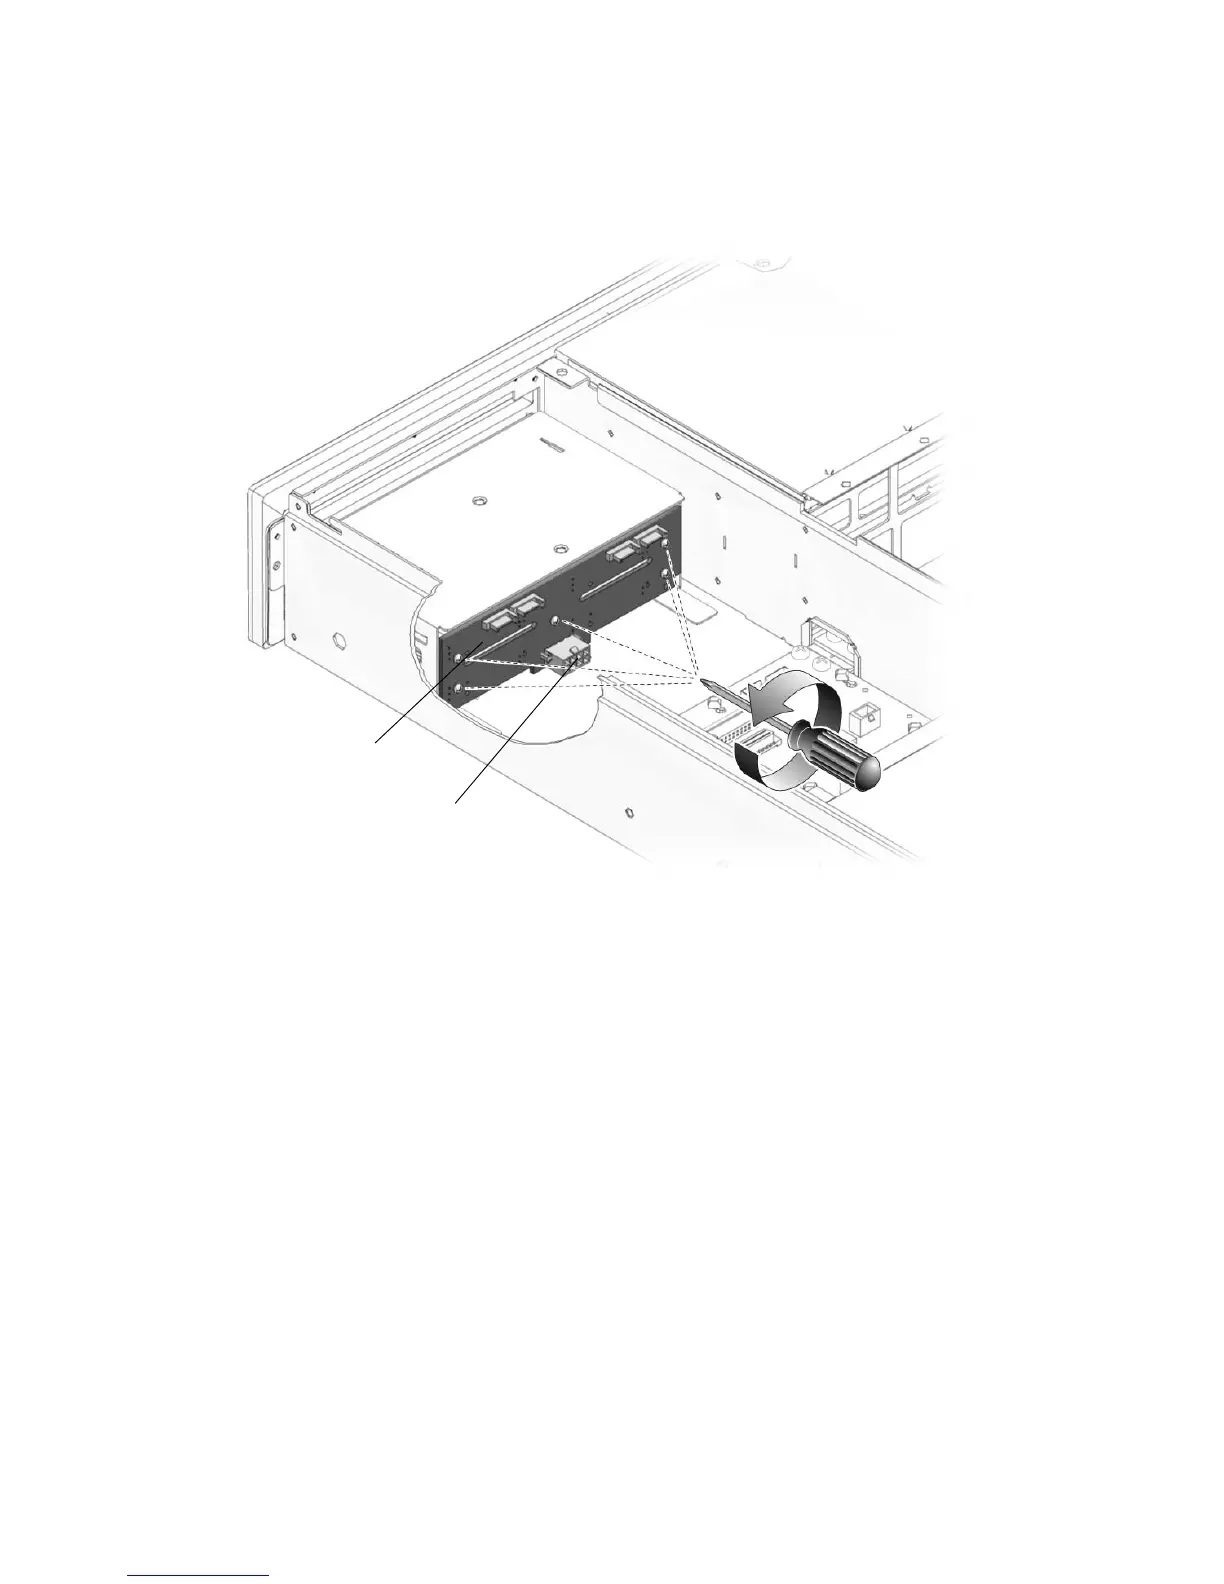
6. Remove the five screws that secure the SAS disk backplane to the chassis
(FIGURE 5-25).
FIGURE 5-25 Removing the SAS Disk Backplane
7. Remove the SAS disk backplane from the chassis and place it on an antistatic mat.
5.2.20 Replacing the SAS Disk Backplane
1. Unpackage the replacement SAS disk backplane and place it on an antistatic mat.
2. Place the SAS disk backplane on the two ledges on the bottom of the drive cage
assembly, with the power connector facing down toward the bottom of the chassis.
The ledges hold the backplane in place temporarily.
SAS disk
backplane
Power cable
le plug
connector