FI SYSTEM DIAGNOSIS 12-63
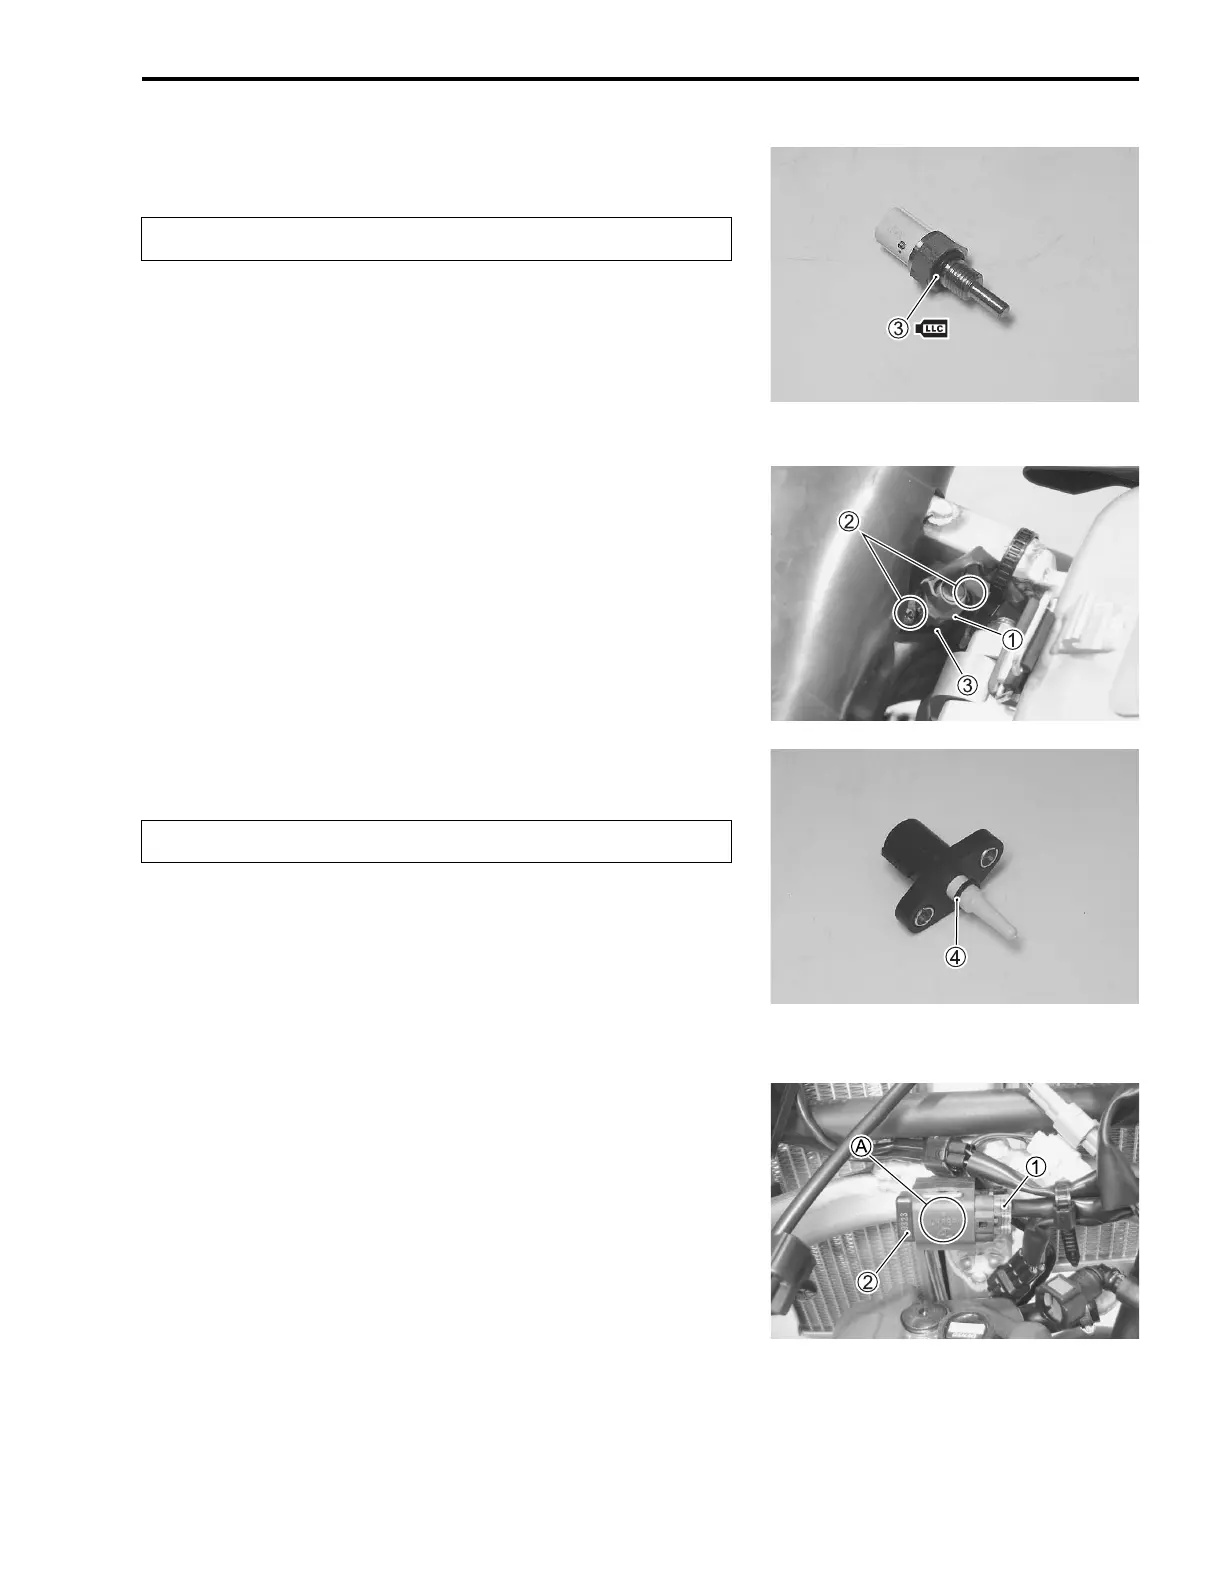
• Apply engine coolant to the O-ring 3.
• Tighten the ECT sensor to the specified torque.
ECT sensor: 12 N·m (1.2 kgf-m, 8.5 lbf-ft)
• Connect the ECT sensor coupler.
• Pour engine coolant. (14-3)
IAT SENSOR INSPECTION
The IAT sensor is installed on the air cleaner. (12-44)
IAT SENSOR REMOVAL AND INSTALLATION
• Remove the seat and fuel tank rubber hand. (5-2, 13-2)
• Disconnect the IAT sensor coupler 1.
• Disconnect the IAT sensor screw 2.
• Remove the IAT sensor 3 from the air cleaner outlet tube.
• Install the IAT sensor in the reverse order of removal.
IAT sensor mounting screw:
1.3 N·m (0.13 kgf-m, 0.95 lbf-ft)
TO SENSOR INSPECTION
The TO sensor is installed on the frame bridge. (12-48)
TO SENSOR REMOVAL AND INSTALLATION
• Remove the fuel tank. (13-2, -3)
• Disconnect the TO sensor coupler 1.
• Remove the TO sensor 2.
• Install the TO sensor in the reverse order of removal.
NOTE:
When installing the TO sensor, the arrow mark A must be
pointed upward.
Replace the O-ring 3 with a new one.
Replace the O-ring 4 with a new one.

 Loading...