T
Tonya WrightAug 16, 2025
What to do if Suzuki Motorcycle engine overheats?
- JJodi IngramAug 16, 2025
If your Suzuki Motorcycle engine overheats, consider adding coolant, cleaning some parts, bleeding air, or replacing some parts.
What to do if Suzuki Motorcycle engine overheats?
If your Suzuki Motorcycle engine overheats, consider adding coolant, cleaning some parts, bleeding air, or replacing some parts.
How to stop brake squeaking on a Suzuki RM-Z250 Motorcycle?
To stop brake squeaking on your Suzuki Motorcycle, try repairing the surface with sandpaper, correcting the pad fitting, replacing parts, tightening to specified torque, replacing brake fluid, or disassembling and cleaning the master cylinder.
What to do if there is leakage of brake fluid in my Suzuki RM-Z250?
If you notice a leakage of brake fluid in your Suzuki Motorcycle, you can try tightening to specified torque, replacing components like the piston, seal, cylinder, or cup.
What to do if Suzuki RM-Z250 Motorcycle engine overcools?
If your Suzuki Motorcycle engine overcools, put on the radiator cover.
How to stop Suzuki RM-Z250 Motorcycle brakes from squeaking?
To address brake squeaking on your Suzuki Motorcycle, try repairing the surface with sandpaper, correcting the pad fitting or replacing it, replacing brake fluid, tightening to the specified torque, or disassembling and cleaning the master cylinder.
Why is there excessive brake lever stroke on my Suzuki RM-Z250 Motorcycle?
If there is excessive brake lever stroke on your Suzuki Motorcycle, consider bleeding air, replenishing fluid to the specified level and bleeding air, or replacing with correct fluid.
Why is brake fluid leaking from my Suzuki RM-Z250 Motorcycle?
If brake fluid is leaking from your Suzuki Motorcycle, consider tightening to the specified torque, replacing some parts, or replacing the piston or seal, or replacing cylinder or cup.
Why does my Suzuki Motorcycle spark plug soon become fouled with carbon?
If your Suzuki Motorcycle spark plug soon becomes fouled with carbon, consider carburetor tuning, adjusting the throttle stop screw, changing something, or replacing some parts, or replacing with hot type plug.
Why do the spark plug electrodes overheat or burn on my Suzuki Motorcycle?
If the spark plug electrodes overheat or burn on your Suzuki Motorcycle, consider replacing with cold type plug, tune up, retightening something, or carburetor tuning.
What to do if magneto over-charges on Suzuki Motorcycle?
If the magneto over-charges on your Suzuki Motorcycle, replace or clean and tighten ground connection.
Essential safety and repair guidelines for mechanics and motorcycle reliability.
Specifications and recommendations for fluids and lubricants used in the motorcycle.
Detailed technical data including dimensions, engine, transmission, chassis, and electrical specs.
Schedule for inspections, cleaning, and replacements based on time or race usage.
Procedures for inspecting, checking, and replacing the spark plug.
Steps for removing, washing, and installing the air cleaner element.
Procedures for checking, changing, and replacing engine oil and the oil filter.
Instructions for checking and adjusting valve clearance when the engine is cold.
Detailed steps for removing the cylinder head and associated components.
Procedures for removing the cylinder and its gasket.
Measuring piston diameter, clearance, pin bore, and ring specifications.
Common engine complaints, possible causes, and recommended remedies for starting and running issues.
Troubleshooting for electrical system issues like no spark, charging problems, and unstable charging.
Guide to selecting the correct ECM tuning map for engine performance.
Adjusting compression/rebound damping and oil quantity for rider preference and conditions.
Adjusting compression/rebound damping and spring pre-load for rider preference and conditions.
Step-by-step instructions for safely removing the engine from the motorcycle frame.
Procedures for reinstalling the engine onto the frame, including torque specifications.
Procedures for removing, inspecting, and replacing clutch plates.
Steps for removing, inspecting, and installing the primary driven gear and clutch sleeve hub.
Procedures for removing, inspecting, and installing the clutch release camshaft.
Steps to remove the kick starter mechanism from the right crankcase cover.
Inspecting kick starter components for wear and damage.
Procedures for installing the kick starter components.
Steps to remove the gearshift shaft assembly and related components.
Procedures for installing the gearshift components, including torque specifications.
Procedures for removing, inspecting, and installing the gear position switch.
Steps to remove the transmission components, including gearshift forks and shafts.
Procedures for removing the crankshaft using a special tool.
Inspecting gear teeth, dogs, grooves, bushings, and forks for wear.
Measuring crankshaft runout and web-to-web width.
Checking engine oil level with the motorcycle upright and engine warm.
Procedures for draining and refilling engine oil and replacing the filter.
Steps for removing the oil pump No.1 and No.2 assemblies.
Inspecting oil pump parts for defects and wear.
Procedures for installing the oil pump No.1 and No.2 assemblies.
Safety guidelines for handling FI system components and connectors.
Handling precautions for high-precision ECM and sensors.
General methods for checking open and short circuits using testers.
How to use the FI indicator light and dealer mode to check system devices and DTCs.
Table correlating DTC numbers with flashing patterns, malfunction parts, and remarks.
Procedure for adjusting the throttle position sensor output voltage.
Visual inspection steps and self-diagnostic procedures to identify malfunctions.
Step-by-step instructions for removing the fuel tank and fuel pump assembly.
Procedure for checking fuel pressure using special tools.
Steps for removing the throttle body assembly from the motorcycle.
Procedures for disassembling the throttle body components.
Steps for installing the fuel injector, ensuring proper alignment.
Procedure for draining, refilling, and bleeding the engine coolant.
Method for checking the cooling system for leaks using a pressure tester.
Steps to remove the water pump case and its components.
Inspecting the water pump impeller and shaft for damage.
Procedures for installing the water pump, impeller, and shaft.
General safety and handling precautions for electrical components and connectors.
Guidelines for using the multi circuit tester and needle-point probes correctly.
Testing regulated voltage and charging output from the magneto.
Step-by-step guide for diagnosing no spark or poor spark issues.
Procedures for measuring primary peak voltage and resistance of the ignition coil.
Steps to remove the stator and CKP sensor.
Steps to remove the front wheel, including axle nut and axle.
Inspecting spacers, dust seals, axle shaft runout, and wheel rim.
Procedures for removing and installing dust seals and bearings in the front wheel.
Steps to remove the rear wheel, including axle nut, axle, and drive chain.
Inspecting wheel spacers, dust seals, sprocket, axle shaft, rim, and bearings.
Procedures for removing and installing dust seals and bearings in the rear wheel.
Construction and components of the front brake system.
Construction and components of the rear brake system.
Procedure for removing air from the brake system.
Steps for draining and refilling brake fluid.
Procedures for replacing front and rear brake pads.
Steps to remove and disassemble the front brake caliper.
Procedures for reassembling and installing the front brake caliper.
Steps to remove and disassemble the rear brake caliper.
Procedures for reassembling and installing the rear brake caliper.
Steps to remove and disassemble the front master cylinder.
Procedures for reassembling and installing the front master cylinder.
Steps to remove and disassemble the rear master cylinder.
Procedures for reassembling and installing the rear master cylinder.
Steps to remove the brake lever.
Steps to remove the brake pedal.
Construction and components of the front fork assembly.
Construction and components of the steering system.
Components and layout of the handlebar controls.
Steps to remove the front fork from the motorcycle.
Procedures for disassembling the front fork components.
Inspecting center bolt, compression damper, inner/outer tubes, and runout.
Procedures for removing and installing bearings in the front fork.
Steps for installing the front fork assembly onto the steering stem.
Steps to remove handlebars and steering stem components.
Inspecting steering stem parts for abnormalities like wear or damage.
Procedures for installing the steering stem, bearings, and handlebar components.
Steps to remove the rear shock absorber from the motorcycle.
Procedures for replacing the rear shock absorber spring.
Inspecting for oil leakage, damper rod condition, and bump rubber.
Procedure for replacing the oil in the rear shock absorber unit.
Steps for disassembling the rear shock absorber and inspecting its parts.
Procedures for reassembling the rear shock absorber unit.
Steps for installing the rear shock absorber onto the motorcycle.
Steps to remove the swingarm and associated components.
Inspecting the pivot shaft, chain buffer, chain guide, plate, and swingarm.
Procedures for removing and installing bearings in the swingarm.
Steps for installing the swingarm, including tightening torque.
Steps to remove the rear suspension linkage components.
Inspecting linkage parts for damage and bearing play.
Procedures for replacing needle roller bearings in the linkage.
Steps for installing the rear suspension linkage components.
Technical specifications for valve dimensions, clearances, and springs.
Standard and limit measurements for camshaft and cylinder head components.
Standard and limit measurements for cylinder, piston, rings, and related clearances.
Comprehensive list of torque specifications for engine and chassis fasteners.
Catalog of specialized tools required for various service procedures.
Schematic illustrating the electrical system connections for the FI system.
Guidelines for properly routing wire harnesses and cables on the motorcycle.
Specific instructions for routing throttle, clutch, and starter cables.
Diagram and instructions for correctly routing fuel hoses.
Diagram and instructions for correctly routing radiator hoses.
Procedures for installing crankcase covers and associated bolts with torque specs.
Steps for installing the exhaust pipe and muffler system.
Instructions for adjusting the clutch cable tension.
Procedure for installing the hot starter lever assembly.
Adjusting the rear brake pedal height.
Diagram showing correct routing for front brake hoses.
Diagram showing correct routing for rear brake hoses.
Procedures for mounting handlebars, levers, and controls.
Installation of major exterior body panels like fenders and covers.
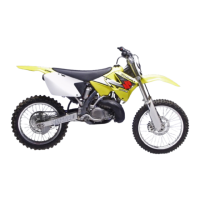
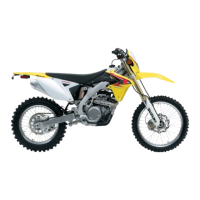
| Displacement | 249cc |
|---|---|
| Fuel System | Fuel injection |
| Bore x Stroke | 77.0 mm x 53.6 mm |
| Ignition | Electronic (CDI) |
| Transmission | 5-speed constant mesh |
| Final Drive | Chain |
| Front Suspension | Inverted telescopic, coil spring, oil damped |
| Rear Suspension | coil spring, oil damped |
| Front Brakes | Single disc |
| Rear Brakes | Single disc |
| Front Tires | 80/100-21 |
| Rear Tires | 100/90-19 |
| Overall Width | 830 mm |
| Ground Clearance | 345 mm (13.6 in) |
| Seat Height | 955 mm |