REAR SUSPENSION 19-7
OIL REPLACEMENT
TOOLS AND EQUIPMENT
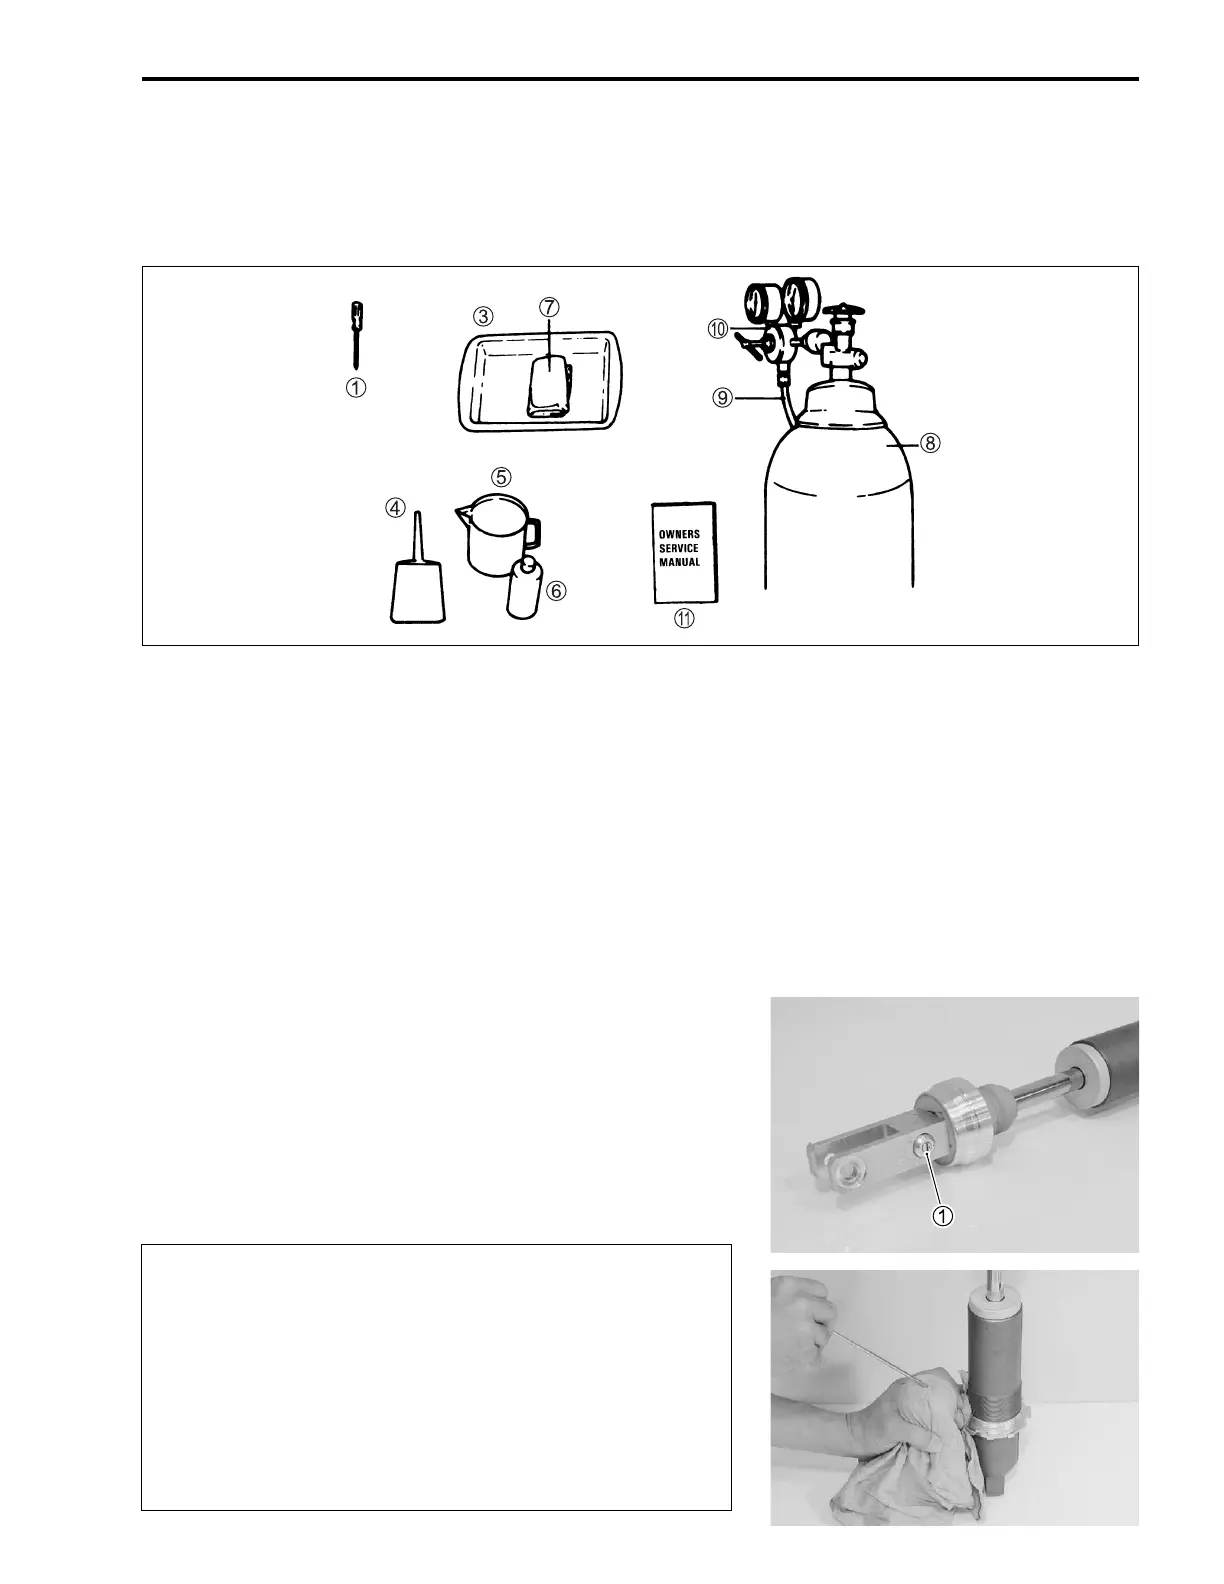
• Following tools and equipment are required to perform oil
replacement.
1 Screwdriver or small punch 7 Rags
2 Vise* 8 Nitrogen tank
3 Drain Pan 9 Filler Hose and Nozzle
4 Oil can 0 Regulator Assembly
5 Beaker A Owner’s Service Manual
6 Specified Shock Oil (SS25)
* Not shown in the illustration
OIL REPLACEMENT PROCEDURE
• Remove the rear shock absorber unit from the frame (19-3),
clean and dry it.
• Remove the spring from the rear shock absorber unit.
(19-4)
NOTE:
Inspect the rear shock absorber unit for oil leakage.
Turn the rebound damping force adjuster screw 1 counterclock-
wise until it stops so that the rear suspension oil can be poured
easily.
• Remove the valve cap. Press the valve with a screwdriver to
bleed out nitrogen gas.
* Releasing high pressure gas from the rear shock
absorber unit can be hazardous.
* Never perform any servicing until the nitrogen gas
pressure has been released from the rear shock
absorber unit. When releasing the gas pressure,
place a rag over the gas valve and use the tip of a
screwdriver etc. to press the valve. Do not use your
finger to depress the gas valve, and direct the valve
away from your face and body.

 Loading...