ECOTEL INSTALLATION
CHAPTER 4
31
ECOTEL 3G 16.1. Revised: 1 March 2011.
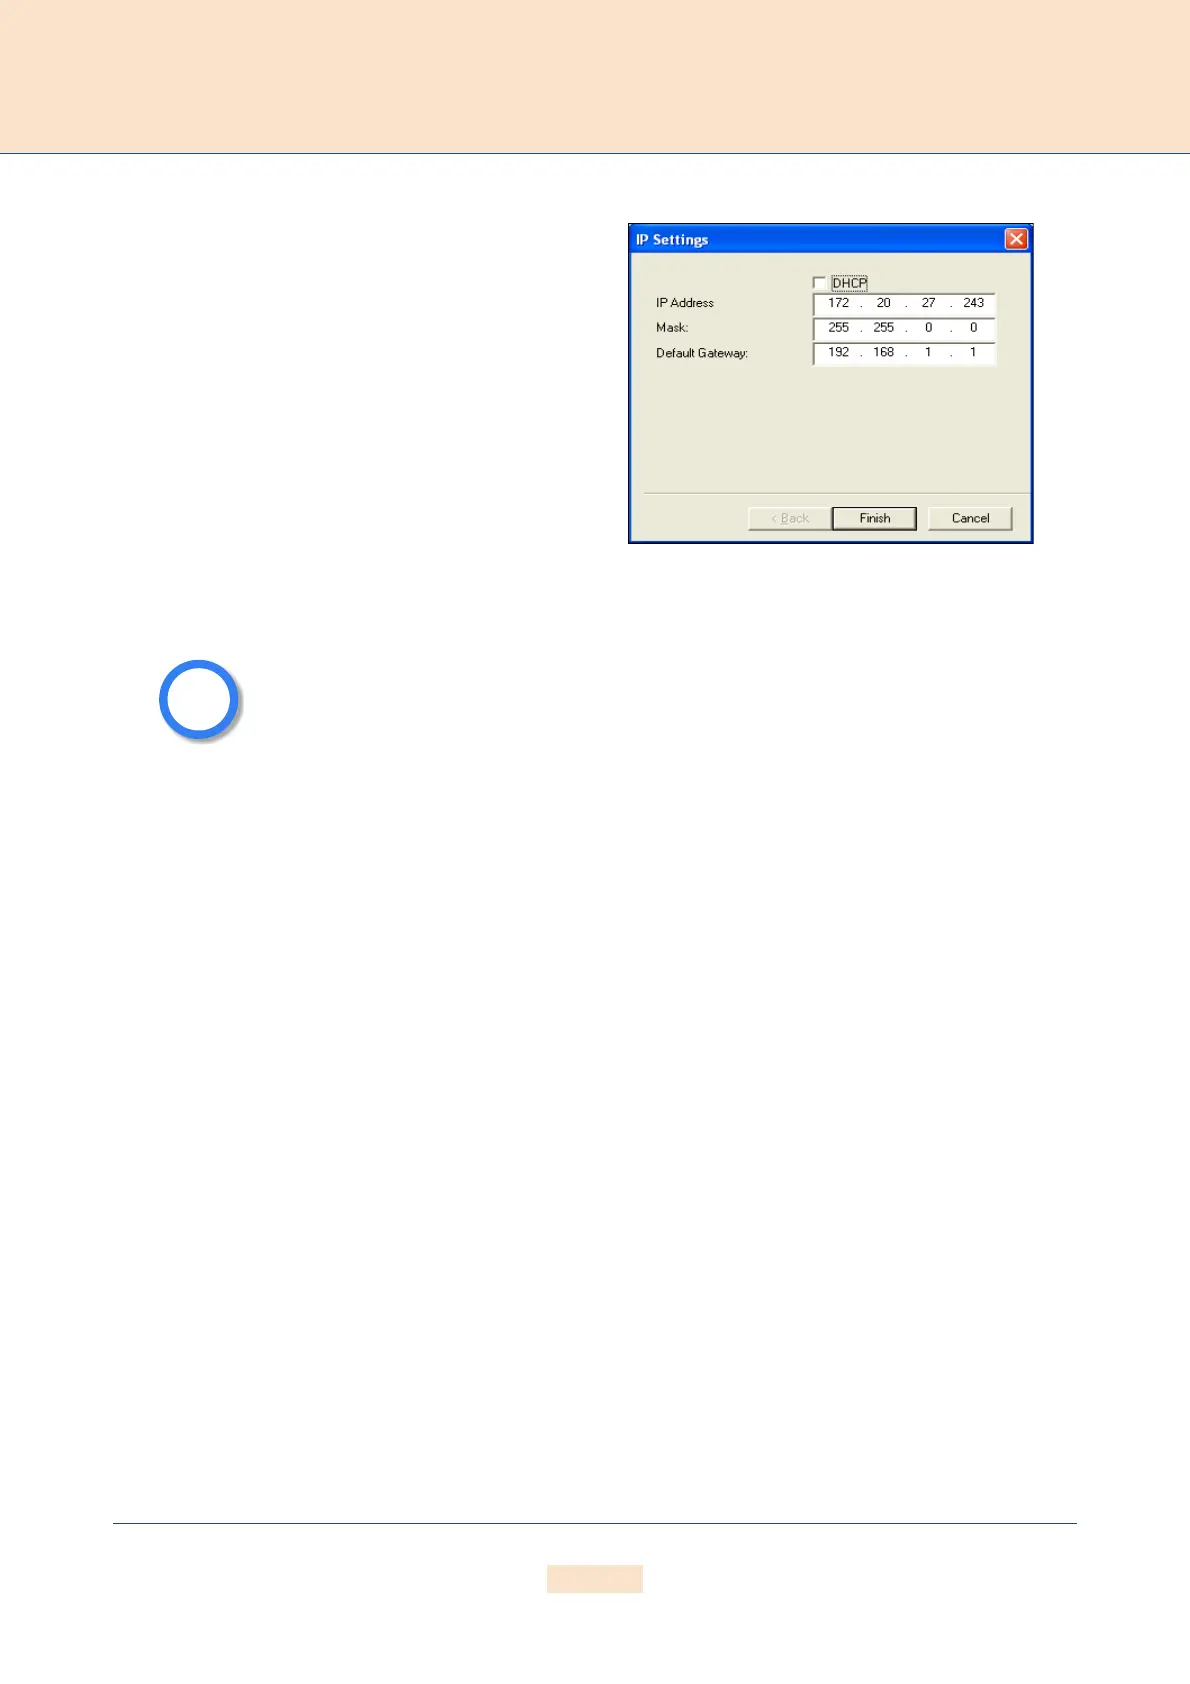
To perform the initial configuration of the system, double-
click the icon or right-click and select Configure. The IP
Settings dialog will appear. If you are using a DHCP serv-
er, activate the checkbox DHCP. This will deactivate the
next three lines. Your DHCP server will automatically pro-
vide all of the other necessary information. If you do not
have a DHCP server, leave the DHCP checkbox empty. The
default IP address appears in the IP Address box. Enter a
new IP address. If the address you enter already exists in
the network, you will be notified to choose another address
at the end of the configuration process. Enter the system’s
netmask in the Mask dialog box. Enter the IP address for
the Default Gateway in the corresponding dialog box.
Click Finish.
Now the IP settings are configured; all other processes run automatically. First the system’s IP address will be
changed and then the system will start with the new IP address.
If you right-click the system’s icon in the main window and choose Temporarily Configure IP Address, only the
IP address for the system’s first Ethernet interface and the netmask will be temporary changed. This can be helpful
if you want to set up local remote access to the system and use other IP settings on the remote device than the
system’s IP configuration in the network. Bear in mind that the functions on the system’s first Ethernet interface
work with the new settings.
Now you can complete the system’s configuration using the GUI (cf. Chapter 4.8.3 on page 32 ).
There is no internal time generation for the system when the power is interrupted.
That means the default time is used when the system is restarted or rebooted! There-
fore it is important to set the system time with an NTP server.
Figure 4.6 Quickstart Configuration: IP Settings