496Sensors (Probes)
© Tibbo Technology Inc.
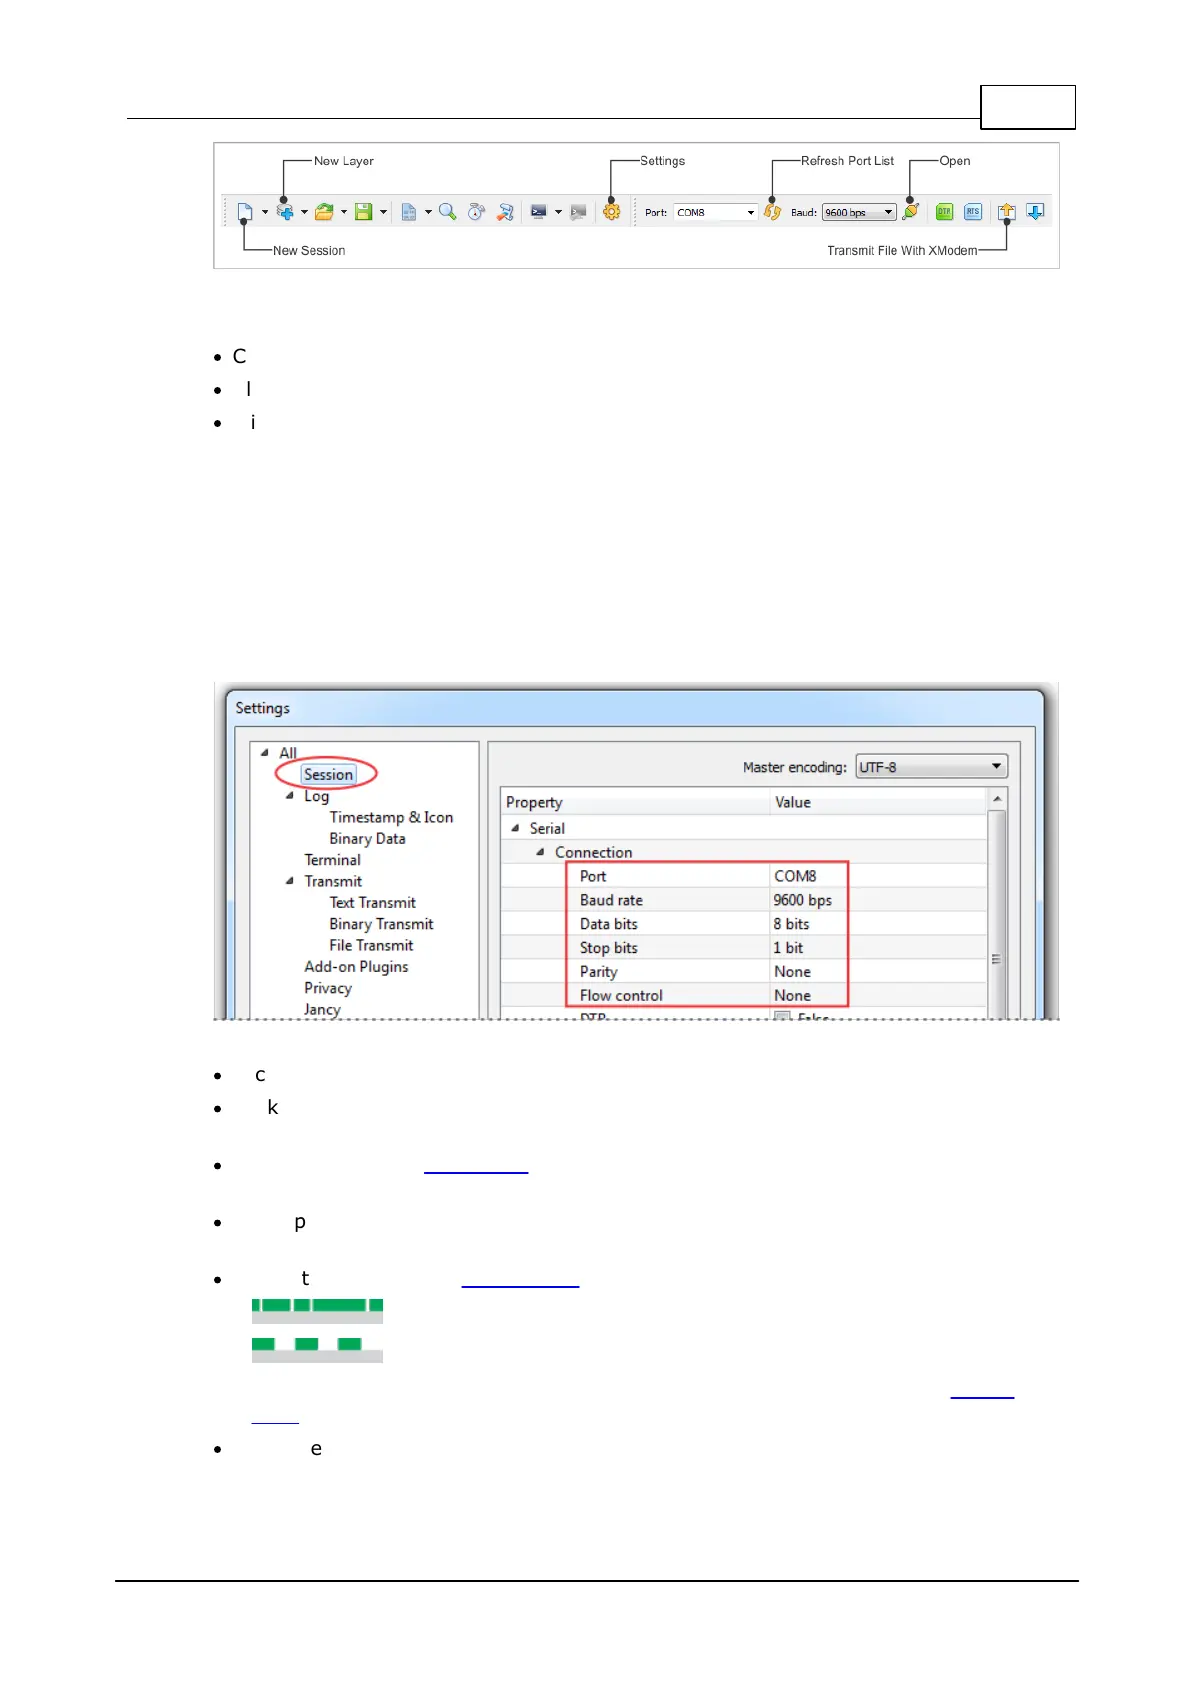
IO Ninja toolbar
·
Click New Session, then choose Serial.
·
Click New Layer and add the XModem layer.
·
Click Settings and make sure that:
o Correct Port is selected;
o The Baud rate is 38400;
o The number of Data Bits is set to 8;
o The number of Stop Bits is set to 1; and
o Parity is set to None.
o The flow control is set to None.
·
Click Open.
·
Click Transmit File With XModem, select the firmware file to send, and click
Open.
·
Press and hold the MD button on the Bus Probe. Each Bus Probe comes with a
metal pin that makes pushing and holding down the MD button easier.
·
Apply power to the Bus Probe. The upload should start. You may release the MD
button at this point.
·
During the upload, the status LEDs will be showing the following patterns:
o — the Probe is receiving and storing the file;
o — XModem transmission completed;
o A number of error patterns may also be displayed. Please refer to the status
LEDs topic for more info.
·
After the upload completes, power-cycle the Probe. The newly loaded application
firmware will start executing.
 Loading...
