Turning the Receiver On/Off
4-1
P/N: 1023998-01
Managing Power
This chapter describes how to power the receiver, charge the battery, and use an external power source.
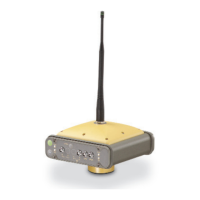
Turning the Receiver On/Off
To turn-on the receiver, press and hold the power button until the LEDs briefly flash. The receiver is
turning on when: the Power LED blinks green, the receiver channels initialize and start tracking all visible
satellites at any time and location, and the serial port is available. When the startup is complete, the
Power LED is solid green only when external power is used; otherwise the Power LED is off.
After startup, the integrated wireless devices in the receiver are ready to use, and the receiver is
available to obtain the correction data from reference station and to measure ground point coordinates
with high accuracy. Also the receiver is ready to start data recording to the internal memory.
To turn-off the receiver, press and hold the power button for more than (3 but less than 10) seconds.
Release the power button when the Power LED blinks yellow. This delay prevents the receiver from
being turned off by mistake. Allow the receiver to complete the power off cycle, which is approximately
15 seconds.
Powering the Receiver
The receiver is powered by an internal battery or an external valid power source connected to the power
port. If an external power source is connected, the receiver draws power from it instead of the battery.
You can connect the receiver to an external power source, such as a vehicle battery, with 9 – 27 VDC
to operate the receiver. See
“Specifications” for more information.
See “Charging the Battery” for more information.
The receiver will draw a small amount of power from the battery when it is turned
off. If the receiver is placed in storage for a long period, 3-6 months, the battery may
become fully discharged. Use an external power supply or recharge the battery
before use.
A power input greater than 27 VDC could damage the receiver.