VIVOTEK - A Leading Provider of Multimedia Communication Solutions
User's Manual - 167
h. If you want to add additional time frames to the schedule, repeat the steps above.
i. Close the window when you nish the time frame settings.
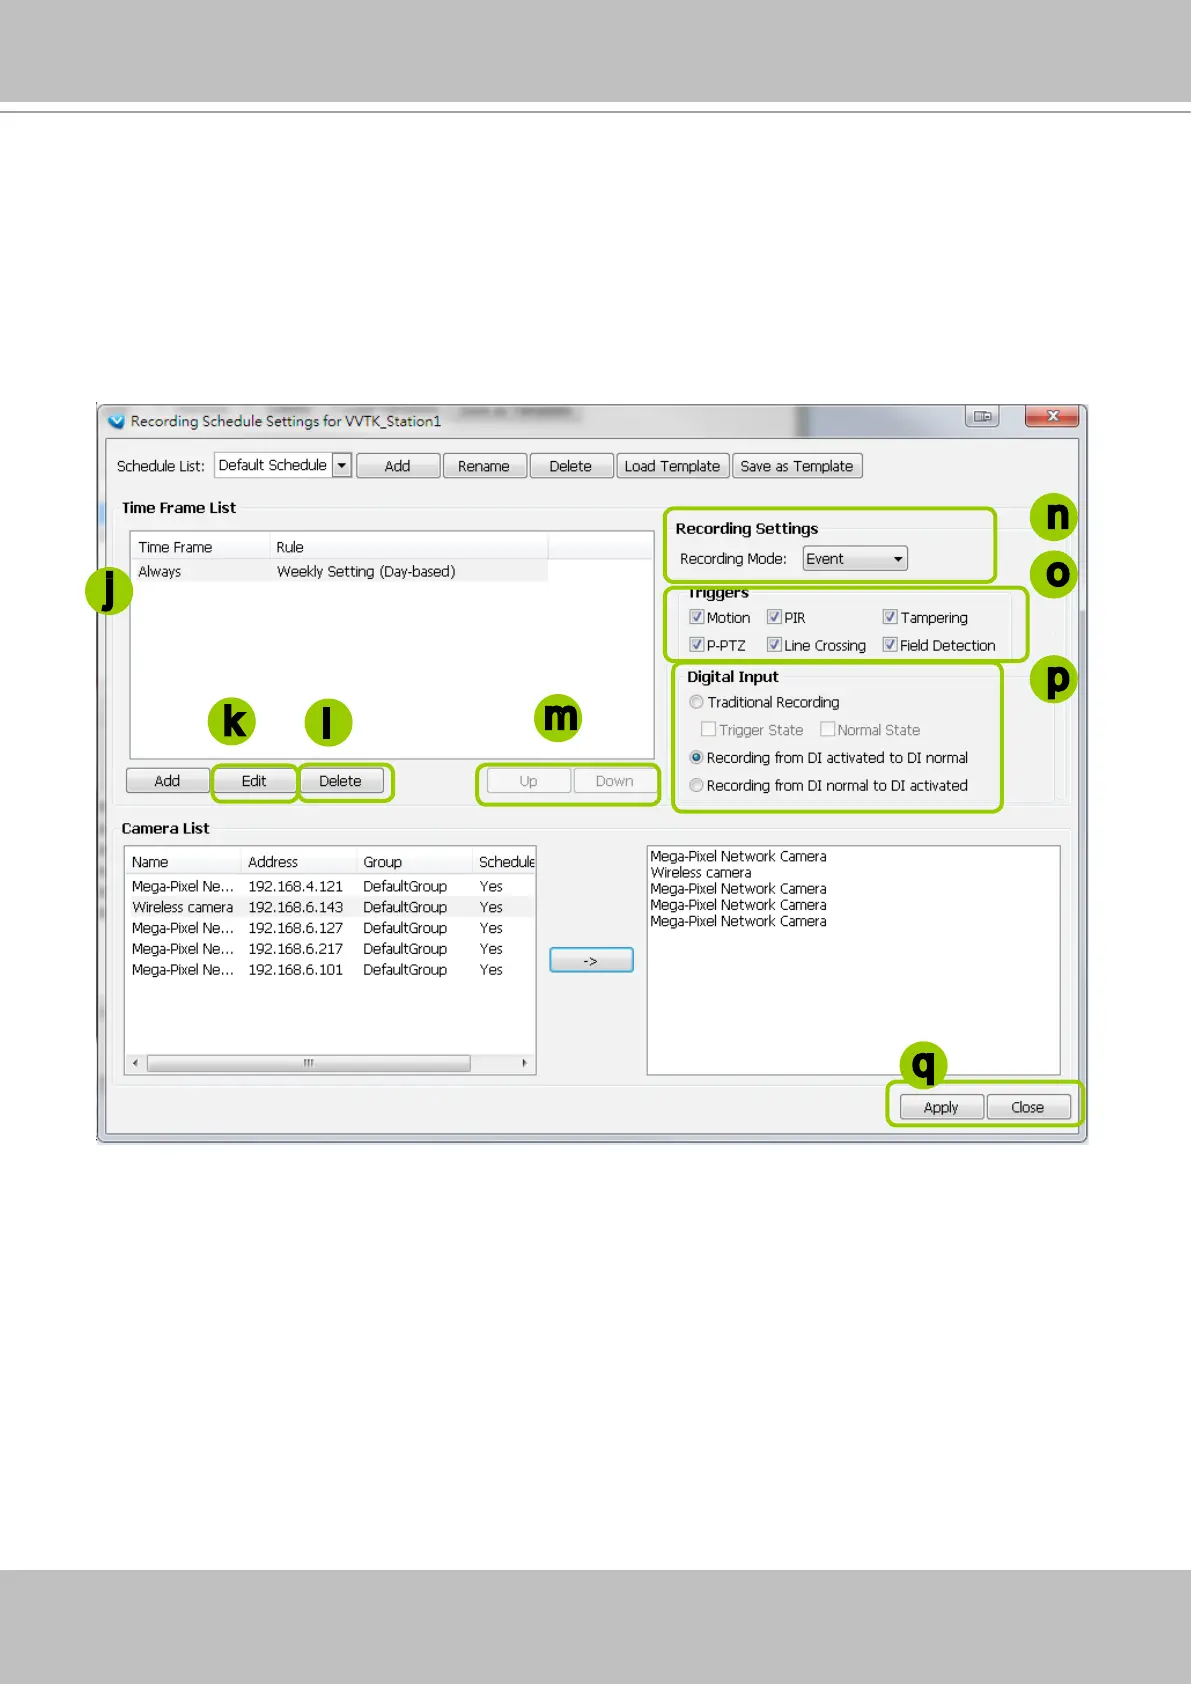
j. Back to the Recording Schedule Settings window, the new time frame will be displayed on the Time
Frame List.
k. If you want to edit an existing time frame, select if from the Time Frame List and click Edit to set up.
l. If you want to delete an existing time frame, select if from the Time Frame List and click Delete.
m. If you want to change the priority of a time frame, select it from the Time Frame List and click Up or
Down to shift its position. The time frame on the top of the list has the highest priority.
Recording Settings
n. Select one of the following Recording Modes for the time frame:
None: No recording action.
Continuous: 24-hours continuous recording. If you want to enable Activity Adaptive Streaming,
please refer to page 160 for detailed illutration.
Event: The server will start to record only when an event is triggered. The recording time length
depends on the settings in Recording Storage Settings. The default time length is 20 seconds (10s
pre-event time plus 10s post-event time). Please refer to page 159 for more information. For more
information about event catagories, please refer to page 270 for detailed information.
o. Select Trigger Source(s): Motion Detection, Line Crossing, Field Detection, PIR, Tampering Detection,
and P-PTZ (Auto Tracking).
p. Digital Input: See next page for more information.
j
n
m
q
k
l
o
p