6. Click TRANSMIT to send the values to VVSX.
7.
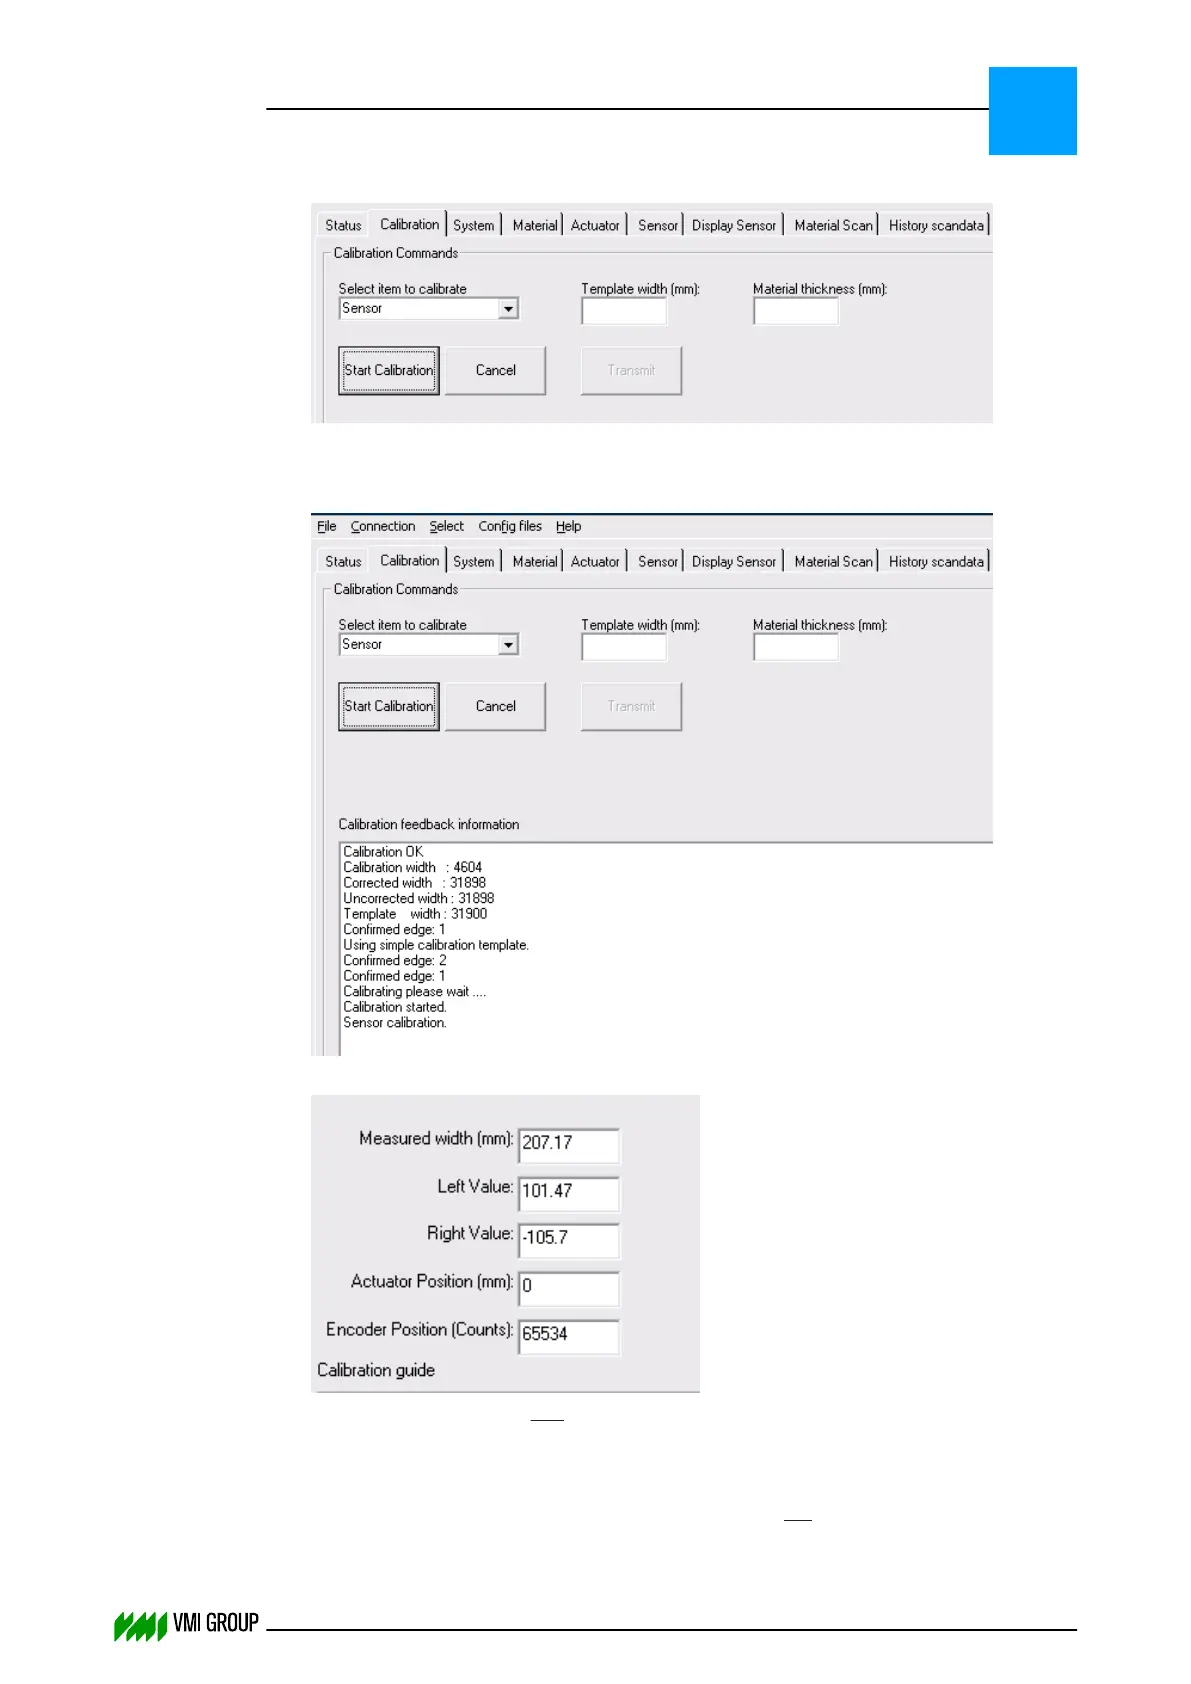
Click START CALIBRATION.
8. Check the CALIBRATION FEEDBACK INFORMATION window for any error during
the calibration process.
When the calibration is successful the message Calibration OK is shown.
9.
Check the LEFT VALUEandRIGHT VALUE.
The values must be equal with a maximum tolerance of 2 mm.
If the LEFT VALUE and RIGHT VALUE difference is within the tolerance of 2 mm,
proceed with Actuator calibration on page 5
‑
17.
If the LEFT VALUE and RIGHT VALUE difference is not within the tolerance of 2 mm,
proceed with the next step.
ALIGNMENTS, ADJUSTMENTS AND CALIBRATIONS
VVS Breaker
5
THINKING FORWARD
VMI Vision System VVS (OL82) VVSX 13.0.12.0, VVSU 3.0.6 / 4 / 2016-07-11 / pd#175592
5-15