WPC 1000 User Manual 1125100
Initialization, Setup, and Checkout 3-17
Setting the Stop-time Limit
To set the Stop-time Limit, do the following:
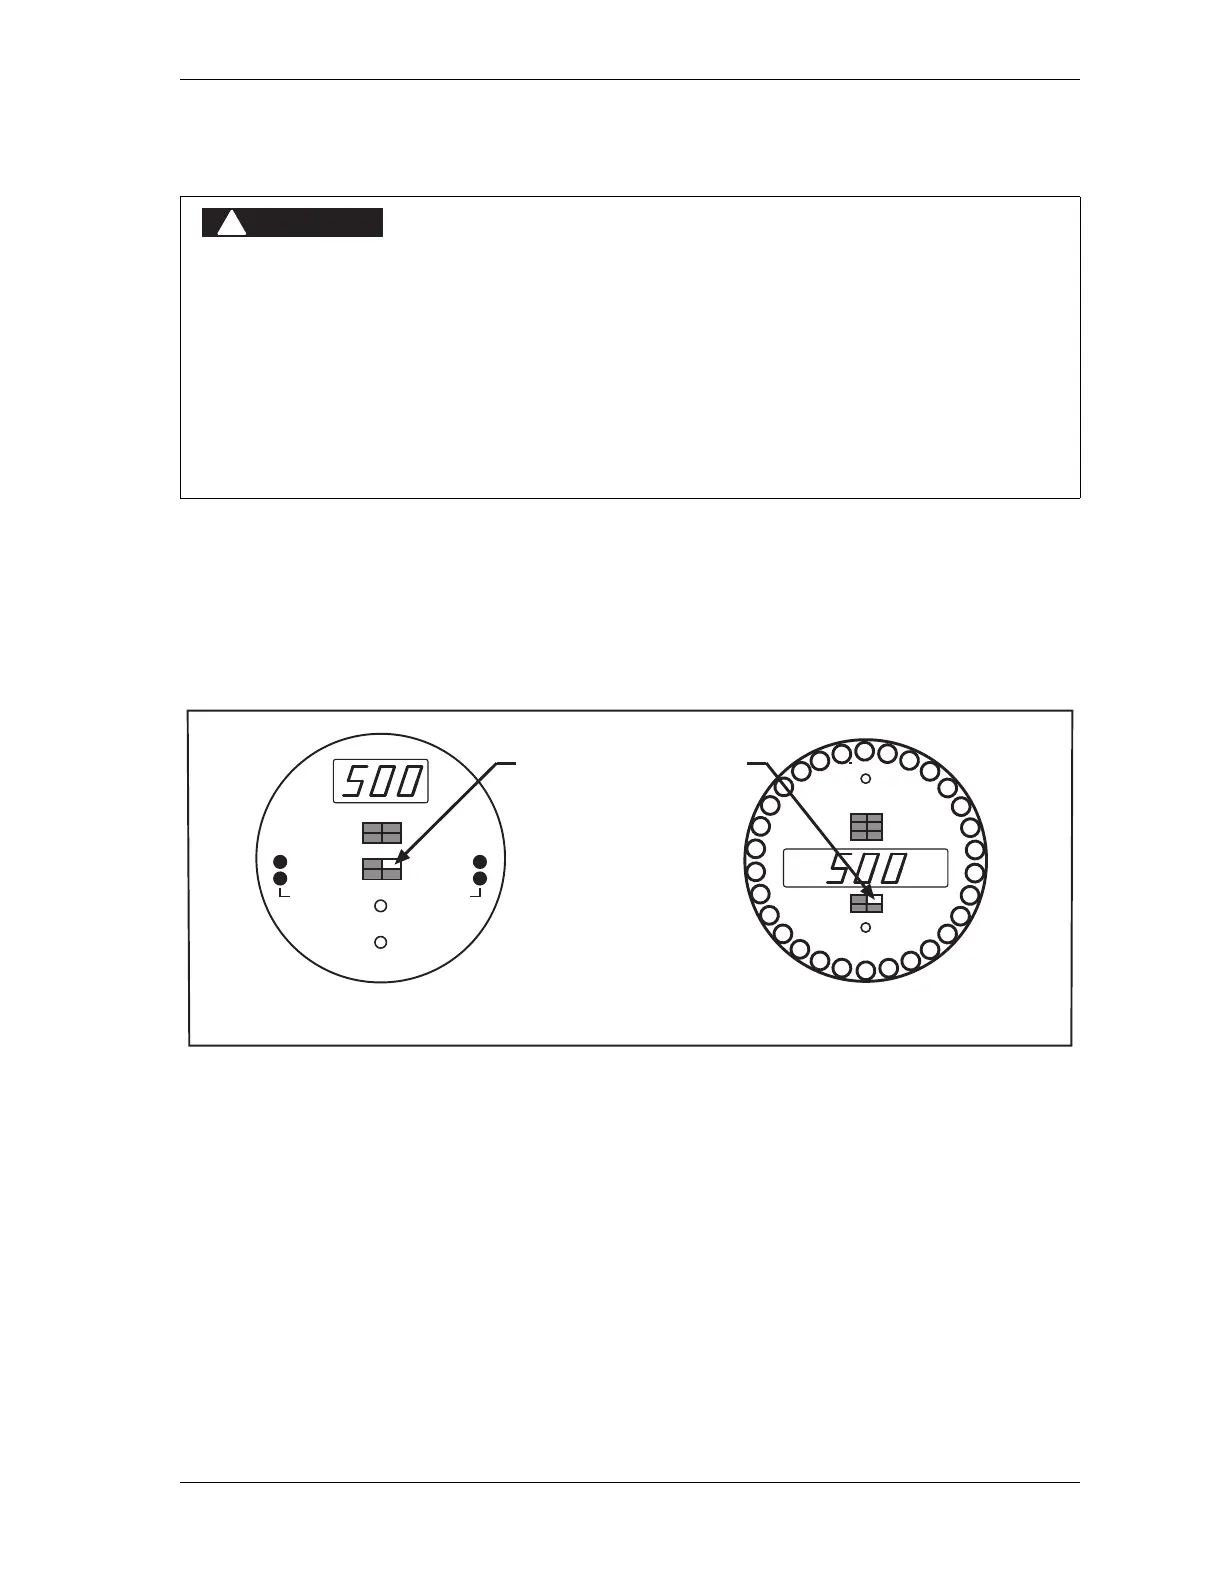
1. With power on to the WPC 1000 and the press in “Inch” mode, press the Reset/Select
button repeatedly until the “Stop Time Limit” indicator becomes lit. The LED display
shows the last Stop-time Limit you set or, if you have not previously set the Stop-time
Limit, it shows the factory setting of 500 mS.
2. Adjust the Stop-time Limit by turning the WPC Settings key switch to “+”
(counterclockwise) to increase the value or to “–” (clockwise) to decrease the value. The
Stop-time Limit setting increases or decreases in 10 mS increments.
3. When the value you want is shown in the LED display, save your setting by pressing the
Reset/Select button until the “Angle/SPM” indicator is lit.
INCORRECT SAFETY DISTANCE DUE TO INCORRECT STOP TIME
• Determine and enter the correct Stop-time Limit when you set up your WPC 1000.
• Perform a 90° Stop Test any time you change the Stop-time Limit of WPC 1000. (See
Determining the 90° Stop Time, page 3-18.) Base the Stop-time Limit on the actual Stopping
Time.
• Recalculate the safety distance based on the new Stop-time Limit and adjust or reinstall
safeguarding devices according to the new safety distance (see Calculating the Safety
Distance, page 3-20).
Failure to comply with these instructions will result in death or serious injury.
Figure 3-7. WPC 1000 Displays Showing Stop-time Limit Value
With Stop Time Limit segment
selected, turn WPC Settings
key switch to + to increase
displayed value and to -
to decrease value
BRAKE WARNING
INTERRUPTED STROKE
TOP STOP ANGLE
AUTO CARRYUP
STOP TIME LIMIT
MICRO-INCH
STOPPING TIME
STOPPING ANGLE
90
° STOP TEST
COUNTER
COUNTER PRESET
ANGLE / SPM
INTERRUPTED STROKE
BRAKE WARNING
TOP STOP ANGLE
AUTO CARRYUP
ANGLE / SPM
90° STOP TEST
STOP TIME LIMIT
MICRO-INCH
STOPPING TIME
STOPPING ANGLE
WPC 1000 Standard Display WPC 1000 Optional Counter Display
CAM 2
off
on
CAM 1
on
off

 Loading...