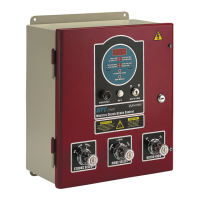
1125100 WPC 1000 User Manual
2-8 Installation
Connecting AC Wiring
All wires can be run through flexible liquid-tight conduit to the control as long as all circuits
are 115V. If your Top-stop circuits and Emergency-stop circuits are low voltage (for
example, 24V), run two conduits–one for 115V wires and one for 24V wires. Be sure to
number all wires so they are consistent with the electrical prints for your press.
Bring the wiring connections for AC power to a convenient point so that you can connect
them to the power terminal block on the back wall of the enclosure at the top left. No. 16 wire
(No. 14, if local codes require it) is recommended for these circuits with a minimum 75° C
temperature rating. To do the wiring, perform the following steps:
1. Locate the power supply input terminal block on the back wall at the top left of the
enclosure, as shown in Figure 2-5, page 2-9.
2. Determine how you will bring wiring from your 115 or 230 Vac power source to the
enclosure. For 115 Vac, you need three wires—high (black), neutral (white) and ground
(green). For 230 Vac, wires are black and red, with green or green-yellow for ground.
3. Run the power wires to the enclosure through flexible liquid-tight conduit. Because WPC
1000 is rated NEMA 12 (protected against dust and oil), you must use conduit of the same
rating and make proper connections to ensure NEMA 12 protection.
ELECTRIC SHOCK OR HAZARDOUS ENERGY
• Disconnect main power before installation.
• Remove all power to the press, press control, and other equipment used with the press.
• Remove all fuses and “tag out” per OSHA 1910.147 Control of Hazardous Energy (Lockout/
Tagout).
• Ensure that installation is performed by qualified personnel.
• Complete all installation procedures before connecting to the AC power source.
Failure to comply with these instructions will result in death or serious injury.
FOR 24 VDC VERSIONS OF WPC 1000:
• Refer to Table 1-1, page 1-9 for DC power requirements
• Wire 24 Vdc directly to connector J103 on the WPC 1000 Control board (see Figure 2-11,
page 2-20 for location and Figure 10 at the back of the manual for wiring)
Connect “+ volts” to pin #57 on J103
Connect “ground” to pin #56
WPC 1000 AUTOMATICALLY ADJUSTS TO 115 OR 230 VOLT INPUT POWER
You do not need to use a switch or other device to set the level of input power.

 Loading...