July 2019
4-21
Xerox® B210 Service Manual
REP 4.9
Repairs - Adjustments
Initial Release
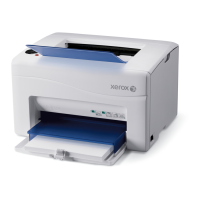
9. Remove the Feed and Registration Sensor PWB Cover, Figure 3:
a. Remove the screw.
b. Release the latch, then remove the cover.
Figure 3 Feed and Reg Sensors PWB Cover (Bottom View)
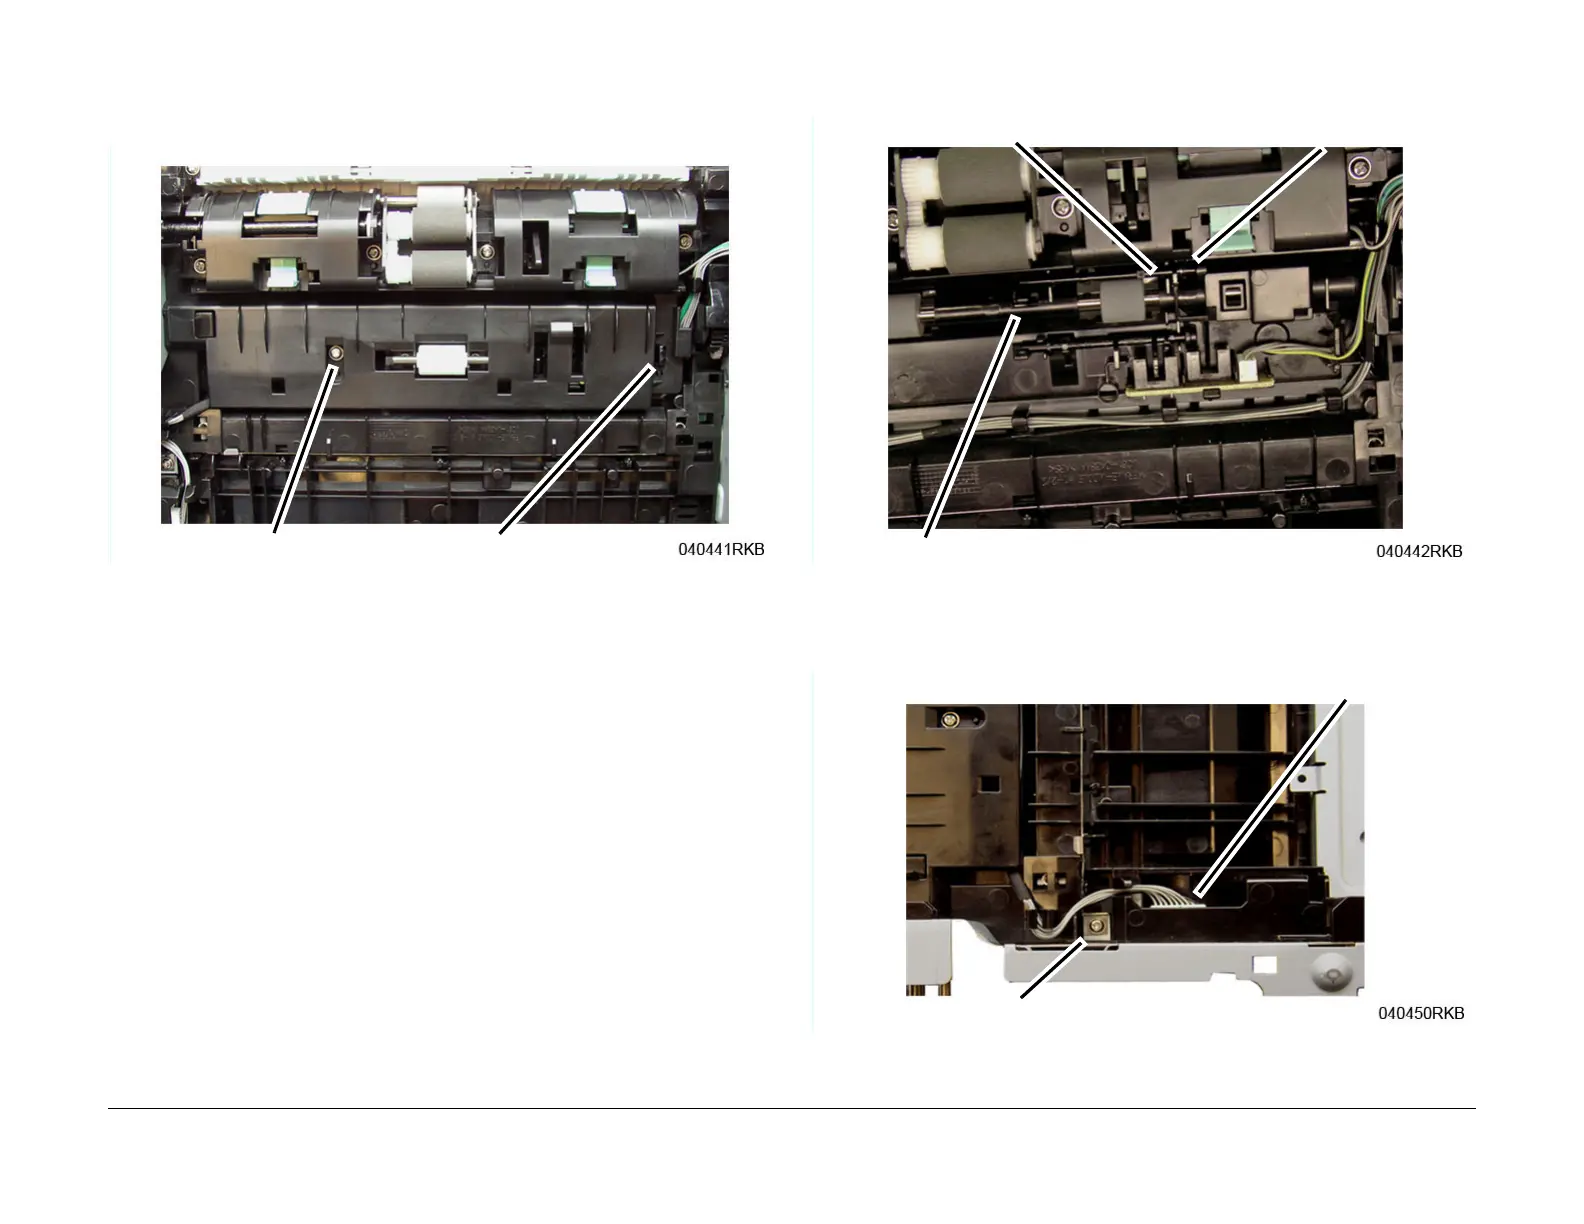
10. Release the latch noting the location of the spring in the frame, then release the F
eed
Sens
or Actuator, Figure 4
.
Figure 4 Feed Sensor Actuator (Bottom View)
11. On the bottom of the printer, disconnect the drive motor connector, then remove t
he
g
round screw, Figure 5
.
Figure 5 Drive Motor Connector & Screw (Bottom View)
Feed Sensor Actuator
Spring
Latch
 Loading...