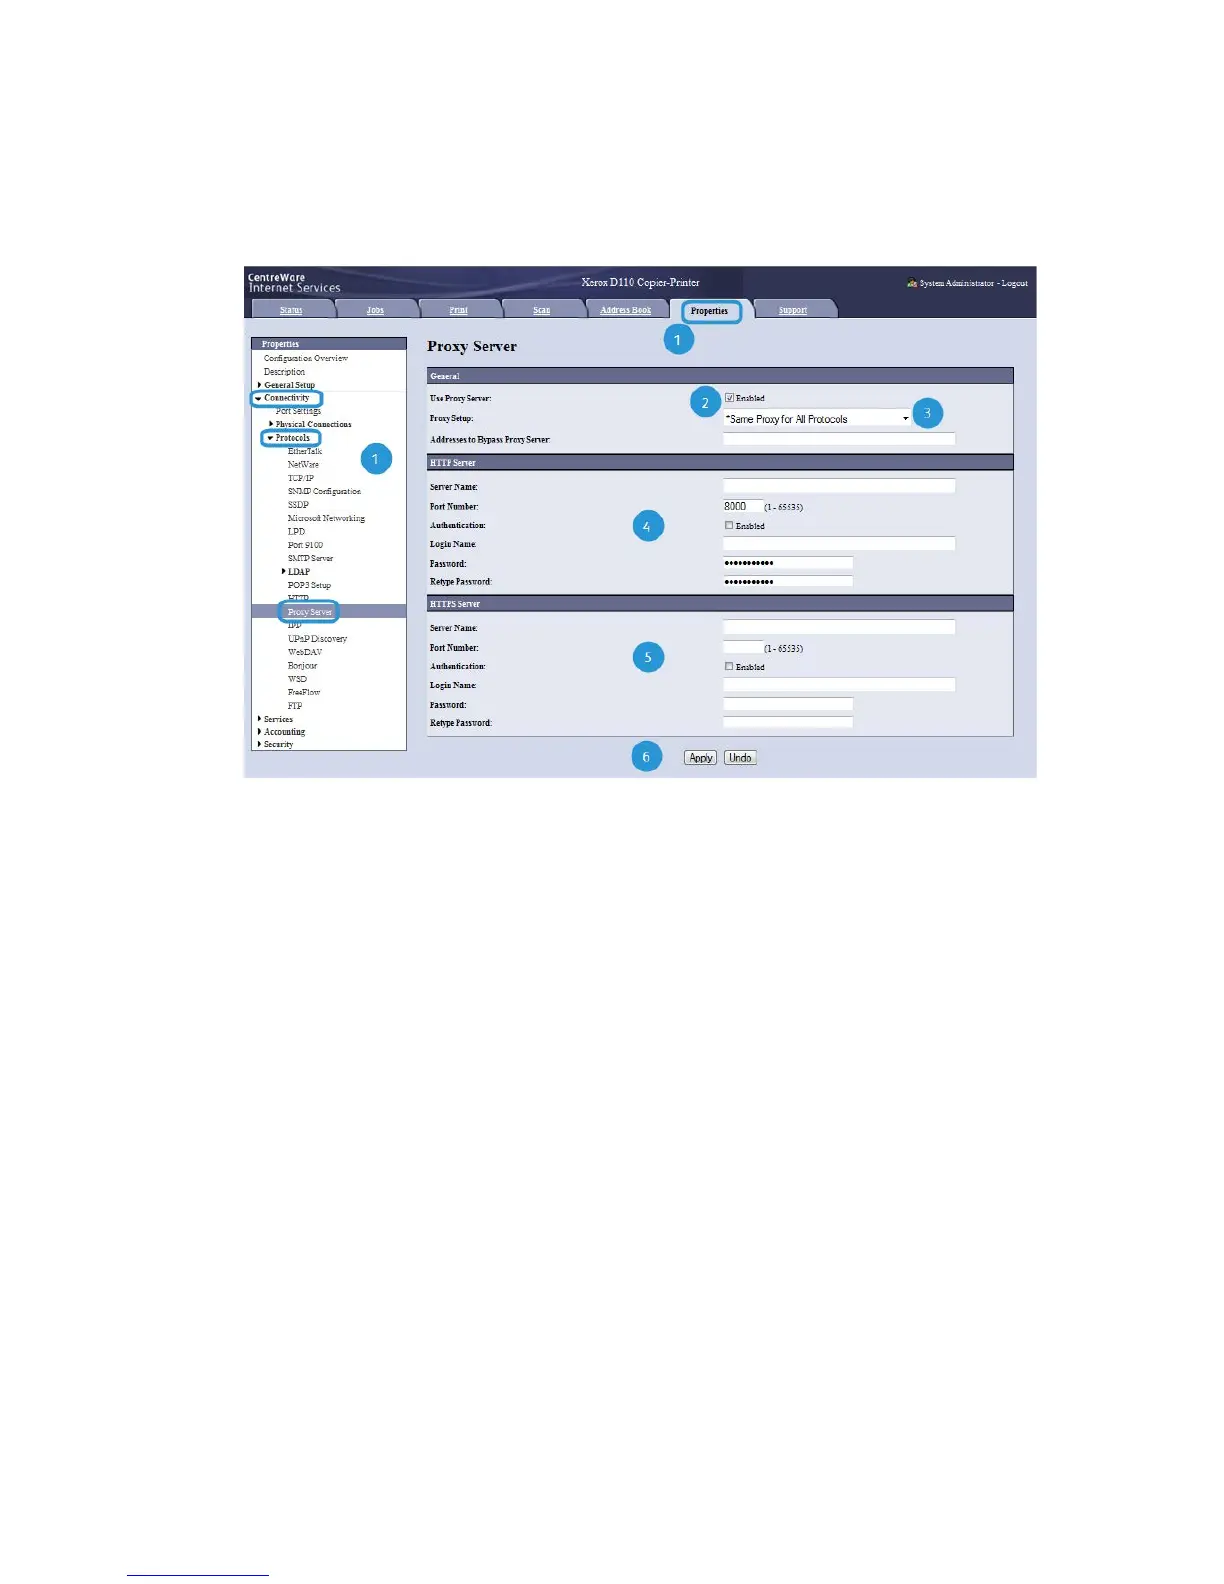
Update Proxy Server
1. In CWIS, click Properties > Connectivity > Protocols > Proxy Server. If prompted,
type the user name and password. The defaults are admin and 1111.
2. Under General, next to Use Proxy Server, select Enabled.
3. Next to Proxy Setup, select *Same Proxy for All Protocols to use the same proxy
settings for HTTP and HTTPS, or Different Proxy for each Protocol.
4. Under HTTP Server, perform the following steps:
a) Type the Server Name.
b) Type the Port Number. The default port number is 8000.
c) Next to Authentication, select Enabled if your proxy server is configured to require
authentication.
d) Type the Login Name and Password. Retype the password to confirm.
5. Under HTTPS Server, type the HTTPS proxy server information, if required.
a) Type the Server Name.
b) Type the Port Number. The default port number is 8000.
c) Next to Authentication, select Enabled if your proxy server is configured to require
authentication.
d) Type the Login Name and Password. Retype the password to confirm.
6. Click Apply.
7. Power off/Power on machine.
5-7Xerox
®
Color C75 Press
System Administration Guide
Remote services