XT2640OperatingManual 13July2016 Page184of187
8.
(OnlyrequiredforchannelshavingtheXcurrentoption)AsourceofACvoltageintoa10.25Kohmloadat200mVrmsata
frequencyofbetween45and450Hz(theuseof50Hzor60Hzisrecommended)withsufficientamplitudeaccuracytoensure
thedesiredratiobetweenthespecifiedXT2640accuracyandthatoftheappliedvoltage.Fora4:1TUR(typicallyused)the
voltagesourceshouldhaveanaccuracyof<0.02544%(SorWchanneltypes)or<0.007815%(Achanneltypes)attheselevels.
Notethatsomesourcesmayrequirethatyouadjustthevoltagesettingtoachievethecorrectvoltageintoa10.25Kohmload.
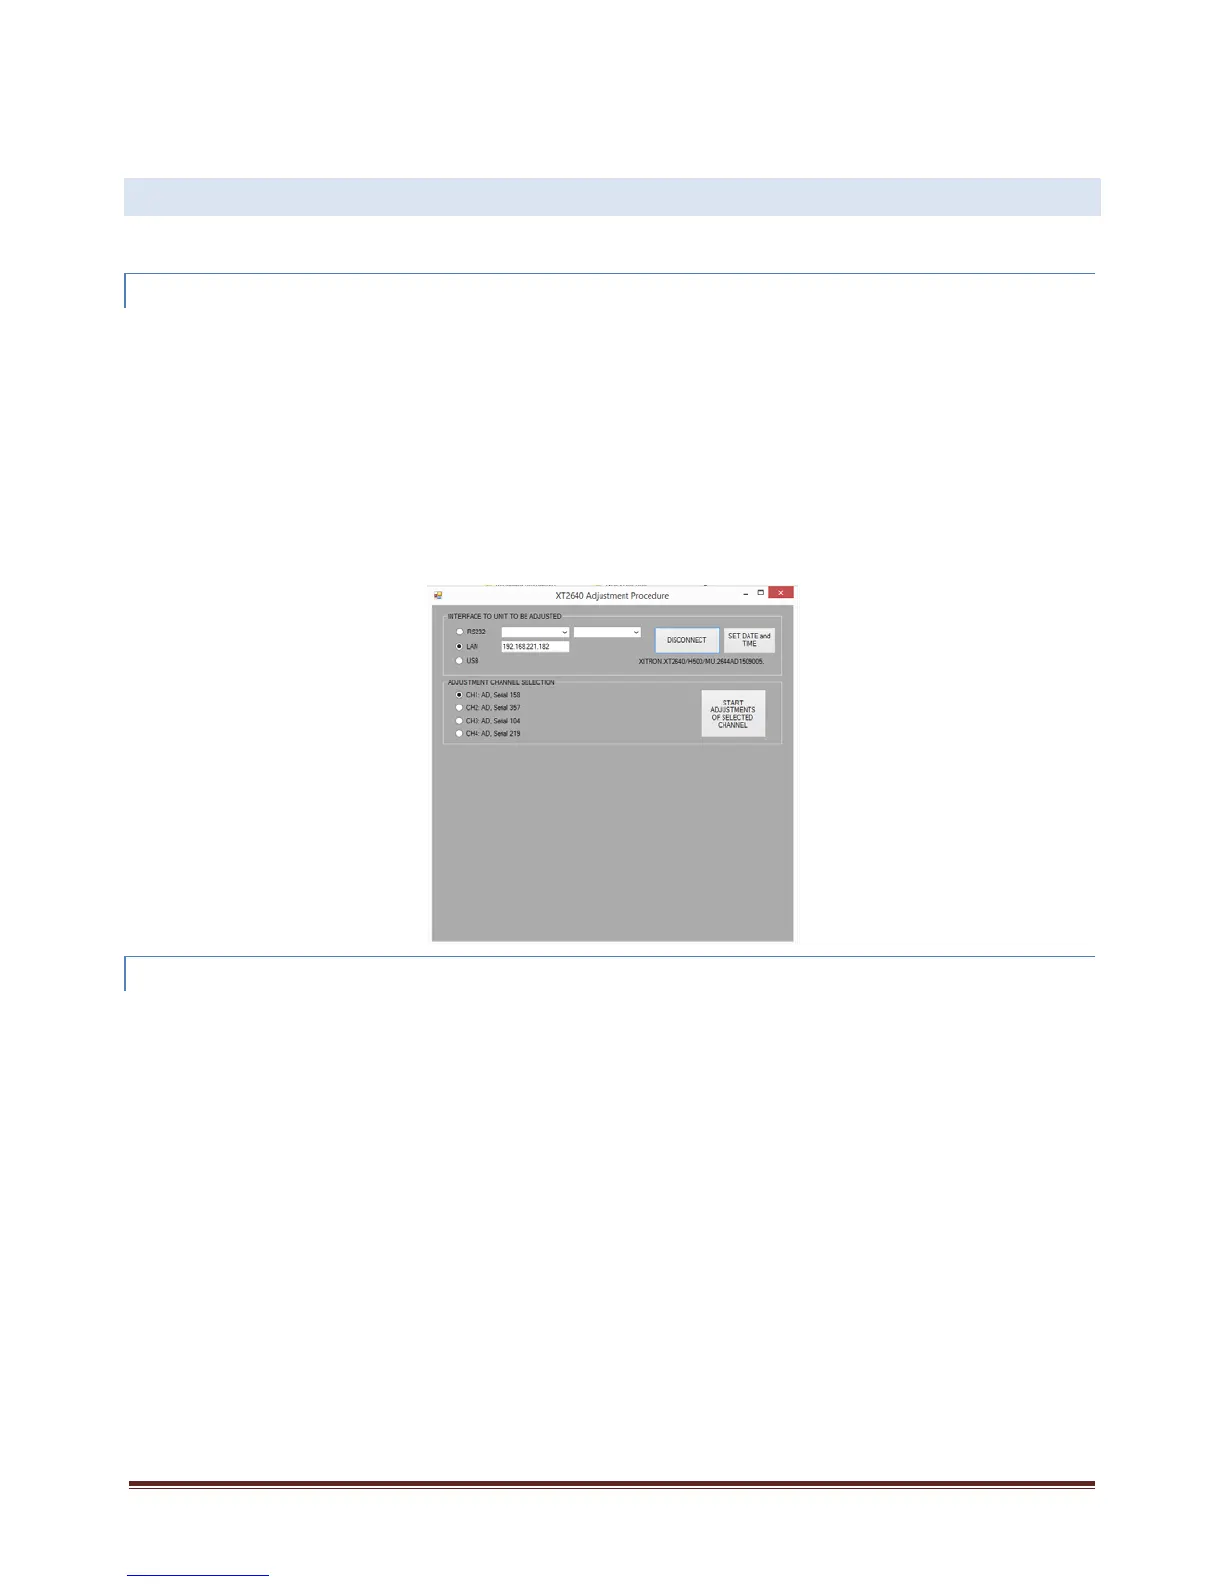
31.2 ADJUSTMENTPROCEDURE
AfterfirstrunningthesoftwareapplicationprovidedandconnectingthechoseninterfacebetweenthecomputerandtheXT2640
youshouldperformtheactionsofeachofthefollowingsections.
31.2.1 STARTINGTHEINTERFACETOTHEXT2640
IntheINTERFACETOUNITTOBEADJUSTEDareaoftheapplication‐
1.
Usingtheradiobuttons,selectthechoseninterfacetotheXT2640.
2.
IfusingtheRS232interfaceselectthebaudratefortheRS232interface.
3.
IfusingtheLANinterfacetypeintheIPaddressoftheXT2640.ThiscanbeseenbypressingtheLANinfoareaontheXT2640
screen.
4.
PresstheCONNECTbutton,thiswillthenberelabeledDISCONNECTandtheidentificationoftheXT2640willbeshown
underneaththebuttonaftertheapplicationhascorrectlyestablishedcommunicationswiththeXT2640.Thisshowsthemodel
number,anyinstalledoptioncontents,theserialnumberandthemainfirmwareversion.Theinstalledchannels,alongwith
theirtypeandoptionandserialnumberswillbelistedwithradiobuttonsintheADJUSTMENTCHANNELSELECTIONareaofthe
application.
5.
CheckthatyouhaveconnectedtothecorrectXT2640andthatithasexpectedserialnumberandchannelcontent.
6.
(Ifrequired)PresstheSETDATEandTIMEbutton.ThiswillsetthedateandtimeoftheXT2640tothatofthecomputer.
31.2.2 ADJUSTINGEACHCHANNELINTHE XT2640
Eachchannelisadjustedseparately,sotheprocedurebelowshouldbeperformedforeachchannelinstalledintheXT2640.Aftera
channelhasbeenadjusted“‐ADJUSTED”isshownfollowingitsserialnumberintheADJUSTMENTCHANNELSELECTIONareaofthe
application.
1.
UsingtheradiobuttonsintheADJUSTMENTCHANNELSELECTIONarea,selectthechanneltobeadjusted.
2.
EnsurethattherearenoconnectionstoanychannelterminalsoftheXT2640.
3.
PresstheSTARTADJUSTMENTSOFSELECTEDCHANNELbutton.