95
Genos2 Owner’s Manual
Song Recording
6
2 Start recording.
You can start recording by playing the keyboard, starting the Style, playing a Multi Pad or touching [Play/Pause].
3 After you nish your performance, touch [Stop] to stop recording.
4 Touch [Save] to call up the Song Selection display, then save the recorded
performance as a le (page37).
Audio Quick Recording
Before recording, make the necessary settings such as Voice/Style selection and the microphone connection (if you want to
record your singing).
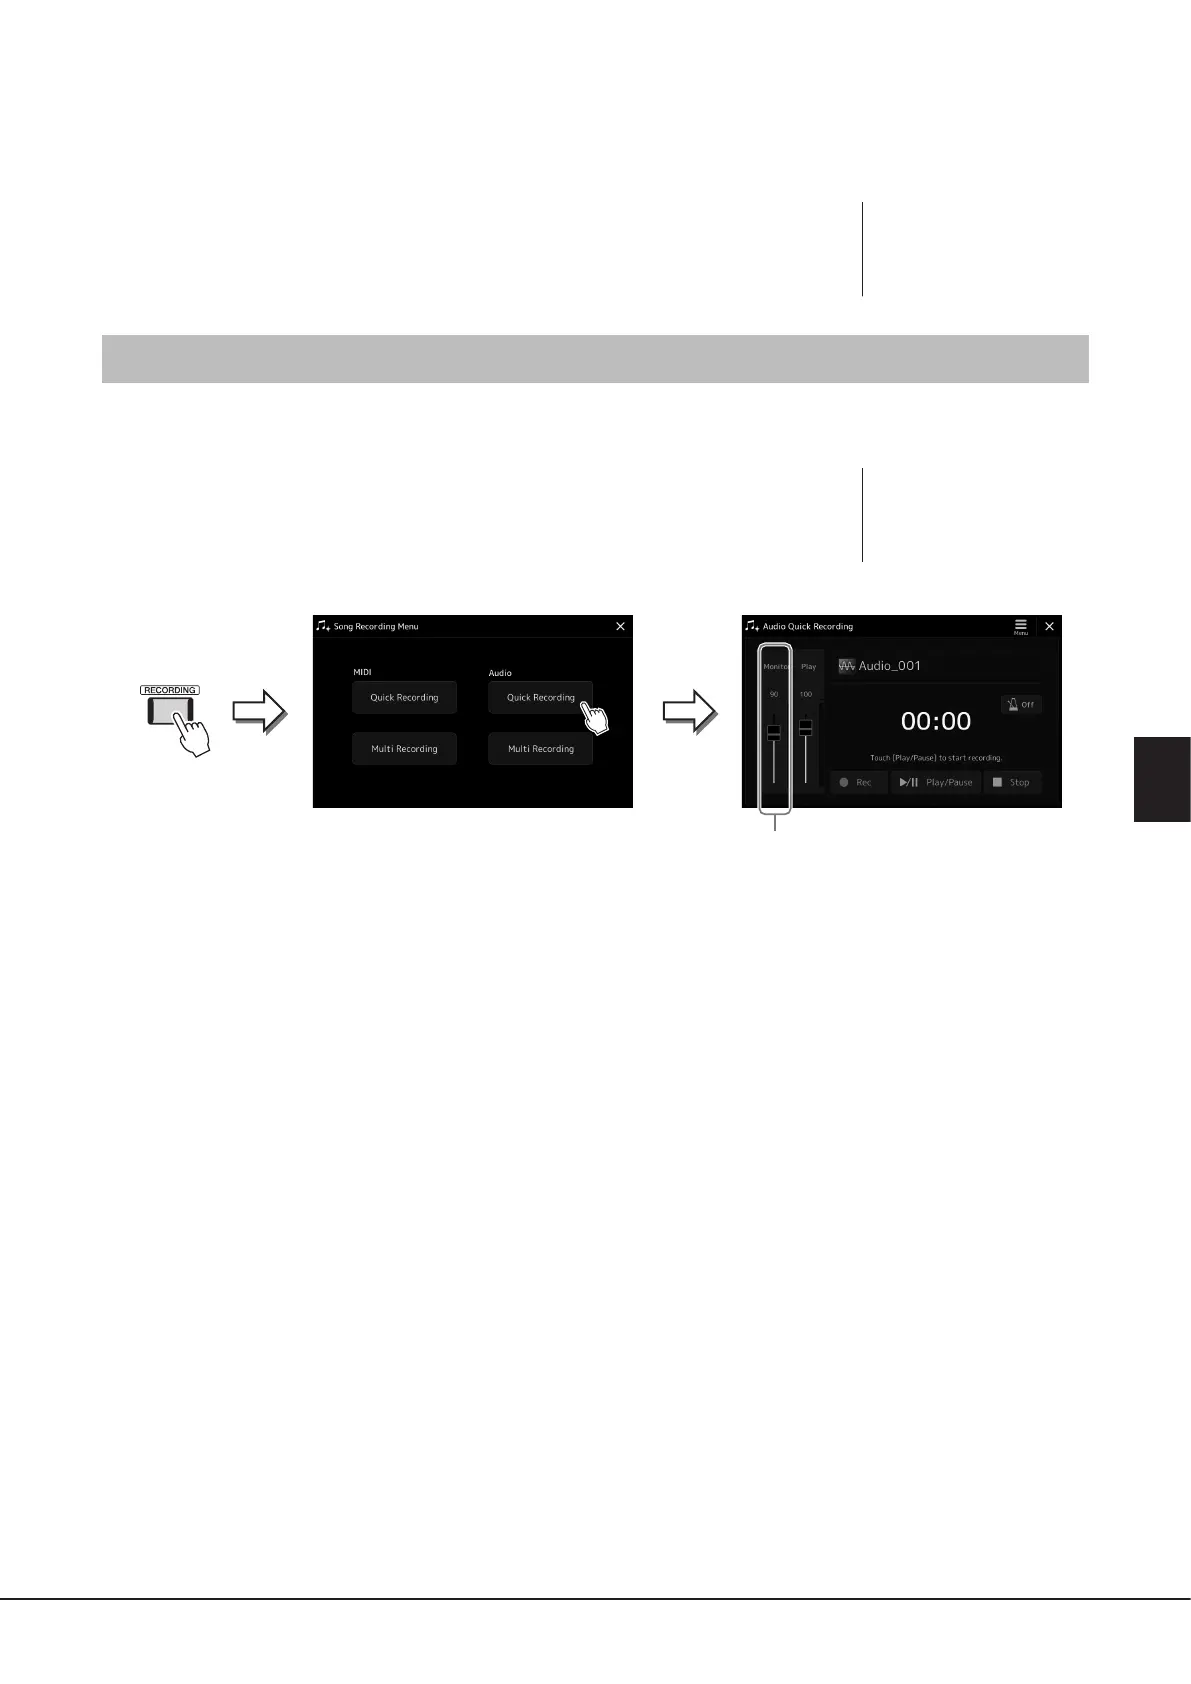
1 Call up the Audio Quick Recording display via [RECORDING] à Audio
[Quick Recording].
The display appears and a new empty audio le is created, with record standby status
enabled. However, unlike MIDI Quick Recording, recording does not start automatically with
keyboard performance, Style playback, or Multi pad playback.
2
2 Before recording, check the recording levels on the Rec Monitor meter by playing the keyboard,
Style, etc., and adjust them accordingly by using the corresponding slider.
Adjust the control so that the volume doesn’t constantly go into the “red” and light up the indicator.
3 Touch [Play/Pause] to start recording.
Immediately after this operation, start and record your performance.
4 After you nish performance, touch [Stop] to stop recording.
Recorded data is automatically saved to User drive as a le with the name automatically set. The recorded Audio Song
appears in the User category on the Song Selection display.
NOTICE
The recorded Song will be lost
if you close the display or you
turn the power o without
executing the save operation.
NOTE
To cancel the recording, touch
[Stop] on the display, and then
press the [EXIT] button, before
going on to step 2.