74
Genos2 Owner’s Manual
Controlling Multi Pad Playback
Playing the Multi Pads
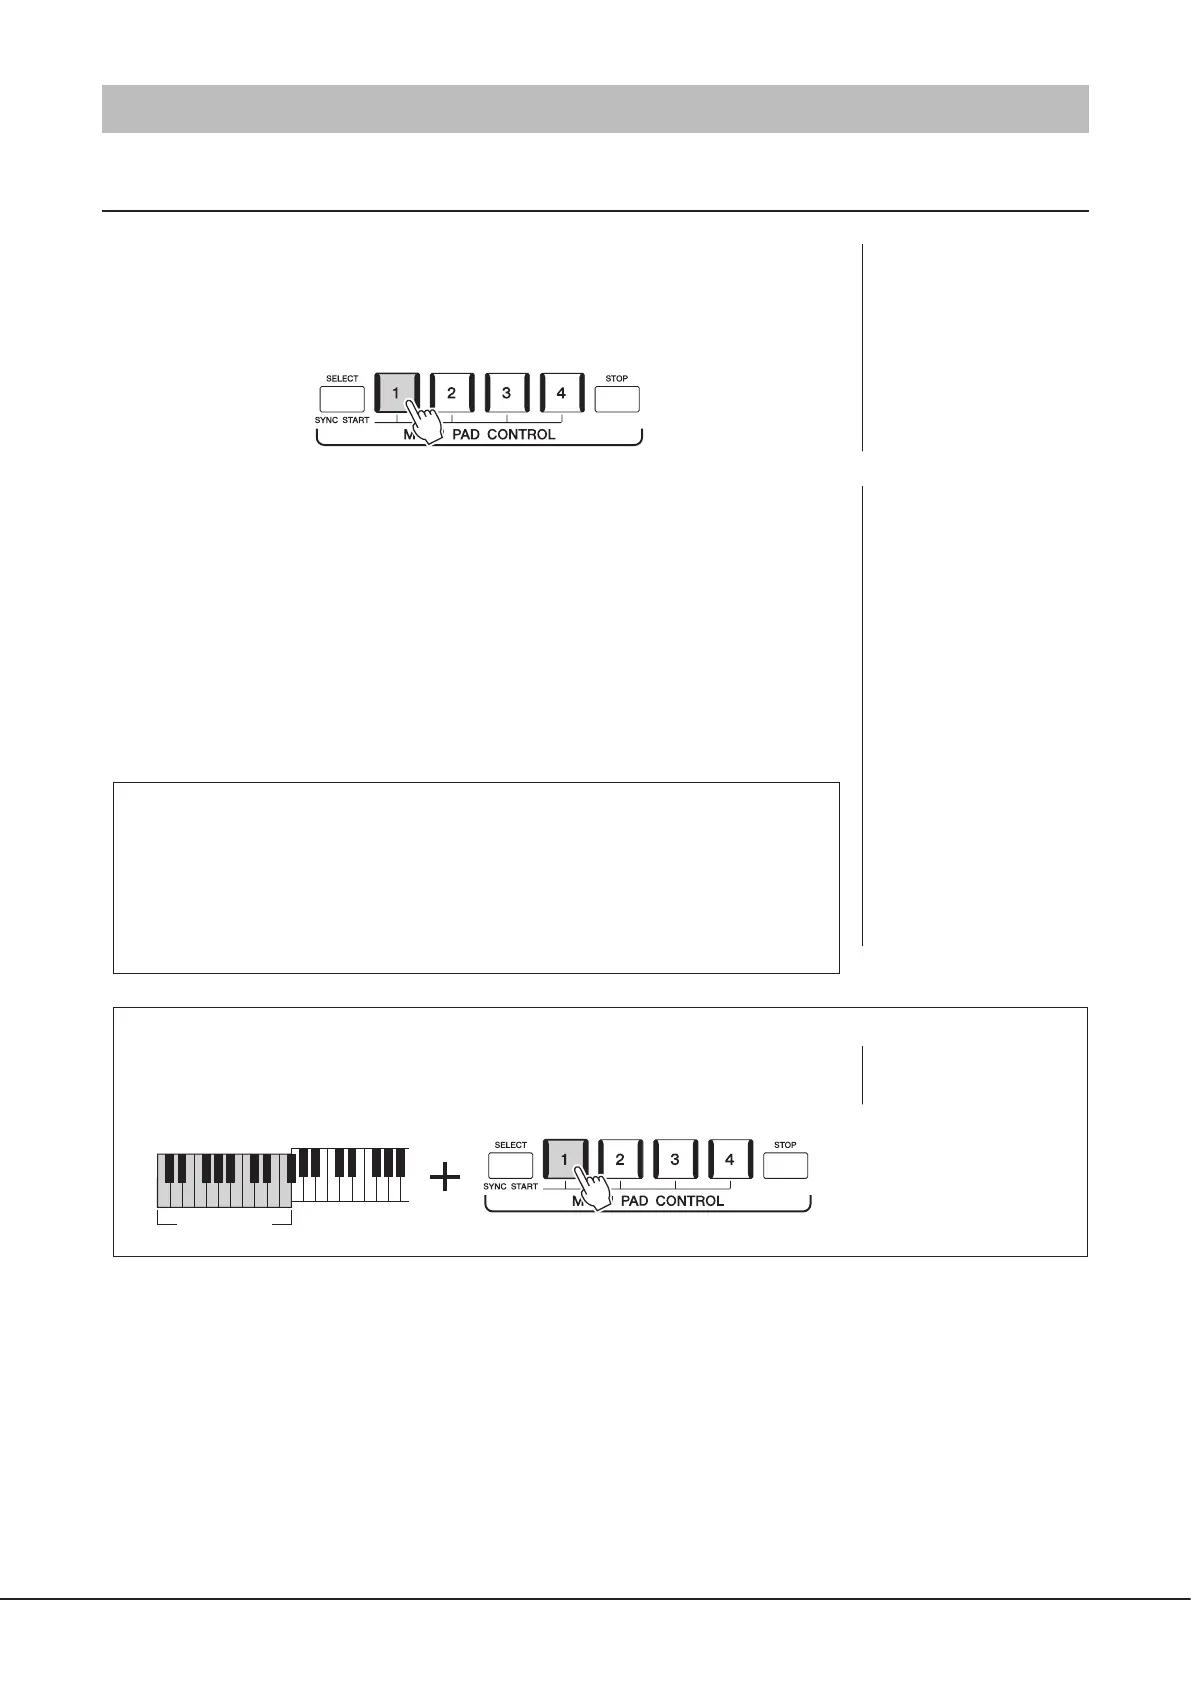
1 Press any of the MULTI PAD CONTROL [1]–[4] buttons to play a Multi Pad
phrase.
The corresponding phrase for the button starts playing back in its entirety at the currently
set tempo. You can play up to four Multi Pads at the same time.
2 Press the [STOP] button to stop playback of the Multi Pad(s).
If you want to stop a specic pad, simultaneously hold down the [STOP] button and press
the pad(s) you wish to stop.
About the lamp status of the MULTI PAD CONTROL [1]–[4] buttons
• Blue: Indicates that the corresponding pad contains data (phrase).
• Red: Indicates that the corresponding pad is playing back.
• Red (ashing): Indicates that the corresponding pad is in standby (Synchro Start; refer to
page75).
• O: Indicates the corresponding pad contains no data and cannot be played.
Using Chord Match
When the [ACMP] or LEFT part is on, Multi Pad phrases automatically change the pitch to match
the chord you play in the chord section.
Play the chord in the chord section before/after pressing any of the Multi Pads.
NOTE
Some Multi Pads are not
aected by Chord Match.
Chord section
NOTE
• There are two types of Multi
Pad data. Some types will play
back once and stop when they
reach to the end. Others will
be played back repeatedly
(loop).
• Pressing the pad during its
playback will stop playing and
begin playing from the top
again.
NOTE
• While the Style or MIDI Song
is playing back, pressing
the Multi Pad button starts
playback at the top of the next
measure. When the Style or
MIDI Song is stopped, pressing
the Multi Pad button starts
playback immediately.
• While the Style or MIDI Song
is playing back, pressing the
STYLE CONTROL [START/STOP]
or SONG A/B [PLAY/STOP]
button also stops playback of
the Multi Pad(s). While both
the Style and MIDI Song is
playing back, pressing the
SONG A/B [PLAY/STOP] button
stops playback of the Song,
Style and Multi Pad(s). This
behavior can be changed with
settings on the Song Setting
and Style Setting displays. For
details, refer to the Reference
Manual on the website.