Directions for Use
92
Operation Manual
2.5.5.4 Preparing the bite plate and the impression material
* Caution
• To prevent the patient from infection, always use new bite plate and impressing material
for each patient. Wipe off the bite plate with alcohol-dampened cloth prior to use to
maintain cleanliness.
• Cleantheheadxatorfor3Dimageacquisitionforeachpatientpriortouse.
• Use general commercial products, "dental alginate impression materials" and "Dental
Silicone impression materials" for 3D image acquisition. Using other kinds of impression
material may cause degradation of 3D image quality.
Coat the bite plate with dental impression
material (Use general commercial products,
"dental alginate impression materials",
"Dental Silicone impression materials", etc).
Advise the patient to bite on the bite plate
coated with dental impression material.
Wait until the impression material hardens.
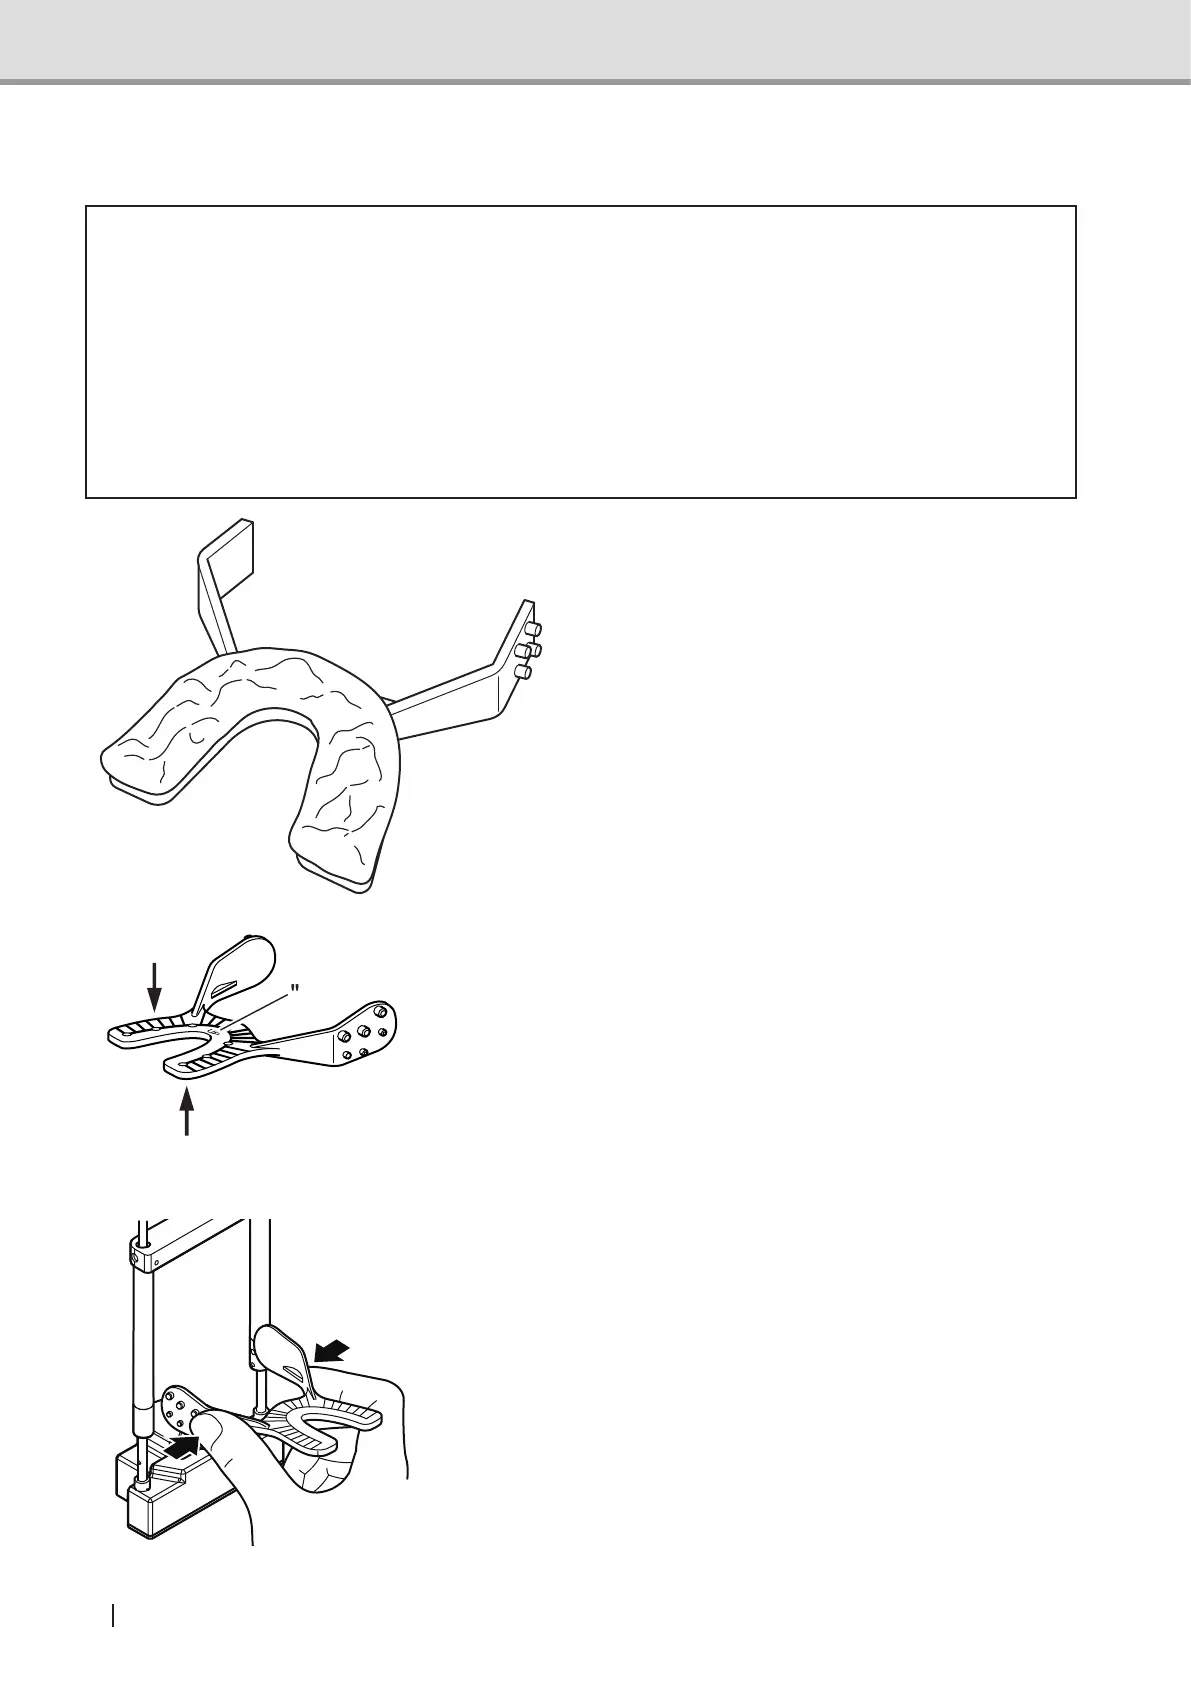
NOTE : Bite plate has the distinction
between upper surface and
lower surface. Upper surface
has thicker attaching pin.
Upper surface also has the
engraved mark "UP". When
coating the bite plate with
impression material and
advising the patient to bite
on the bite plate, make sure
which side is upper and
which side is lower.
2.5.5.5 Attaching the bite plate
Asshowninthegure,holdthebiteplate
coated with the hardened impression mate-
rial. Creep the attaching unit and insert the
pin into the attaching hole of the up-down
positioningunitoftheheadxatorfor3D
image acquisition.
NOTE : If the bite plate is crept too
much, it may cause damage.
mark
"UP"