Directions for Use
94
Operation Manual
2.5.5.7 Positioning of 3D image acquisition
* Warning
• Do not look directly into the positioning beam although the power output (Class 2) is at
the level in which adverse effect on the eyes can be avoided by blinking.
* Caution
• Positioning beam is a laser beam. Be careful not to direct the positioning laser beam into
patient's eyes. Also, advise the patient not to look directly into the beam.
• To minimize X-ray exposure, properly position the patient.
• If the rotating arm is deviated from its correct position, it may cause complications during
the procedure. Be sure to return the arm to its reset position and then retry.
1. Aligning the positioning beam
Align the horizontal position of the image acquiring area.
Fix the forehead support to the top and the up-down positioning unit to the bottom.
Press the positioning beam switch. The rotat-
ing arm unit will move to the positioning point
and the beam will be emitted. The intersection
point of the emitted median beam and the
medsagittal vertical beam will be the center
ofFOV.Movetherotatingarmandthehead
xatorfor3Dimageacquisitionsothatthe
desired area for image acquisition comes into
the image acquisition area.
Suppl. :TakeintoaccountthediameteroftheFOVandadjustthebeamslightlyinsidethe
row of teeth.
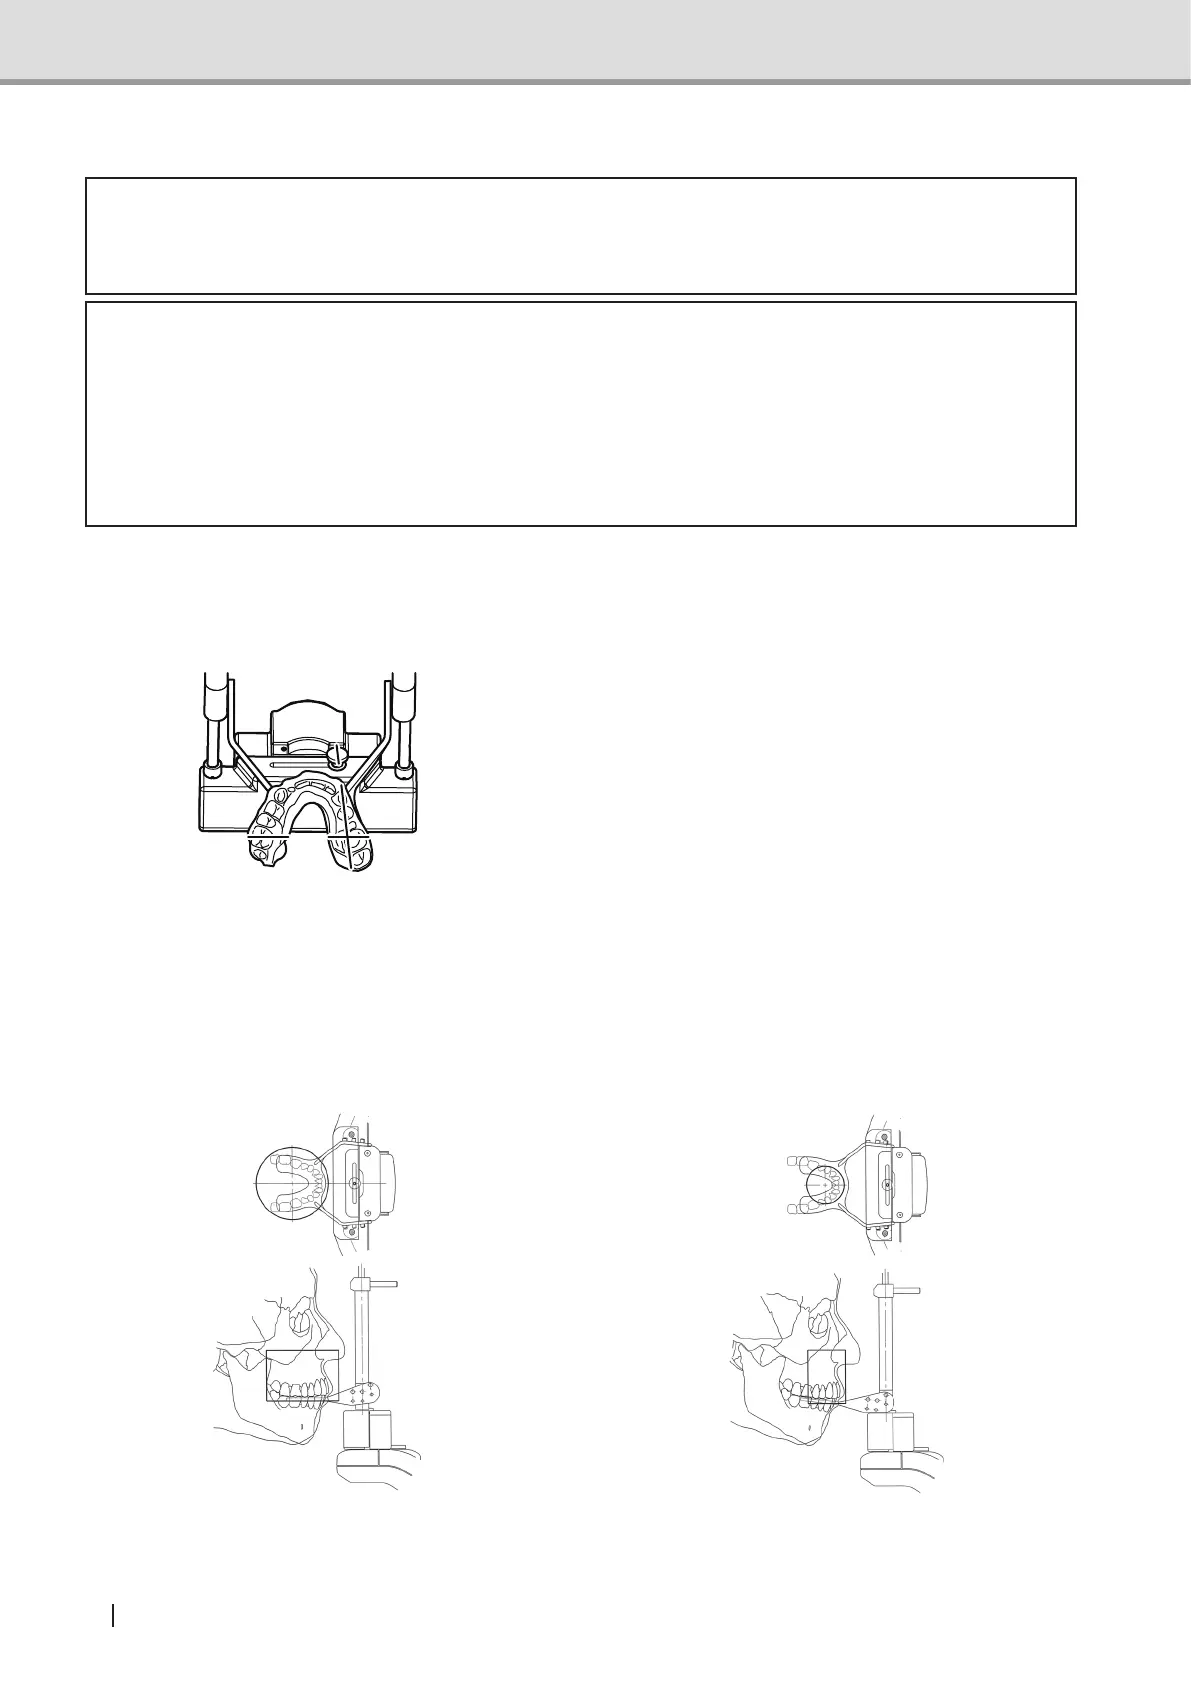
Example of 3D Oral and upper anterior tooth image
acquisition
Example of 3D Dental and upper anterior tooth
image acquisition
3D Oral image : Diameter 77mm
3D Dental image : Diameter 40mm