START-UP
Axio Examiner Installing standard components Carl Zeiss
M60-2-0003 e 05/2012 27
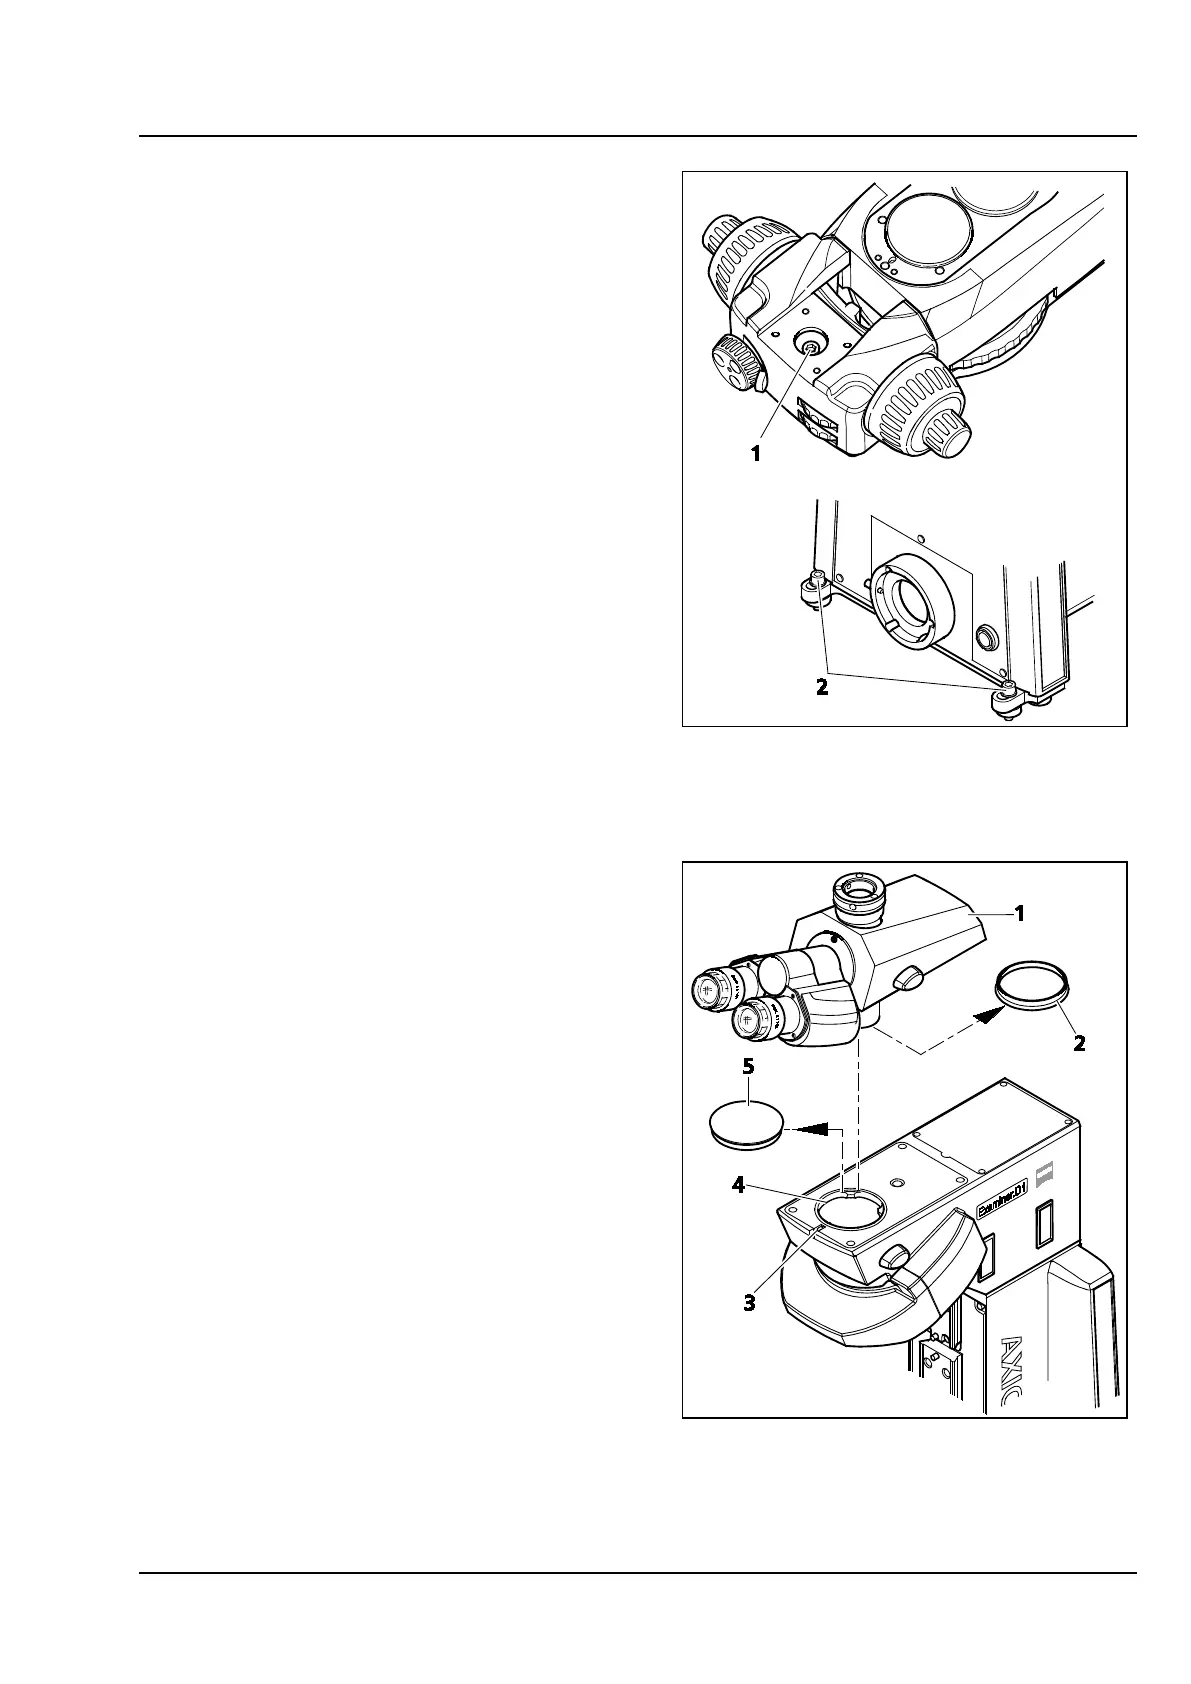
3.1.2 Fastening the microscope to a
tabletop
The lower microscope part has three screws for
fastening the microscope to a perforated panel.
Proceed as follows:
• Remove the condenser carrier, if any (see
section 3.1.9).
• Align the microscope.
• Screw in and tighten the screw located inside
the upper microscope part (Figure 3-2/1) and
the two screws at the rear side (Figure 3-2/2).
• Attach the condenser carrier again if required
(see section 3.1.9).
3.1.3 Attaching a binocular tube /
phototube
Every binocular tube included in the system
overview (see section 2.2) may be attached to the
Axio Examiner stand. Proceed as follows:
• Loosen the hexagon socket head screw
(Figure 3-3/3) using a ball head-screwdriver,
width A/F 3. Remove the dust caps (Figure 3-3/2
and 5) from the tube bottom side and from the
stand's dovetail socket.
• Attach the binocular tube (Figure 3-3/1) by
inserting the dovetail ring into the socket
(Figure 3-3/4). Rotate the binocular tube into
the desired viewing position, and tighten the
hexagon socket head screw (Figure 3-3/3) using
a ball-head screwdriver again.
Figure 3-2 Fastening the stand to a tabletop
Figure 3-3 Attaching the binocular
(photo)tube