START-UP
Axio Examiner Installing optional components Carl Zeiss
M60-2-0003 e 05/2012 51
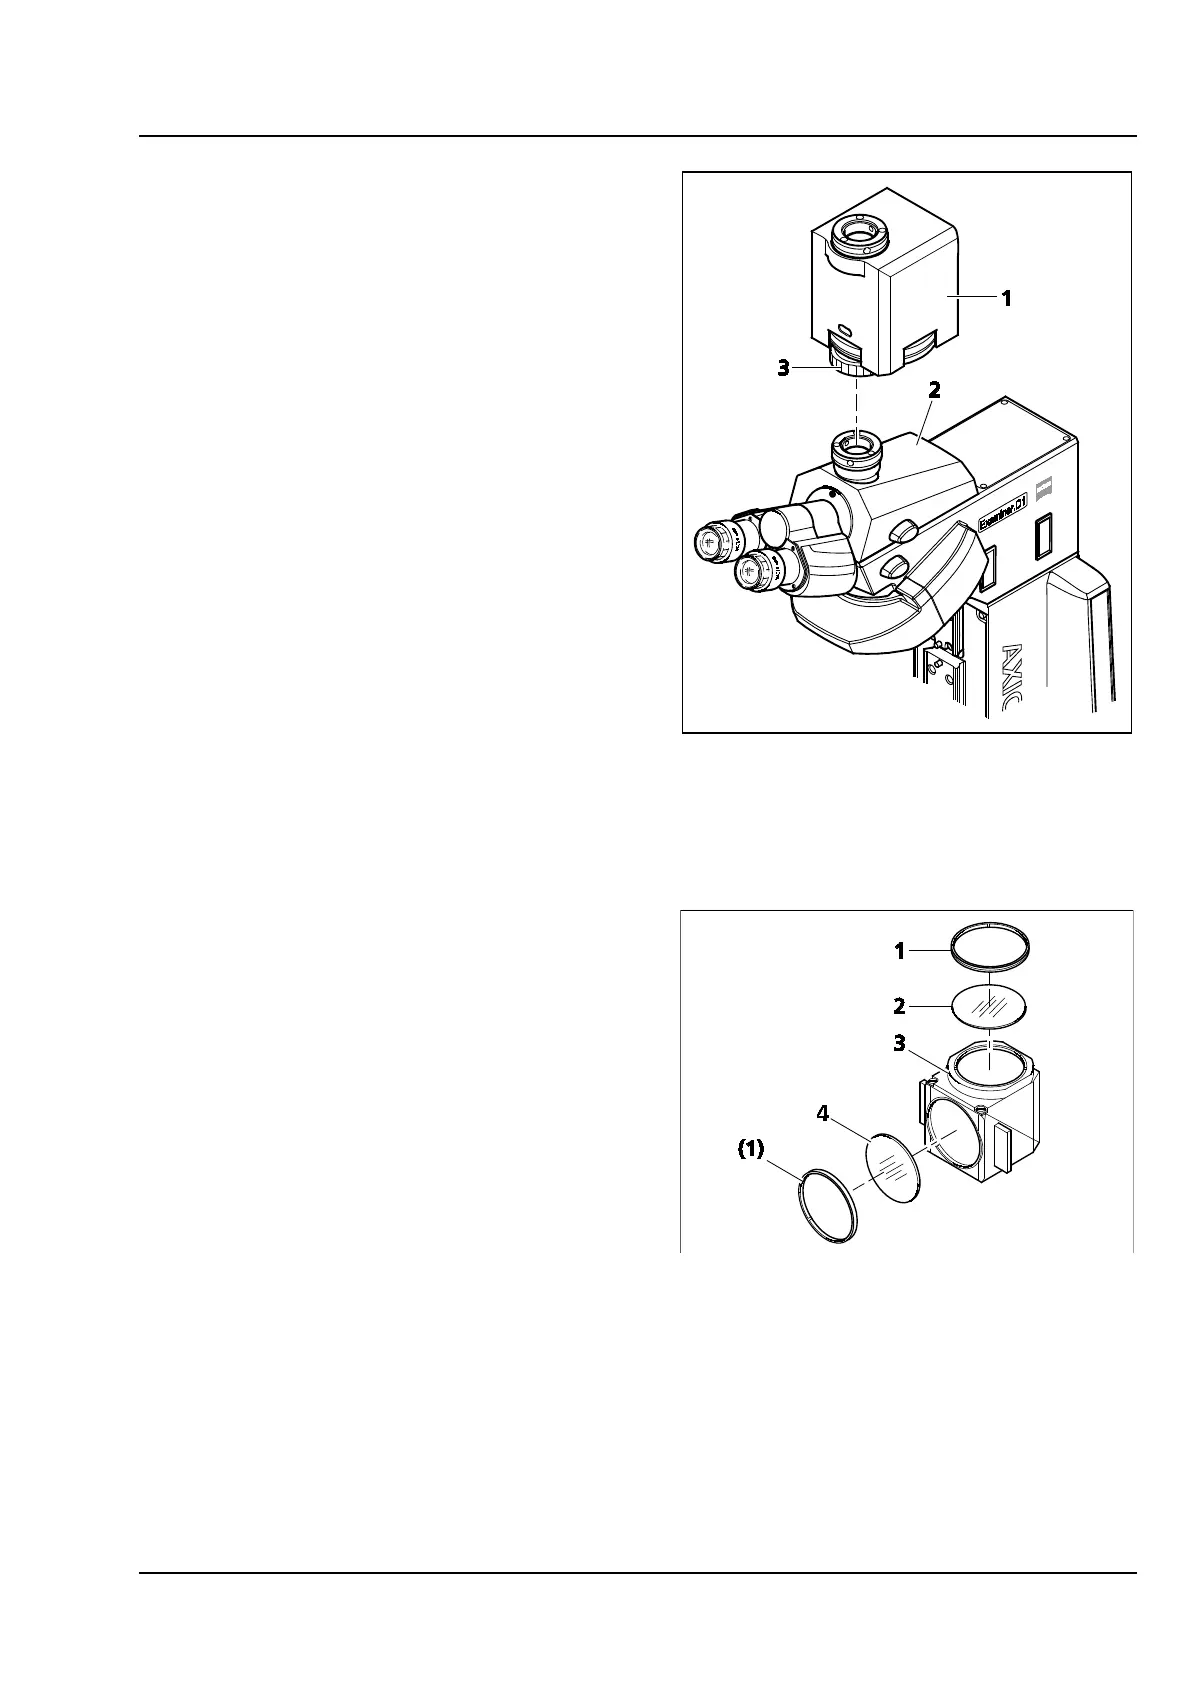
3.3.4 Attaching the magnification
changer
• If required, remove the camera with adapter (or
dust cap) from the phototube camera socket
(Figure 3-35/2).
• Remove the phototube from the stand top part,
and unscrew the tube lens. Put the phototube
onto the stand top part again, and secure it.
• Put the magnification changer (Figure 3-35/1)
on the camera socket, line it up, and secure it
with the union nut (Figure 3-35/3).
• Install the camera with the corresponding
adapter at the camera socket of the
magnification changer.
3.3.5 Replacing the filter set in the FL
P&C reflector module
The filter sets for the FL P&C reflector module may
be combined and installed on an individual basis by
the customer. Corresponding filter sets or
completely assembled FL P&C reflector modules
may be ordered from Carl Zeiss.
• Remove the FL P&C reflector module
(Figure 3-36/3) from the reflector turret (see
section 3.1.5).
• Use the assembly sheet metal part from the
toolset to unscrew the retainer ring
(Figure 3-36/1).
• Turn the reflector module upside down to drop
the filter (Figure 3-36/2 or 4) on a soft surface.
• Put the barrier filter in position (Figure 3-36/2),
put the excitation filter in position
(Figure 3-36/4), and secure them by the retainer
ring (Figure 3-36/1).
Figure 3-35 Putting on the magnification
changer
Figure 3-36 Replacing the filter set in the FL
P&C reflector module