START-UP
Axio Examiner Installing standard components Carl Zeiss
M60-2-0003 e 05/2012 39
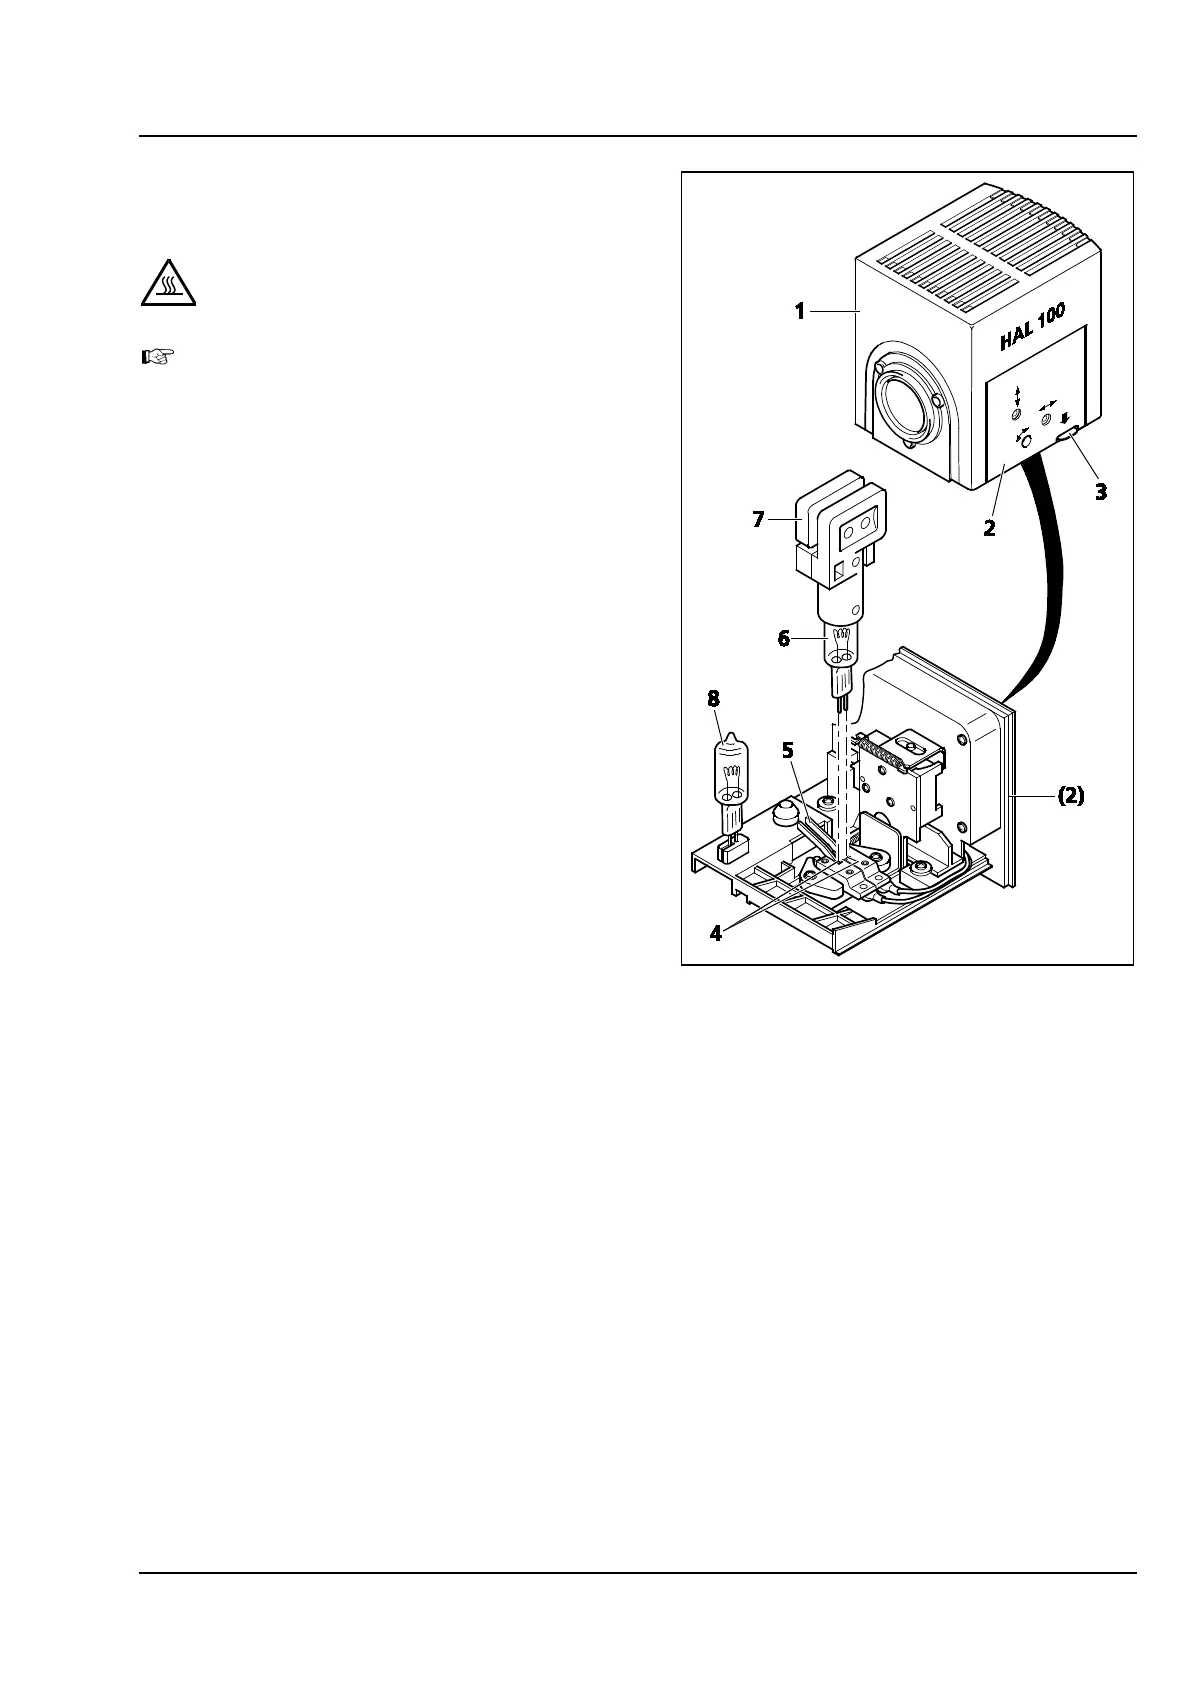
Replacing a 12 V, 100 W halogen 3.1.13.3
lamp
CAUTION
Hot surface!
To replace the halogen lamp, the lamp
housing does not need to be removed from
the stand. DO NOT keep the attached
exchange tool (Figure 3-20/7) for the
halogen lamp inside the lamp housing while
the illuminator is in operation.
The replacement bulb (Figure 3-20/8) may
remain pinned up inside the lamp housing.
• Switch off the external power supply unit of
HAL 100 (see section 3.2.2). Pull off the HAL
100 three-pole connector.
• Push down the unlock key (Figure 3-20/3) of
the HAL 100 halogen lamp (Figure 3-20/1), pull
out the bulb holder (Figure 3-20/2) completely,
and put it down separately.
• Push down both spring levers (Figure 3-20/5),
and pull out the old halogen lamp
(Figure 3-20/6) upwards.
• Push down both spring levers, insert the new
lamp into the lamp base (Figure 3-20/4), and
release the spring levers. For holding/grasping
the halogen lamp, use only the exchange tool
(Figure 3-20/7), since any trace of fat on the
halogen lamp may compromise its useful life.
• Briefly press down the spring levers once again
to center the lamp.
• Insert the bulb holder again, and push it in until
you feel that it has locked into place.
• Insert the HAL 100 three-pole connector again.
Figure 3-20 Replacing a halogen lamp