START-UP
Carl Zeiss Installing standard components Axio Examiner
36 M60-2-0003 e 05/2012
3.1.12 Attaching, removing and adjusting
the height of a stage carrier
(1) Attaching the stage carrier
To attach the stage carrier at the stand, please
proceed as follows:
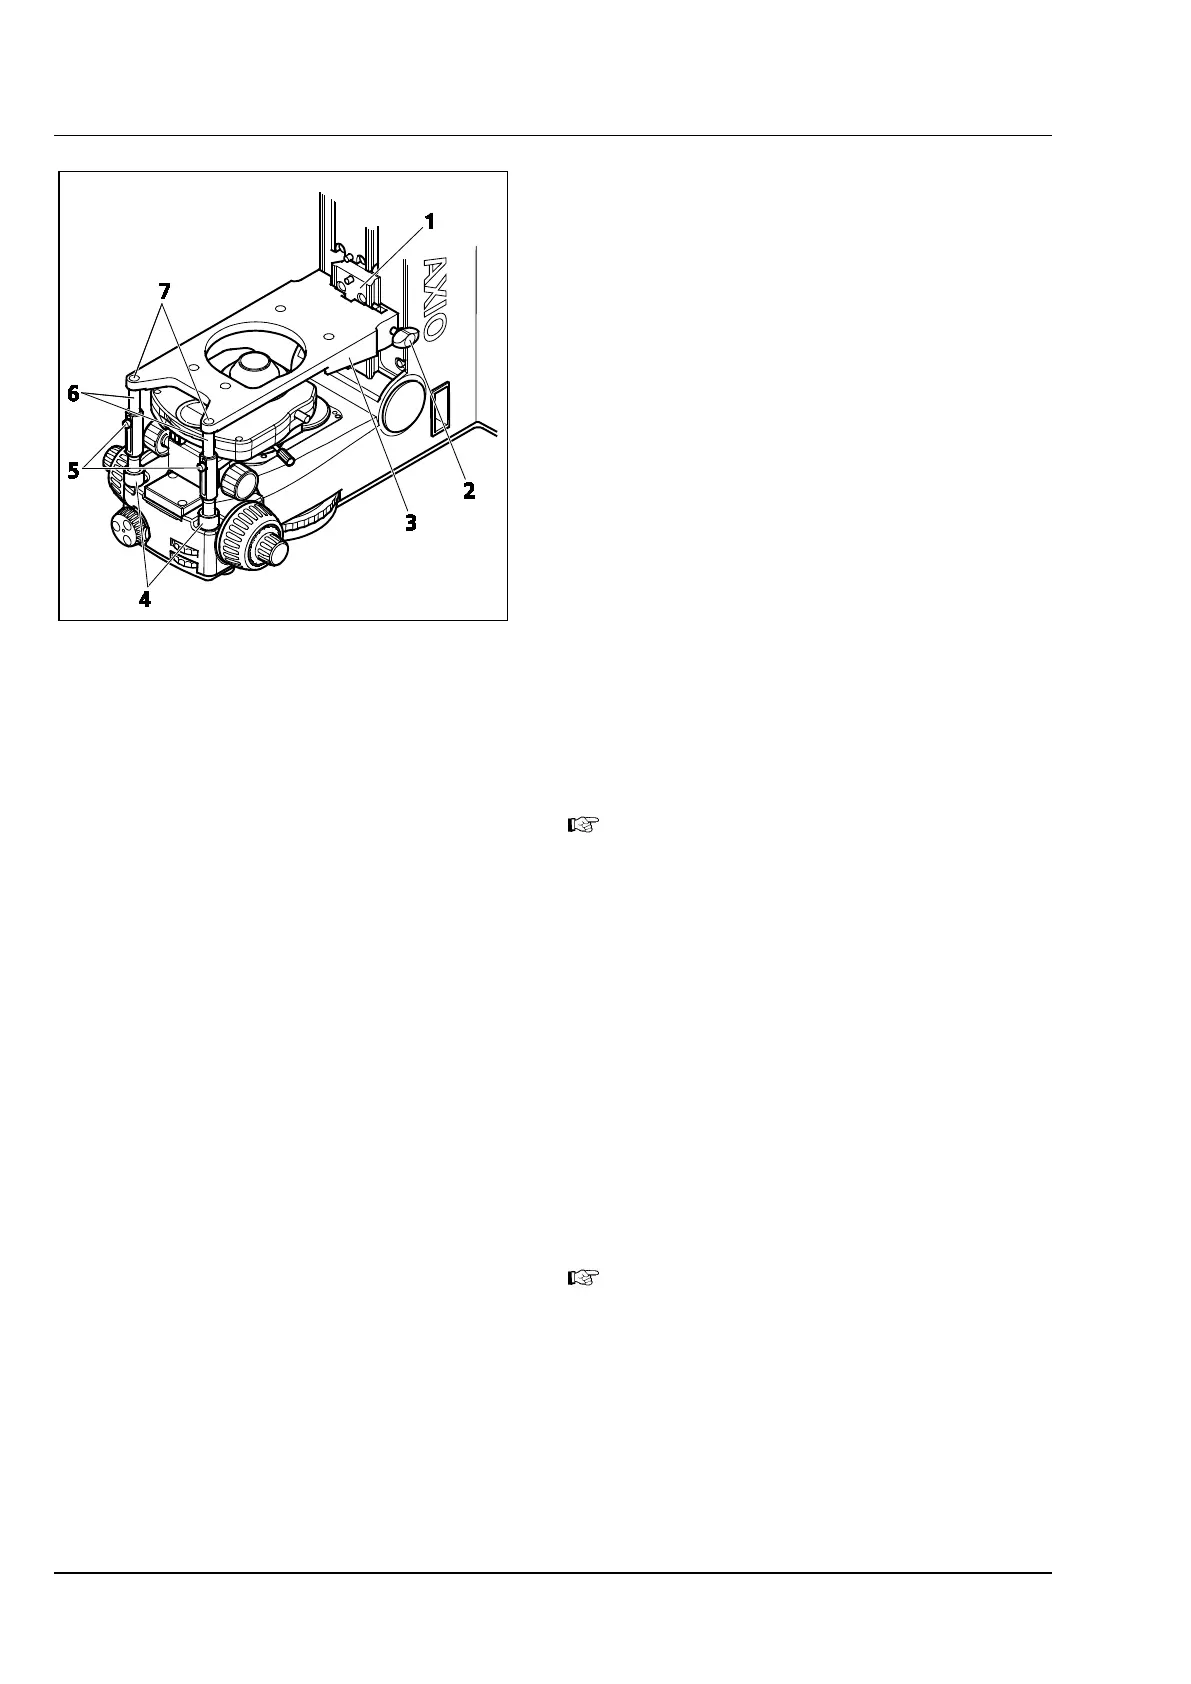
• Hold the stage carrier (Figure 3-17/3) and the
mounted stage with your left hand, and insert it
at a slight angle first into the dovetail guide
(Figure 3-17/1) at the stand.
• Hold the stage carrier as horizontally as
possible, and push it against the left-hand guide
surfaces. While doing so, swivel the stage
carrier to the right to ensure that the right-hand
side also engages in the dovetail guide at the
stand.
• Tighten the clamping screw (Figure 3-17/2)
slightly with your right hand.
• Align the stage carrier correspondingly at the
lower stop screw, and tighten the clamping
screw (Figure 3-17/2) without using excessive
pressure.
If the adapter is used for expanding the
specimen area (see section 3.3.1), align the
stage carrier at the upper stop screw.
• Loosen the adjusting screws (Figure 3-17/5) at
the stage carrier supports using a ball head
screwdriver.
• Push in the supports (Figure 3-17/6) and fasten
them at the stage carrier to the right and to the
left using screws (Figure 3-17/7).
• Pull the supports down until the clamping rings
(Figure 3-17/4) rest on the stand.
• Tighten the adjusting screws (Figure 3-17/5).
• Tighten both clamping rings (Figure 3-17/4)
until you feel a slight resistance.
Do not overtighten the clamping rings.
Otherwise, the stage carrier will be pushed
up and/or bent.
Figure 3-17 Attaching the stage carrier
(stage not shown in the drawing)