START-UP
Axio Examiner Establishing a mains connection, and switching … Carl Zeiss
M60-2-0003 e 05/2012 47
For connecting examiner control and docking station to the Axio Examiner mot., please proceed as
follows:
• Connect both sockets at the lower microscope part to the sockets (Figure 3-29/4 and 5) at the
examiner control unit.
• Connect the sockets at the upper microscope part to the sockets (Figure 3-29/2) at the examiner
control unit.
• If required, connect the docking station to the examiner control unit (Figure 3-29/3).
All connections at the Axio Examiner mot. have a mechanically coded design. Do not use excessive
force when connecting the units.
• Connect the HAL 100 three-pole illuminator plug into the corresponding three-pole jack at the
examiner control unit.
3.2.2 Connecting and switching the HAL
100 halogen lamp on or off
The HAL 100 halogen lamp is powered and
switched either on or off by the external power
supply unit.
The external power supply unit may be connected
to a line voltage of between 100 and 240 VAC,
50 ... 60 Hz. The power supply unit will automati-
cally adapt to the corresponding line voltage
within that range.
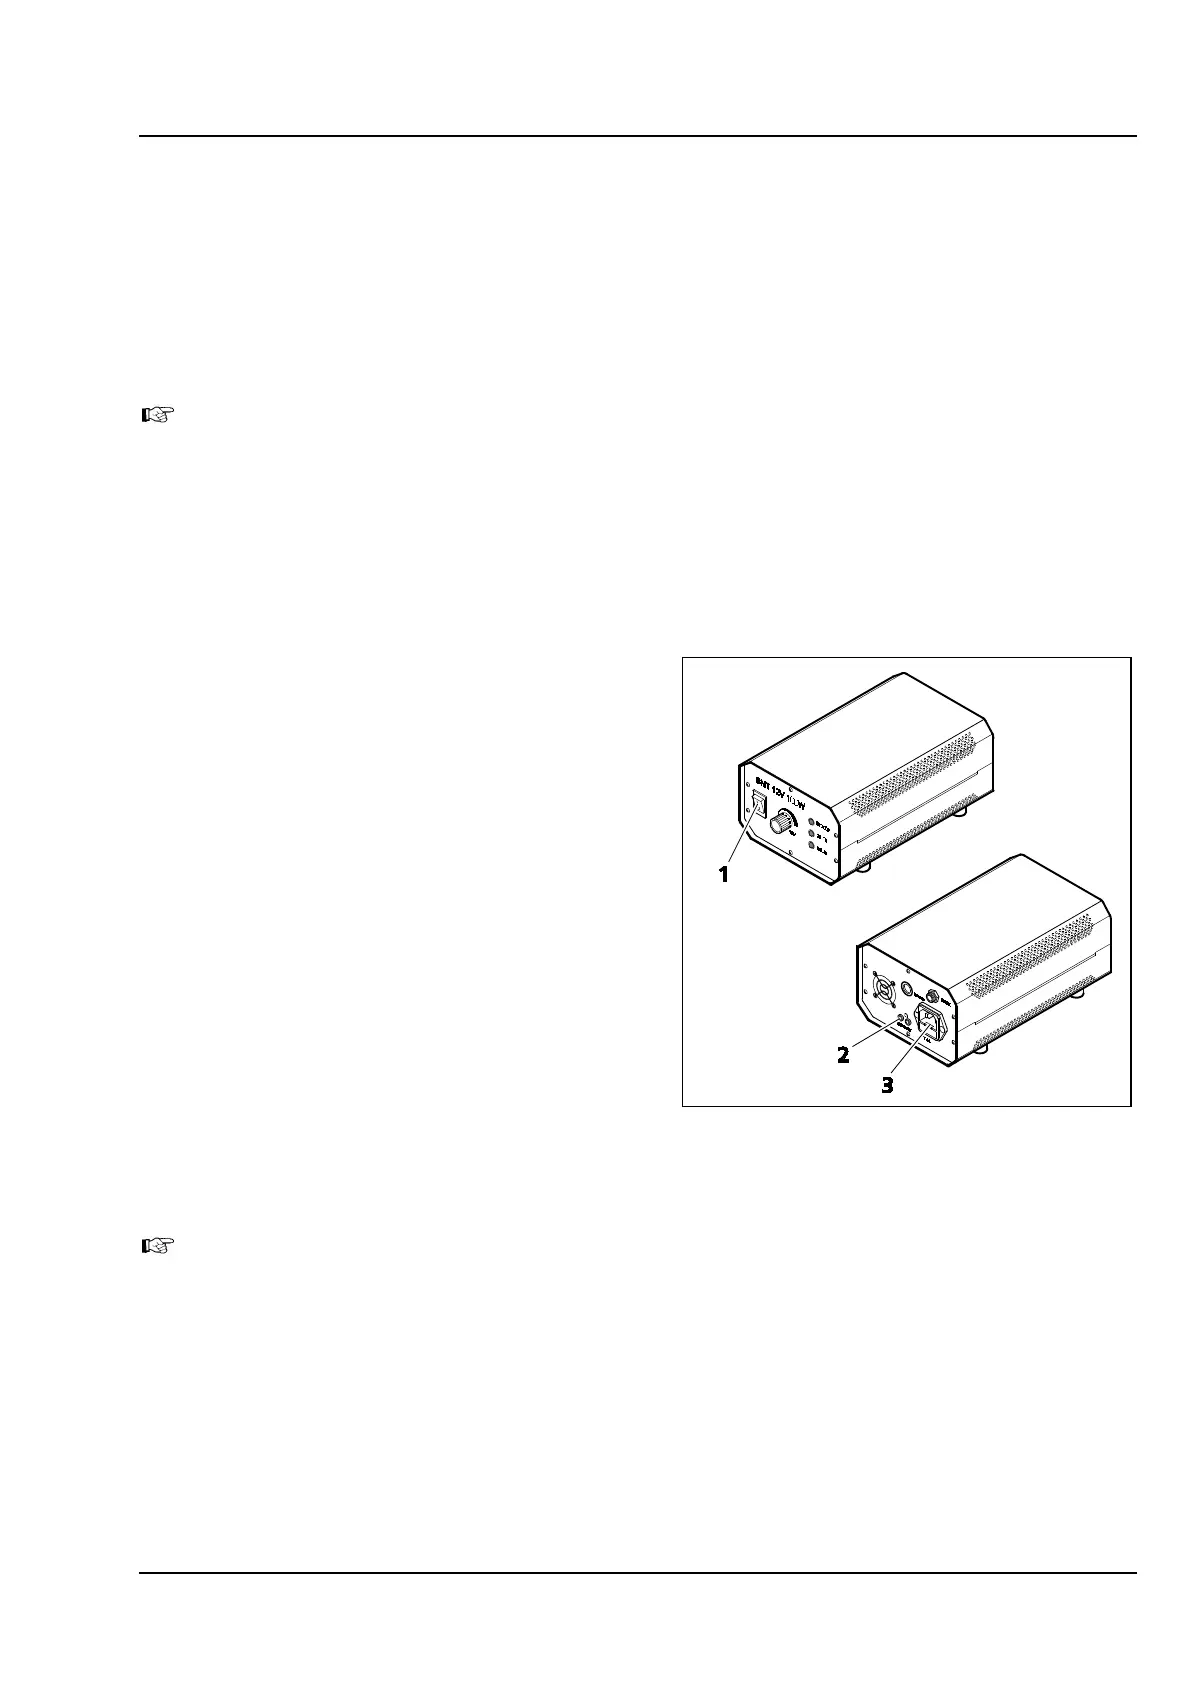
• Plug the three-pole HAL 100 illuminator plug
into the separate external power supply unit
(Figure 3-30/2).
• Connect the AC power socket of the external
power supply unit (Figure 3-30/3) to a mains
outlet using an AC power cord.
• Press the power button (Figure 3-30/1) to
switch the HAL 100 halogen lamp either on or
off.
When attaching the HAL 100 halogen lamp to the transmitted light socket, connect the
illumination control cable of the external power supply unit to the stand (Figure 3-18/4).
Figure 3-30 External power supply unit for
HAL 100
(front and rear side)