START-UP
Axio Examiner Installing standard components Carl Zeiss
M60-2-0003 e 05/2012 31
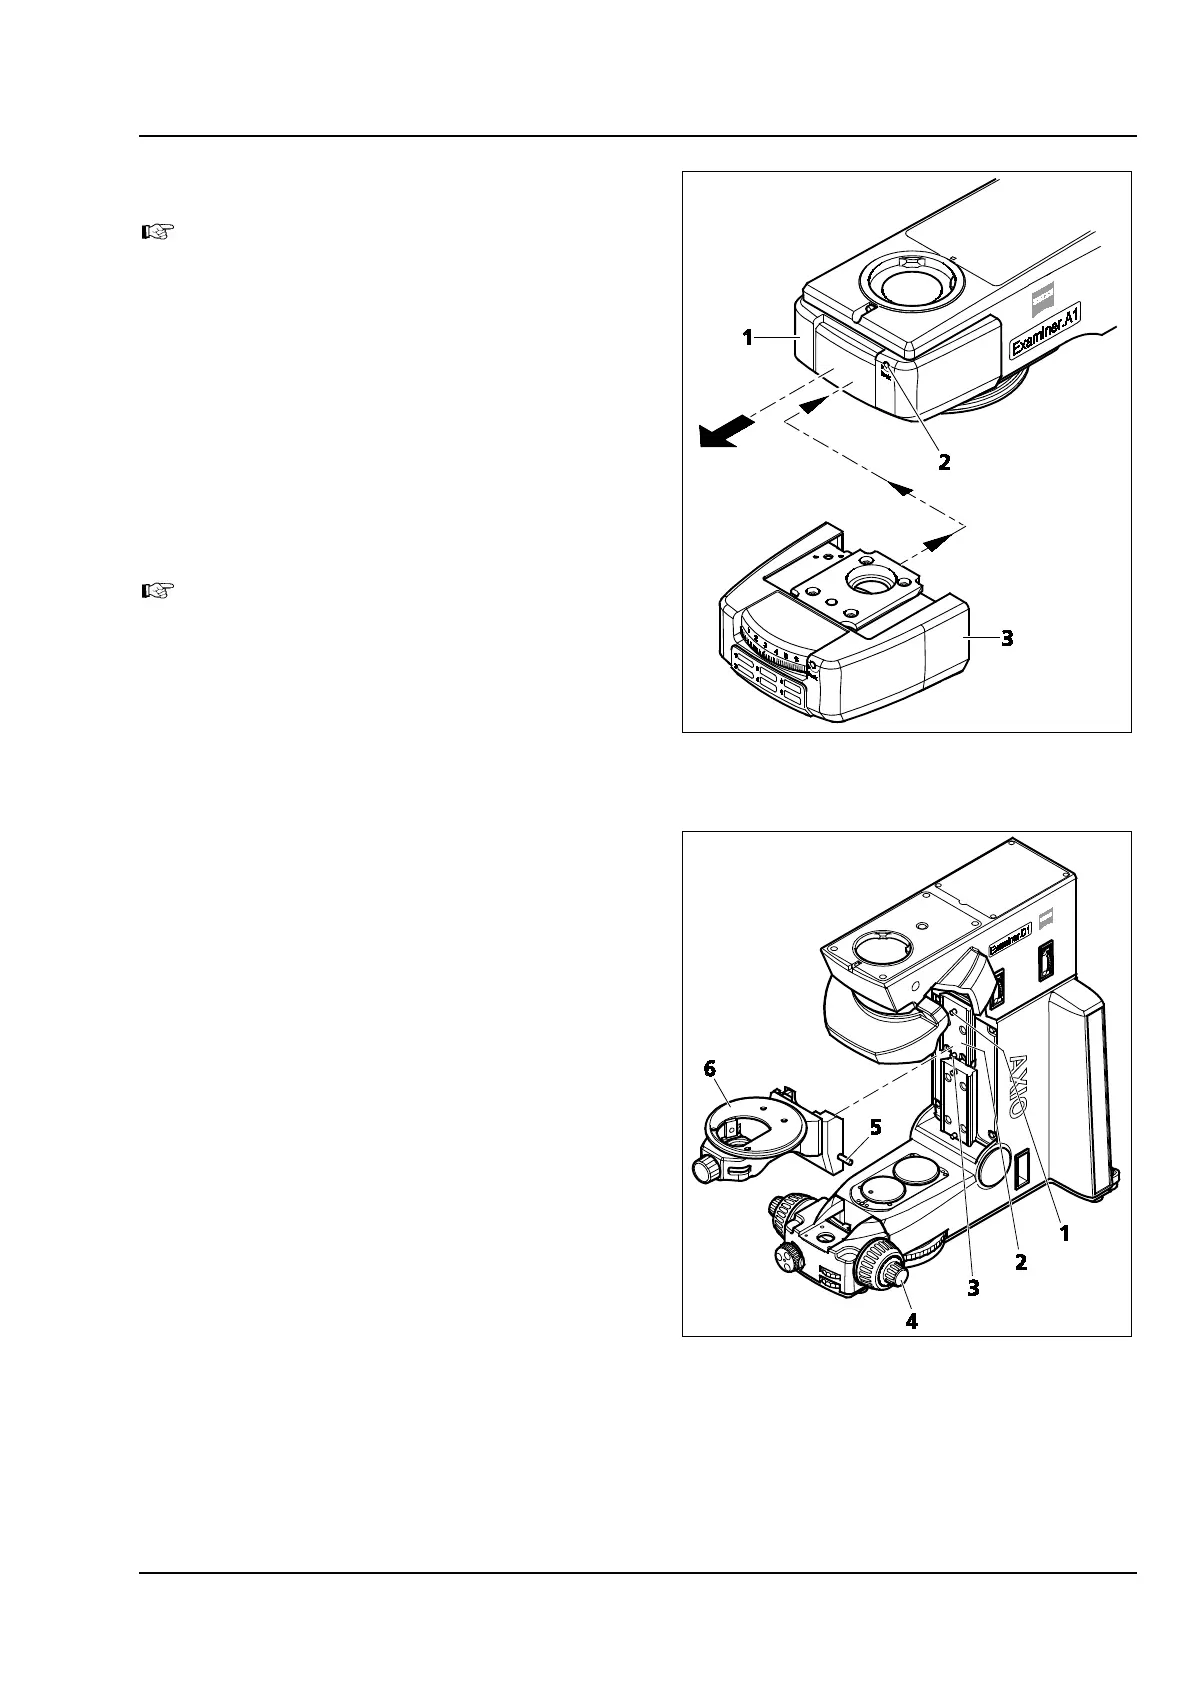
3.1.6 Installing a reflector insert
Only for microscopes with the Axio
Examiner.A1 top part.
• Insert the ball head screwdriver (width
A/F 3 mm) into the borehole (Figure 3-8/2), turn
the locking screw counterclockwise until it
reaches its stop, and pull off the closing cap
(Figure 3-8/1) toward the front side.
• Slide the reflector insert (Figure 3-8/3) equipped
with reflector modules, e.g., reflector turret 6x,
up to its stop into the stand top part, keep it
pressed on, and tighten the locking screw
clockwise.
When the reflector insert is pulled out, the
reflected-light optical path is blocked
automatically to prevent any dazzling.
3.1.7 Installing an objective mount or
objective nosepiece
To attach the objective mount or objective
nosepiece to the stand, please proceed as follows:
• For installation, move to the lowest Z position
possible using the pinion knob (Figure 3-9/4).
• Hold the objective mount or objective nosepiece
(Figure 3-9/6) with your left hand, and slide it in
a slightly oblique position on the left-hand side
first into the upper dovetail guide (Figure 3-9/2)
at the stand.
• Hold the objective mount or objective nosepiece
as horizontally as possible, and push it against
the left-hand guide surfaces. While doing so,
turn the objective mount or objective nosepiece
to the right in order to engage the right-hand
side into the dovetail guide at the stand as well.
• Put the objective mount or objective nosepiece
on the lower stop screw (Figure 3-9/3).
• Tighten the clamping screw (Figure 3-9/5) with
your right hand.
Figure 3-8 Installing a reflector insert
Figure 3-9 Installing an objective mount or
objective nosepiece