START-UP
Carl Zeiss Installing standard components Axio Examiner
38 M60-2-0003 e 05/2012
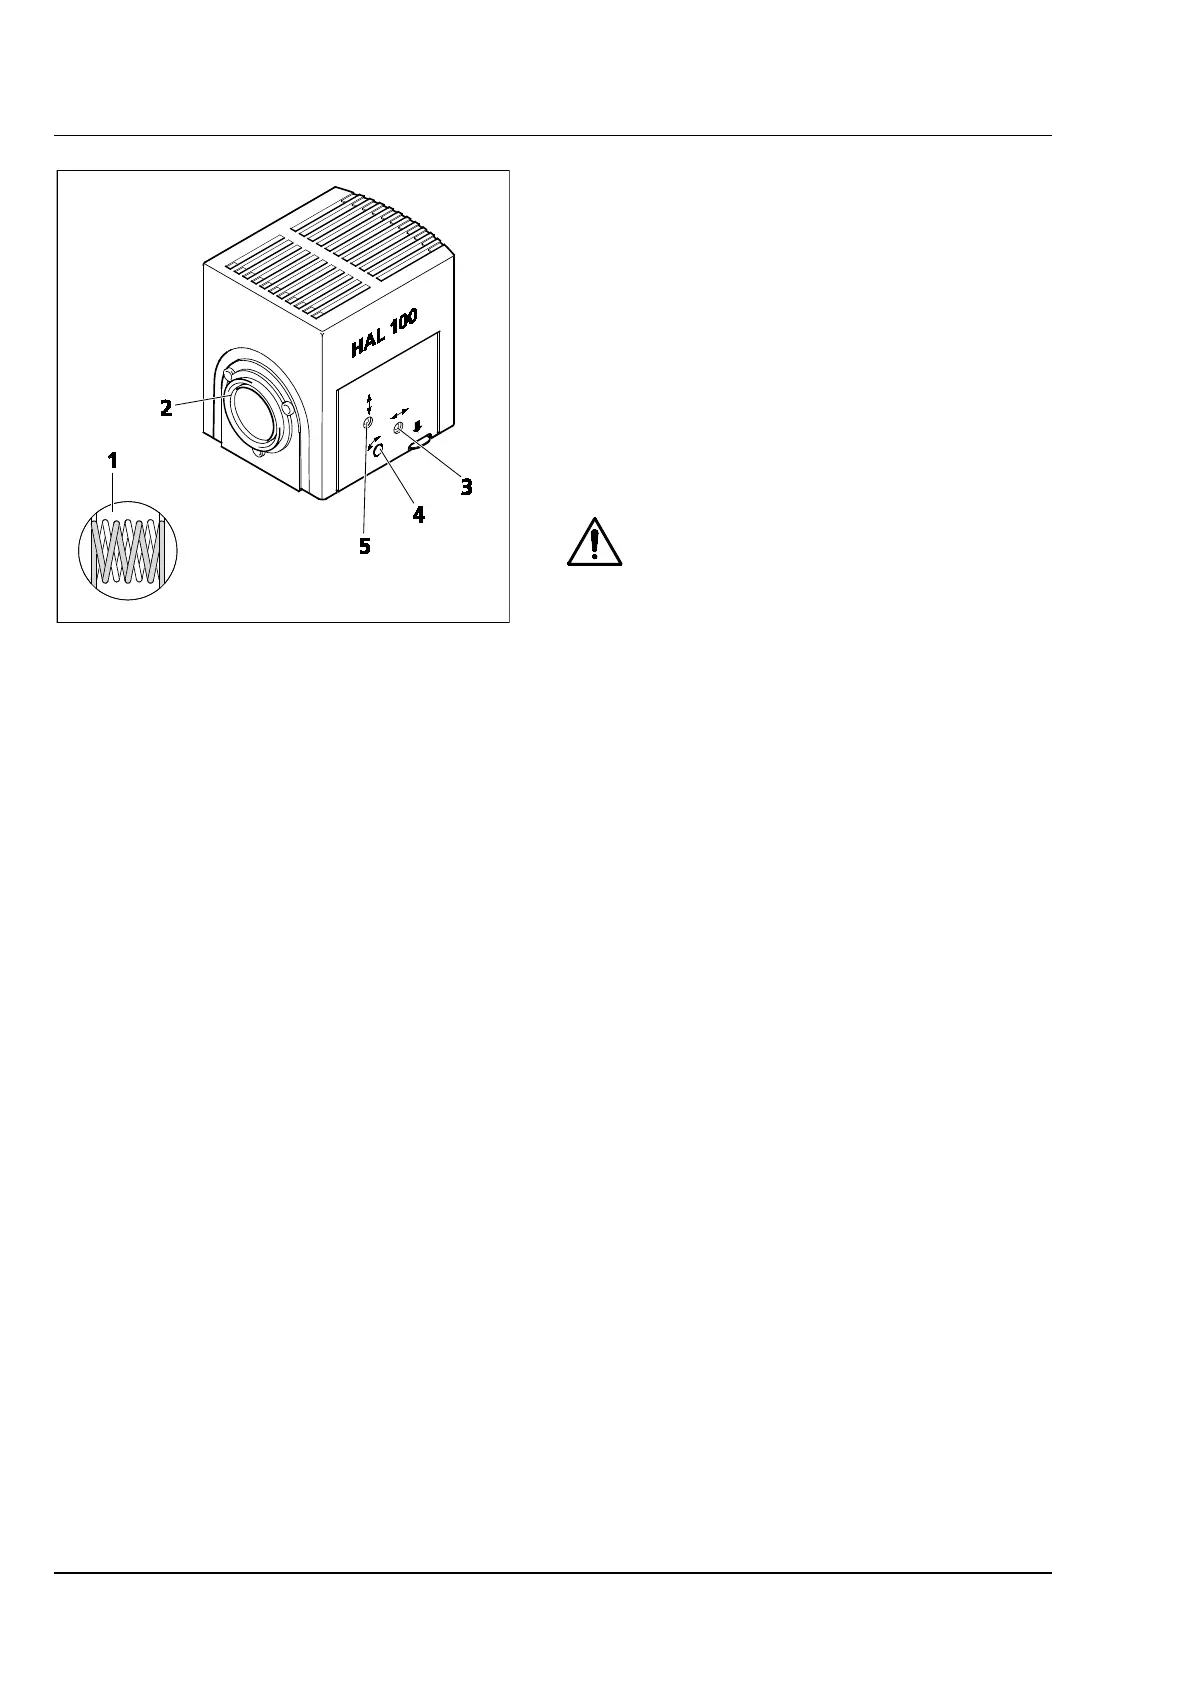
Adjusting the HAL 100 halogen 3.1.13.2
lamp
(1) Coarse adjustment
• Loosen the clamping screw (Figure 3-18/2), and
remove the ready-to-operate halogen
illuminator from the microscope stand.
• Switch on the 12 V DC 100 W external power
supply unit (see section 3.2.2).
• Direct the light beam against a projection
surface (wall) which is at least 3 m away.
Do not look into the illuminator's light
exit opening.
• Set the adjusting screw (Figure 3-19/3) using a
ball head screwdriver (width A/F 3) to reach the
best focus possible for both images of the lamp
filaments on the projection surface.
• Then, set the adjusting screws (Figure 3-19/4
and 5) to a value at which the lamp filaments of
one image exactly fill out the gaps in the
reflector image (Figure 3-19/1).
(2) Fine adjustment
• Attach the microscope lamp and locate it in position using the clamping screw at the microscope
stand again.
• If required, switch out the transmitted-light diffusing screen, and remove the filter drawer from the
corresponding holder compartment.
• Focus the ≤ 40x lens on the specimen, and find a free object position.
• Remove the eyepiece, and center the lamp filament and the lamp filament's mirror image in the pupil
image using the adjusting screws (Figure 3-19/4 and 5).
• Set the adjusting screws (Figure 3-19/3) to optimize the uniform illumination of the pupil image.
• If required, switch on the diffusing screen, and insert the filter drawer again.
Figure 3-19 Adjusting the HAL 100 halogen
lamp