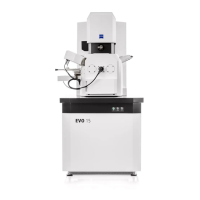
ZEISS 7 Troubleshooting | 7.2 Column
This procedure consists of the following steps:
Tungsten
Filaments pre-
aligned
1. Venting the Gun and the Specimen Chamber [
}
124]
2. De-energizing the Microscope [
}
125]
3. Disassembling the Gun [
}
126]
4. Disassembling the Firing Unit [
}
127]
5. Cleaning the Firing Unit [
}
128]
6. Cleaning the Anode [
}
130]
7. Unpacking a New Filament Holder | Tungsten Filament (Pre-Aligned) [
}
132]
8. Installing the Filament Holder to the Firing Unit [
}
137]
9. Installing the Brass Retaining Washer | Tungsten (Pre-Aligned) [
}
138]
10. Reinstalling the Firing Unit to the Gun [
}
142]
11. Reinstalling the Gun to the Microscope [
}
143]
Tungsten
Filaments not-pre-
aligned
This procedure also applies to the replacement of LaB₆ filaments with tungsten filaments.
1. Venting the Gun and the Specimen Chamber [
}
124]
2. De-energizing the Microscope [
}
125]
3. Disassembling the Gun [
}
126]
4. Disassembling the Firing Unit [
}
127]
5. Cleaning the Firing Unit [
}
128]
6. Cleaning the Anode [
}
130]
7. Disassembling the Filament Holder | Tungsten (Not Pre-Aligned) and LaB₆ [
}
133]
8. Unpacking a New Filament | Tungsten (Not Pre-Aligned) [
}
134]
9. Installing the Filament to the Filament Holder | Tungsten (Not Pre-Aligned) and LaB₆ [
}
136]
10. Installing the Filament Holder to the Firing Unit [
}
137]
11. Installing the Brass Retaining Washer | Tungsten (Not Pre-Aligned) [
}
139]
12. Reinstalling the Firing Unit to the Gun [
}
142]
13. Reinstalling the Gun to the Microscope [
}
143]
LaB₆ Filaments
1. Venting the Gun and the Specimen Chamber [
}
124]
2. De-energizing the Microscope [
}
125]
3. Disassembling the Gun [
}
126]
4. Disassembling the Firing Unit [
}
127]
5. Cleaning the Firing Unit [
}
128]
6. Cleaning the Anode [
}
130]
7. Disassembling the Filament Holder | Tungsten (Not Pre-Aligned) and LaB₆ [
}
133]
8. Unpacking a New Filament | LaB₆ [
}
135]
9. Installing the Filament to the Filament Holder | Tungsten (Not Pre-Aligned) and LaB₆ [
}
136]
10. Installing the Filament Holder to the Firing Unit [
}
137]
11. Installing the Brass Retaining Washer | LaB₆ [
}
141]
12. Reinstalling the Firing Unit to the Gun [
}
142]
13. Reinstalling the Gun to the Microscope [
}
143]
14. Starting up the LaB₆ Filament for the First Time [
}
144]
15. Aligning the Emission Image [
}
145]
Instruction Manual ZEISS EVO | en-US | Rev. 10 | 354706-0780-006 123