Chapter 5. Inventory
Deleting Items
If you wish to delete an item and start over, use the following procedure.
) IMPORTANT: This method is not to be used once you start receiving and selling inventory. It is
to be used only in the start up phase of implementation.
This process deletes the item(s) from the Inventory Static File (IM1.D) and
Inventory Store File (IM2.D) and the following files if found:
IM3.D 13 Month History File
IMH.D Revolving History File
IM9.D Multiple Location File
OM4.D Multiple Vendors
BC1.D Bar Code File
1 From the INVENTORY MENU, select 10 for Inventory Special Maintenance.
2 Select 4 for
Other Inventory Files.
3 Select 1 for
Delete Items-No Transactions
4 The computer displays the
Delete Item Numbers screen:
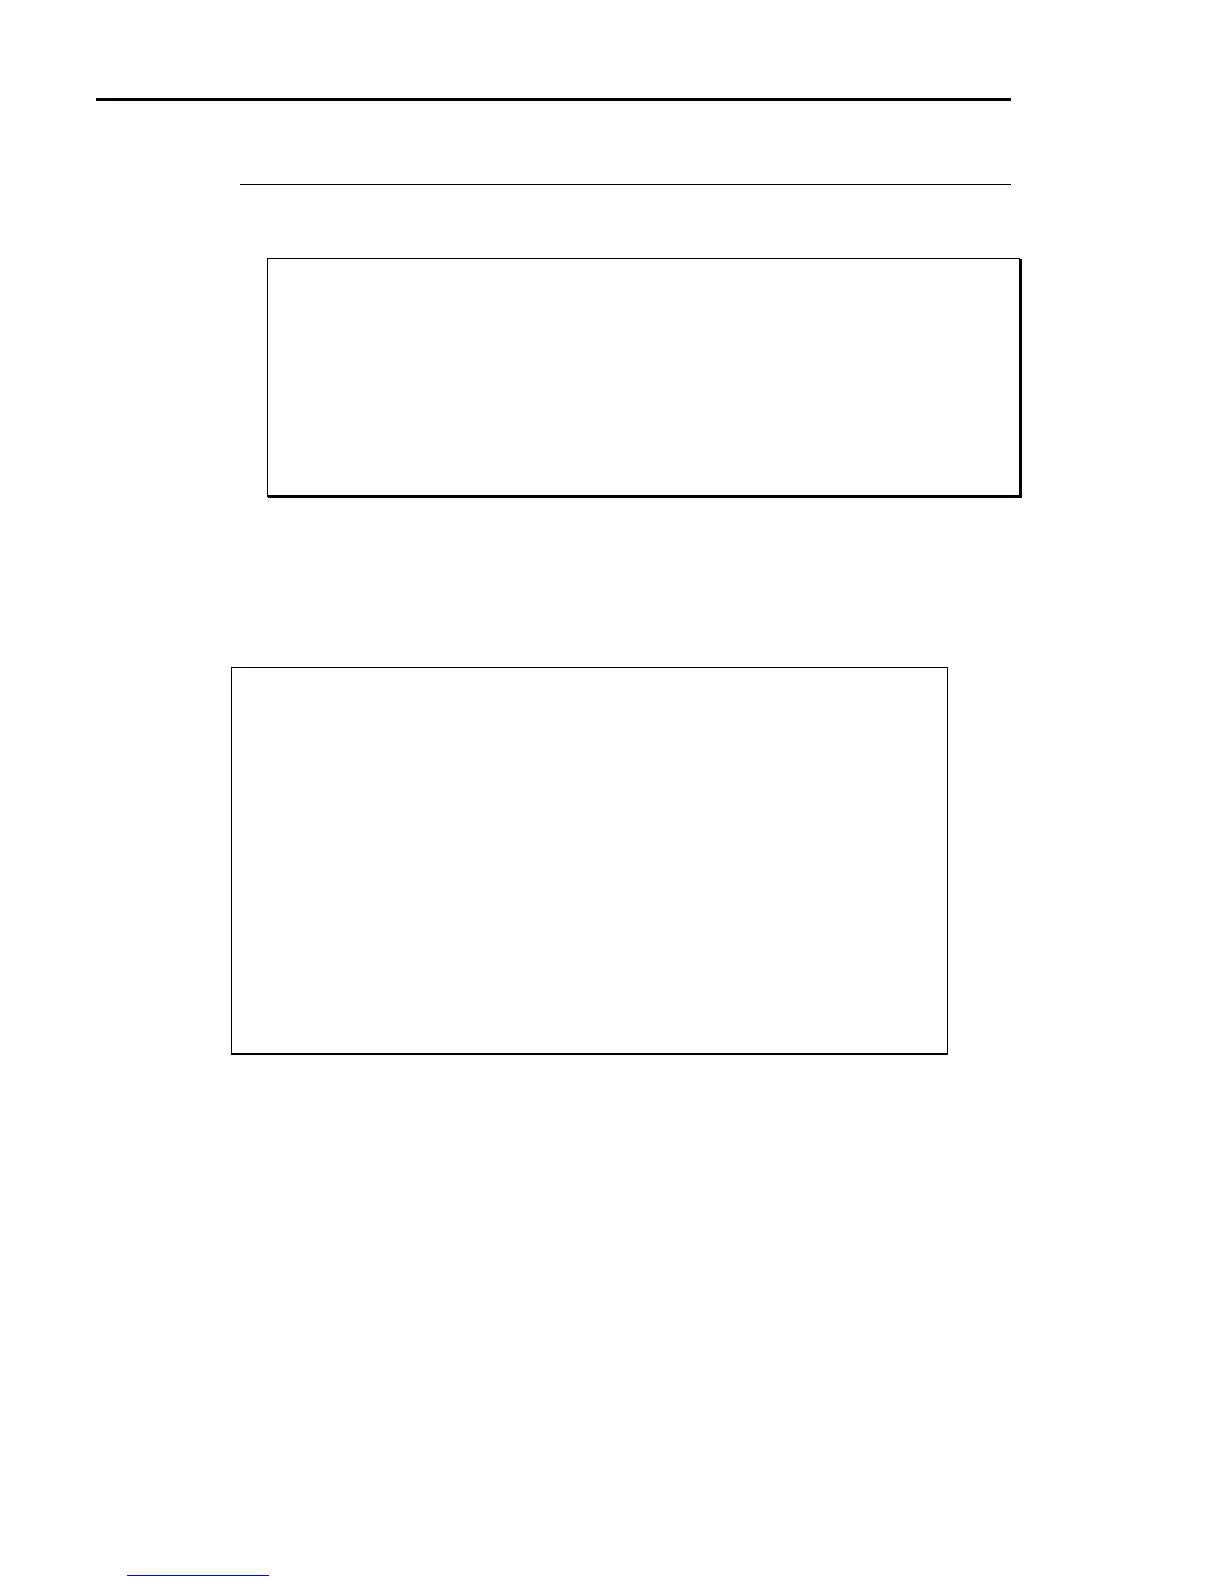
DS03402 Delete Item Numbers DIM11 DATA Date mm/dd/yy
Rev10.0.1 Port 39
Store 01
Item No 0
<UpA> = Change Store
<Ent> = Next Item
<Esc> = End
The cursor is positioned at Item No. You have the following options:
<UpA>=Change Store Press up arrow to change the store number.
Enter an item to delete Enter the item number you wish to delete. If you don’t
know the item number, you can find it on an item report.
Be sure to press Enter after you enter the item number.
<Ent>=Next Item After you display and/or delete an item, you can press
Enter to view the next item in item number order.
<Esc>=End Press Esc to end this procedure and return to the
previous menu.
186 Dimensions 14