EDIT SAMPLE
S3200XL Operator’s Manual - Version 1.00 Page 157
THE JOIN PAGE
In this page, you may join two samples end to end, crossfade them and merge them. This can
be very interesting for creating long, evolving sounds and big, thick orchestral and synth
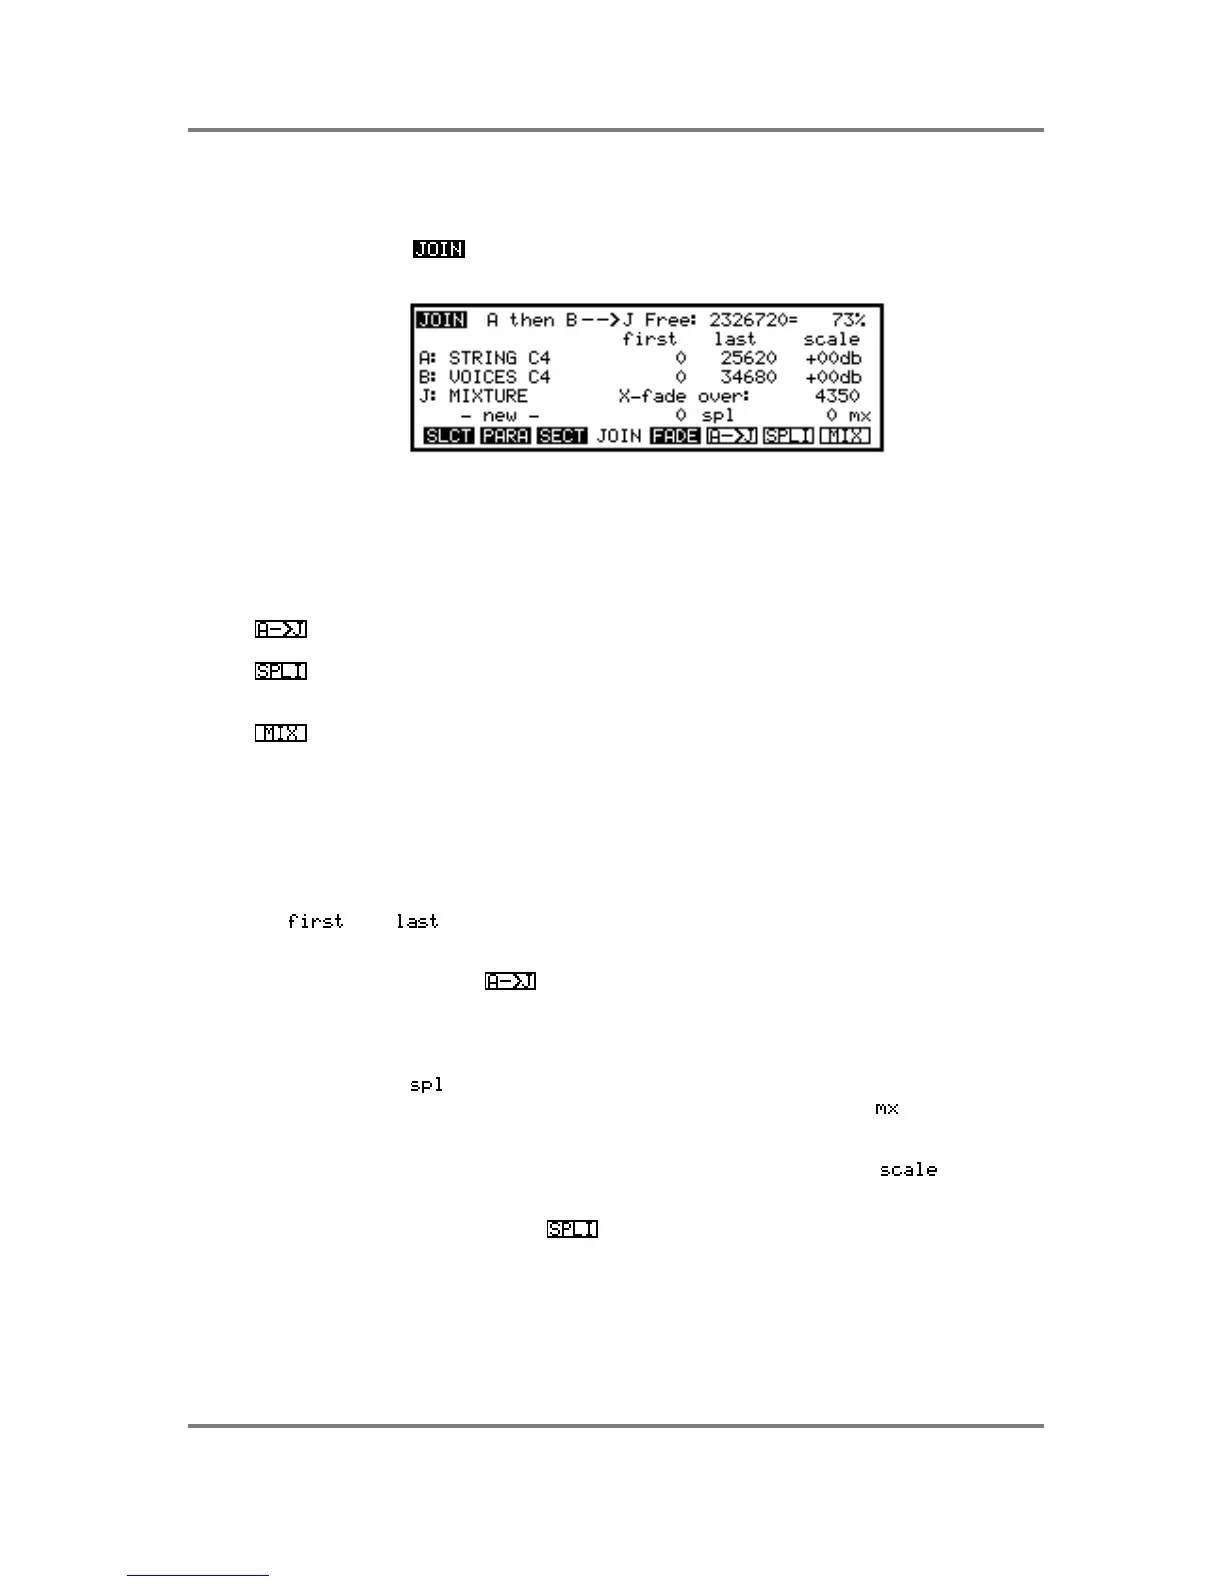
textures. Pressing will display this screen:
The samples to be joined together are known here as A and B, and the resulting JOINed
sample is called J. Though A and B can be the same sample, the resulting (J) sample cannot be
the same as either A or B. Press the NAME key to enter a new sample name for the sample J.
Existing samples can be overwritten and therefore can be used for J.
As mentioned earlier, this page has three basic functions
This will copy part of a sample (A) to another (J)
This will splice two samples end to end. You may also crossfade the two
samples.
This will mix two samples together, effectively layering them on top of each
other.
SPLICING SAMPLES
Select the A and B samples using the DATA control. You must then choose a name for the J
sample. This can either be the name of an existing, unwanted sample, or you can enter a new
name using the NAME key followed by pressing ENT/PLAY.
Now you should select the portions of the A and B samples which are to be combined using
the and fields. For example, you may want to splice just the attack portion of
sample A to the sustain portion of sample B, or mix just parts of two samples together. If you
want to hear exactly what part of a sample you are going to use, you can set the first and last
points of A, and then press - this will copy sample A into sample J without sample B so
that you audition it in isolation using the ENT/PLAY key (you can overwrite J later, of course, so
you’ve done no permanent damage to A if you get things wrong).
Notice how the figures at the bottom alter as the lengths of samples A and B are changed. The
figure before the (splice) field is the total length of the selected portions of the two
samples (minus the X-fade length - see below), and the figure before the (mix) field is the
length of the longest sample portion to be included.
You may set the respective levels of each of the samples A and B using the parameters
but be careful you don’t overload the system by setting too high a level.
Once you’ve set everything, press . If sample J already contains data, you will be asked if
you want to overwrite it (you should press GO or ABORT as necessary). After a few seconds
(depending on the length of the samples), you can hear the fruits of your labours by pressing
the ENT/PLAY key.
 Loading...