MM-400A
8. Operation Screens
8-94
(Caution) When measuring displacement (at the start of current, at the start of
the external input signal “DIST TRIGGER”, and constantly) by changing
MEASUREMENT MODE to REFERENCE, displacement is reset (0 mm).
(2) SENSOR
Select the manufacturer's name of the sensor to be connected from the
following:
Ono Sokki, Mitutoyo, KEYENCE, HEIDENHAIN
(3) SENSOR STEP
Enter the displacement sensor resolution. Set the value between 0.1 to 10.0
µm.
(Ex.) GS-1830A, GS-1813A, LGK-110, LG200-110: 1.0 µm
ST1278: 0.5 µm
The measurement range changes depending on the SENSOR STEP setting.
The measurement range of displacement is ± (SENSOR STEP setting x
30000) µm.
(Ex.) When the SENSOR STEP setting is 1 µm:
± (1 x 30000) µm = ±30000 µm = ±30 mm
(4) POLARITY
Set the displacement polarity.
FORWARD: Plus (+) in the direction of displacement sensor retraction)
REVERSE: Minus (-) in the direction of displacement sensor retraction)
(5) UNITS
Select mm or inch as the unit to measure and display the displacement.
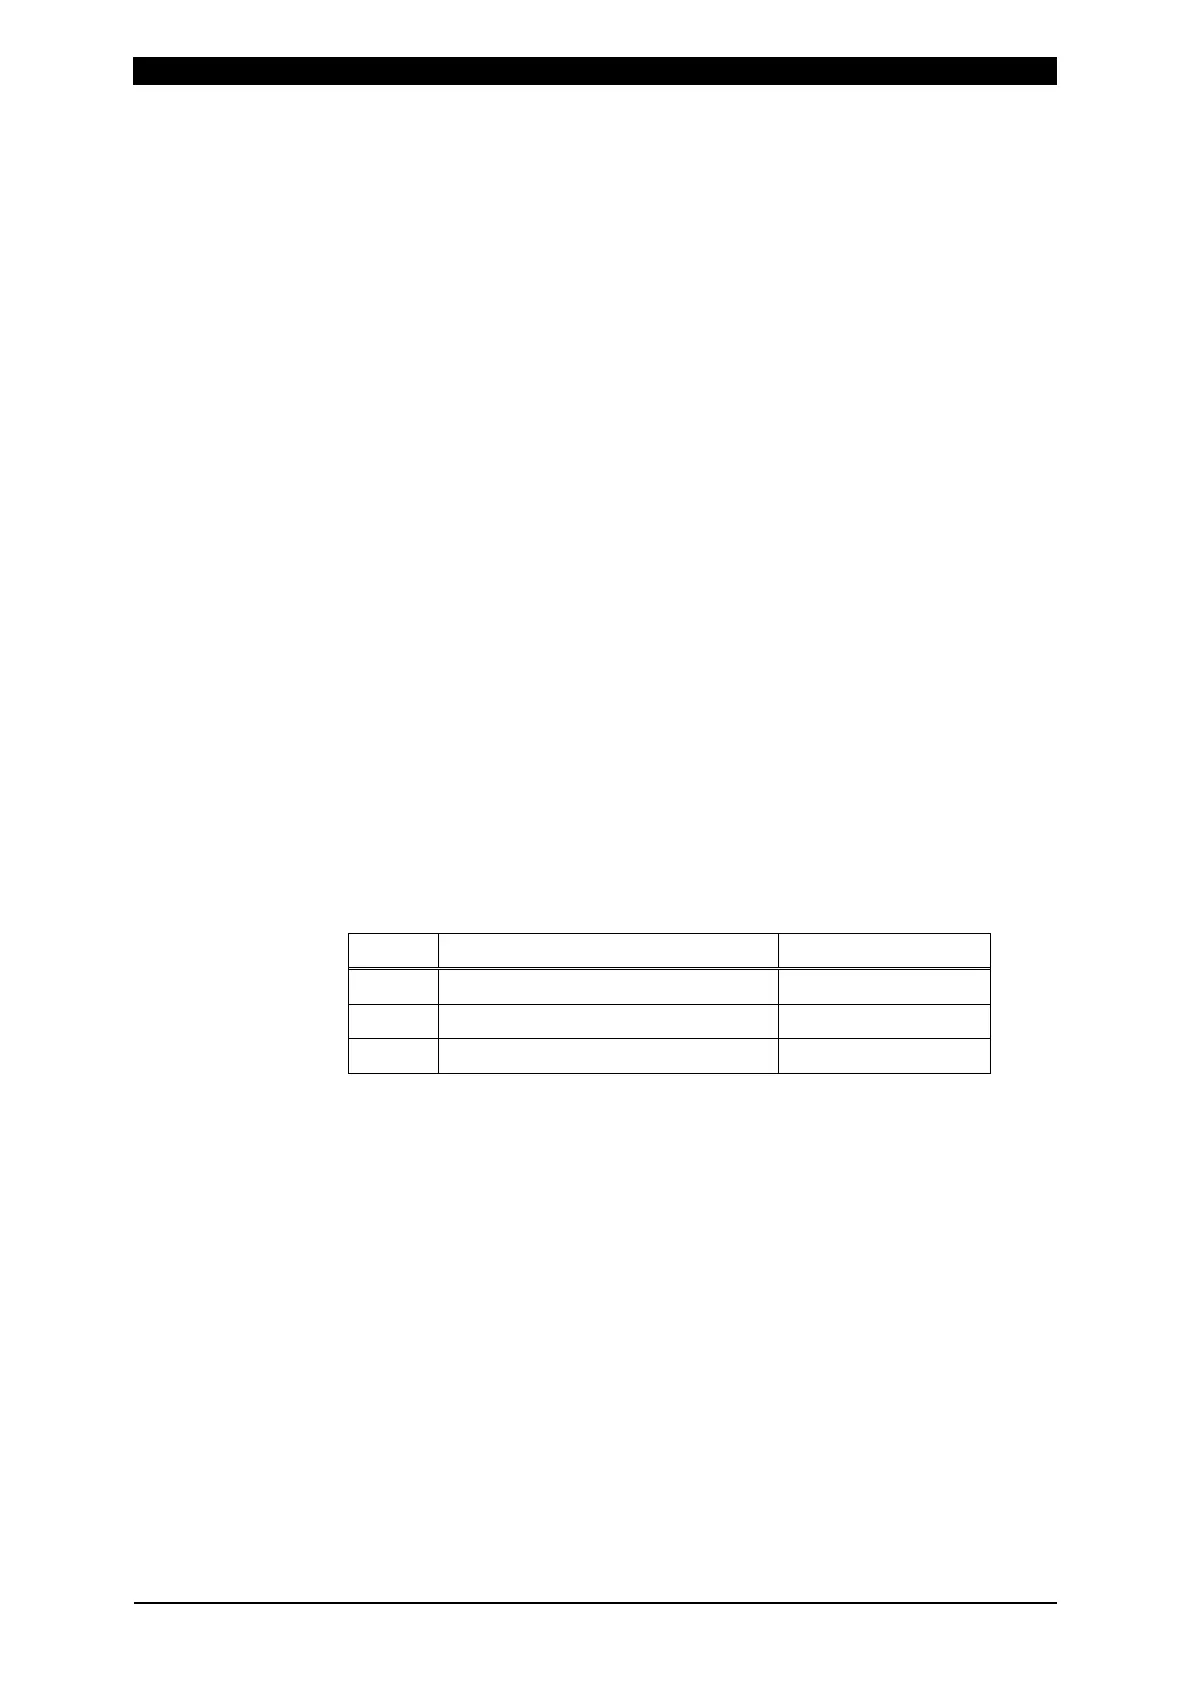
(6) OUTPUT RANGE
Select an analog output range for displacement.
Setting Output voltage and displacement Multiplying factor
2 mm ±2.047 mm (±5 V) 16x
10 mm ±8.191 mm (±5 V) 4x
30 mm ±32.767 mm (±5 V) 1x
(7) Function keys
MENU: Touching this displays the MENU screen.
NEXT: Touching this displays the EXTEND SETUP (4): FORCE (1/2) screen.
PREV: Touching this displays the EXTEND SETUP (2): DISPLACEMENT (2/3)
screen.
DIST: Touching this displays the EXTEND SETUP (1): DISPLACEMENT (1/3)
screen.
FORCE: Touching this displays the EXTEND SETUP (4): FORCE (1/2)
screen.
EXTERNAL: Touching this displays the EXTEND SETUP (6): EXTERNAL
(1/2) screen.