EasyManua.ls Logo

AmScope MU USB3.0 - User Manual

AmScope MU USB3.0
147 pages
Print Icon
To Next Page IconTo Next Page
Loading...
1
MU Camera Series Users Manual (Windows)

Table of Contents

Questions and Answers

  • D
    Dalton GonzalezAug 18, 2025
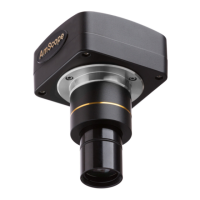
    What to do if the camera is not activating or detected on my AmScope Microscope?
    • P
      Phillip JonesAug 18, 2025
      If the camera is not activating or being detected on your AmScope Microscope, first ensure that a working USB cable is used to attach the camera to the computer in a powered USB 2.0 port. If it's still not detected, try replacing the USB cable and reinstalling both the driver and software. Also, make sure that you install the driver from the included software CD or the www.amscope.com website.
  • R
    Rick CooperAug 20, 2025
    Why is one side of the field of view darker on my AmScope MU USB3.0?
    • O
      Oscar CollinsAug 20, 2025
      A dark field of view on one side of your AmScope Microscope may be due to several reasons. First, the nosepiece might be misaligned; turn it until it clicks into place. Second, stains or dust could be on the objective, eyepieces, or base lens; clean all lenses with lens cleaner or a lint-free cloth. Finally, the port might not be fully open; if your microscope has a shutter or prism switch, ensure it's fully adjusted.
  • K
    kimberly06Aug 22, 2025
    What to do if I see obstructions in the field of view of my AmScope MU USB3.0 Microscope?
    • S
      scottcooperAug 23, 2025
      If you observe obstructions in the field of view of your AmScope Microscope, it could be due to stains, dust, or dirt on the specimen. Clean the slide, or use a new specimen if the sample is destroyed. Alternatively, stains, dust, or dirt may have accumulated on a lens. Clean both ends of the reduction lens and the lens on the camera body with lens cleaning solution and a non-abrasive optical lens cloth.
  • H
    hoffmanrobertAug 26, 2025
    How to fix an unclear image on AmScope MU USB3.0 Microscope?
    • J
      Justin ValdezAug 26, 2025
      An unclear image on your AmScope Microscope can be caused by a few things. Start by cleaning both ends of the reduction lens and the lens on the camera body with lens cleaning solution and a non-abrasive optical lens cloth, as stains, dust, or dirt may have accumulated on a lens. Also, remove the camera and use compressed air to remove any dust from the port, ensuring all objectives are cleaned. Finally, the sample might not be in focus; refocus while looking at the sample on the computer screen, adjusting the trinocular port or the microscope’s main focusing knobs.
  • A
    Ann DuarteAug 28, 2025
    Why is the field of view not bright enough on my AmScope MU USB3.0 Microscope?
    • M
      Mark JohnsonAug 28, 2025
      If the field of view on your AmScope Microscope isn't bright enough, try these solutions: Turn the dimmer dial or knob up on the microscope’s illumination source, or use a stronger light. If that doesn't work, adjust the exposure settings in the software; turn “Auto Exposure” on and raise the “Exposure Target”, or turn it off and adjust the “Exposure Time” setting.
  • D
    delgadorobertAug 30, 2025
    What causes a black image on the screen of my AmScope Microscope?
    • E
      ejonesAug 30, 2025
      A black image on your AmScope Microscope screen may stem from several issues: the port on the microscope might be closed, so open the port/shutter where the camera is installed, or move to another port. Another cause might be that the cap is left on the camera/reduction lens, so remove the camera and reduction lens and check all ends for caps/stickers. Also, ensure the microscope light is on and the intensity is turned up, verifying no caps are blocking the light path. Finally, the exposure might be set too low; turn auto exposure on, or adjust the “Exposure Time” slider until the image is visible.
  • A
    Austin RodriguezSep 2, 2025
    How do I resolve a dark side or image movement while focusing my AmScope MU USB3.0?
    • R
      Rose RomeroSep 2, 2025
      If one side of the field of view is dark or the image moves while focusing your AmScope Microscope, make sure the sample is secured to the stage. Also, ensure that the objective lenses of your microscope are locked into position.
  • M
    Michael GrahamSep 4, 2025
    How can I fix the inverted image on my AmScope MU USB3.0?
    • C
      Christopher AustinSep 4, 2025
      If the image on your AmScope Microscope is inverted, use the “Horizontal” and “Vertical” flip functions under “Flip” in the left navigation bar to correct for image inversions. This issue may occur if you are using a compound microscope, or if the reduction lens is inverting the image.
  • O
    Omar GutierrezSep 6, 2025
    Why am I getting a low frame rate on my AmScope Microscope?
    • S
      sclarkeSep 6, 2025
      A low frame rate on your AmScope Microscope can be due to several factors. Lower the live resolution and exposure time, use more light from the microscope, and set the frame rate setting to the highest. If the frame rate remains low, a USB3.0 device with a USB3.0 port may be required, or the PC hardware might not be powerful enough.
  • K
    Kathryn LeeSep 9, 2025
    How do I fix the 'Error Message: Insufficient Bandwidth' on my AmScope MU USB3.0?
    • N
      Nicholas ObrienSep 9, 2025
      The 'Error Message: Insufficient Bandwidth' on your AmScope Microscope indicates that the USB port used with the camera is not USB2.0/3.0 (depending on camera model) and/or powered. If using a high-resolution setting with a USB3.0 camera in a USB2.0 port, lower the resolution or use a USB3.0 port with a USB3.0 camera. Also, try using a different USB port on your computer, and if the error persists, try a different USB cable. If it's still malfunctioning, try a different computer if available.

Summary

Before Use

Safety Precautions

Provides essential safety guidelines for handling and operating the microscope camera.

Getting Started Guide

Quick Start Setup

Provides a step-by-step guide for initial setup, including checking contents and basic connection.

Software Installation via CD

Details the process of installing the AmScope software using the provided CD.

Software Installation via Download

Explains how to download and install the AmScope software from the website.

Using the Software

Activating the Camera

Guides the user on how to launch the software and connect to the camera for live view.

Capturing and Saving Still Images

Explains how to take and save still images using the software's capture function.

Recording and Saving Video

Guides users on how to record and save video clips using the software.

Capture and Resolution Settings

Details the "Snap" and "Record" buttons and how to adjust image capture resolution.

Exposure and Gain Adjustments

Explains settings for exposure and gain, including auto exposure functionality.

White Balance Control

Describes how to adjust white balance for accurate color reproduction using sliders and ROI.

Color Adjustment Sliders

Details sliders for hue, saturation, brightness, contrast, and gamma for color fine-tuning.

Top Toolbar Features

Calibration Shortcuts

Provides shortcuts to access calibration menus for measurements.

Top Navigation Bar Menus

Capture Menu Functions

Covers the "Capture" menu options for taking photos, recording videos, and starting broadcasts.

Process Menu Introduction

Introduces the "Process" menu for advanced image enhancement and annotation tools.

Process Menu Continued

Continues the "Process" menu explanation, covering Color Composite, Segmentation & Count, Denoise.

Measurement Menu Tools

Covers the "Measurement" menu for drawing and measuring tools, including Scale Bar and Z Order.

Process Menu Tools

Segmentation and Counting

Introduces the "Segmentation & Count" tools for segmenting images and counting objects.

Denoise Image Function

Explains the "Denoise" function for removing noise and improving image clarity.

Sharpen Image Function

Details the "Sharpen" function for enhancing image detail and defining lines.

Measurement Menu Functions

Measurement Menu Settings

Covers the "Measurement" menu for defining measurement units, scale bars, and Z order.

Options Menu Functions

Options Menu Overview

Details the "Options" menu for adjusting software behavior, preferences, and calibration.

Measurement Menu: General

Details parameters for measurement tools, including significant figures and label display.

Measurement Menu: Length Unit

Explains the "Length Unit" settings for selecting measurement units.

Calibration Menu Procedure

Guides users through calibrating the software for accurate real-world measurements.

Troubleshooting Common Issues

Common Issues: Field of View

Lists common problems with symptoms, causes, and remedies for the camera and software.

Common Issues: Camera Detection

Continues troubleshooting common issues like camera detection and low frame rates.

Common Issues: Error Messages

Addresses error messages related to calibration, bandwidth, and device connection issues.

AmScope MU USB3.0 Specifications

General IconGeneral
Camera TypeDigital
CategoryMicroscope
InterfaceUSB 3.0
Frame RateUp to 60fps
CompatibilityWindows, Mac
Sensor TypeCMOS
Light SourceLED
Focus ControlManual
Video FormatAVI
SoftwareAmScope
Magnification Range40x to 1000x
Image FormatJPG, TIFF
Software CompatibilityAmScope, ToupView

Related product manuals