Conguring Client Settings
Conguring Network Settings
110
Stopping a Wireless Network Connection
To stop a wireless network connection, please do the following:
1. On Atrust Client Setup, click Network > Wireless to open the Wireless Network list.
2. Click to check the desired wireless network. The Disconnect
button appears on the top of the
Wireless Network list.
3. Click Disconnect to stop the wireless network connection.
Adding a Wireless Network
In case that you cannot nd the desired wireless network in the Wireless Network list, you can manually add it.
To add a wireless network to the Wireless Network list, please do the following:
1. On Atrust Client Setup, click Network > Wireless to open the Wireless Network list.
2. Click Add on the top of the Wireless Network list.
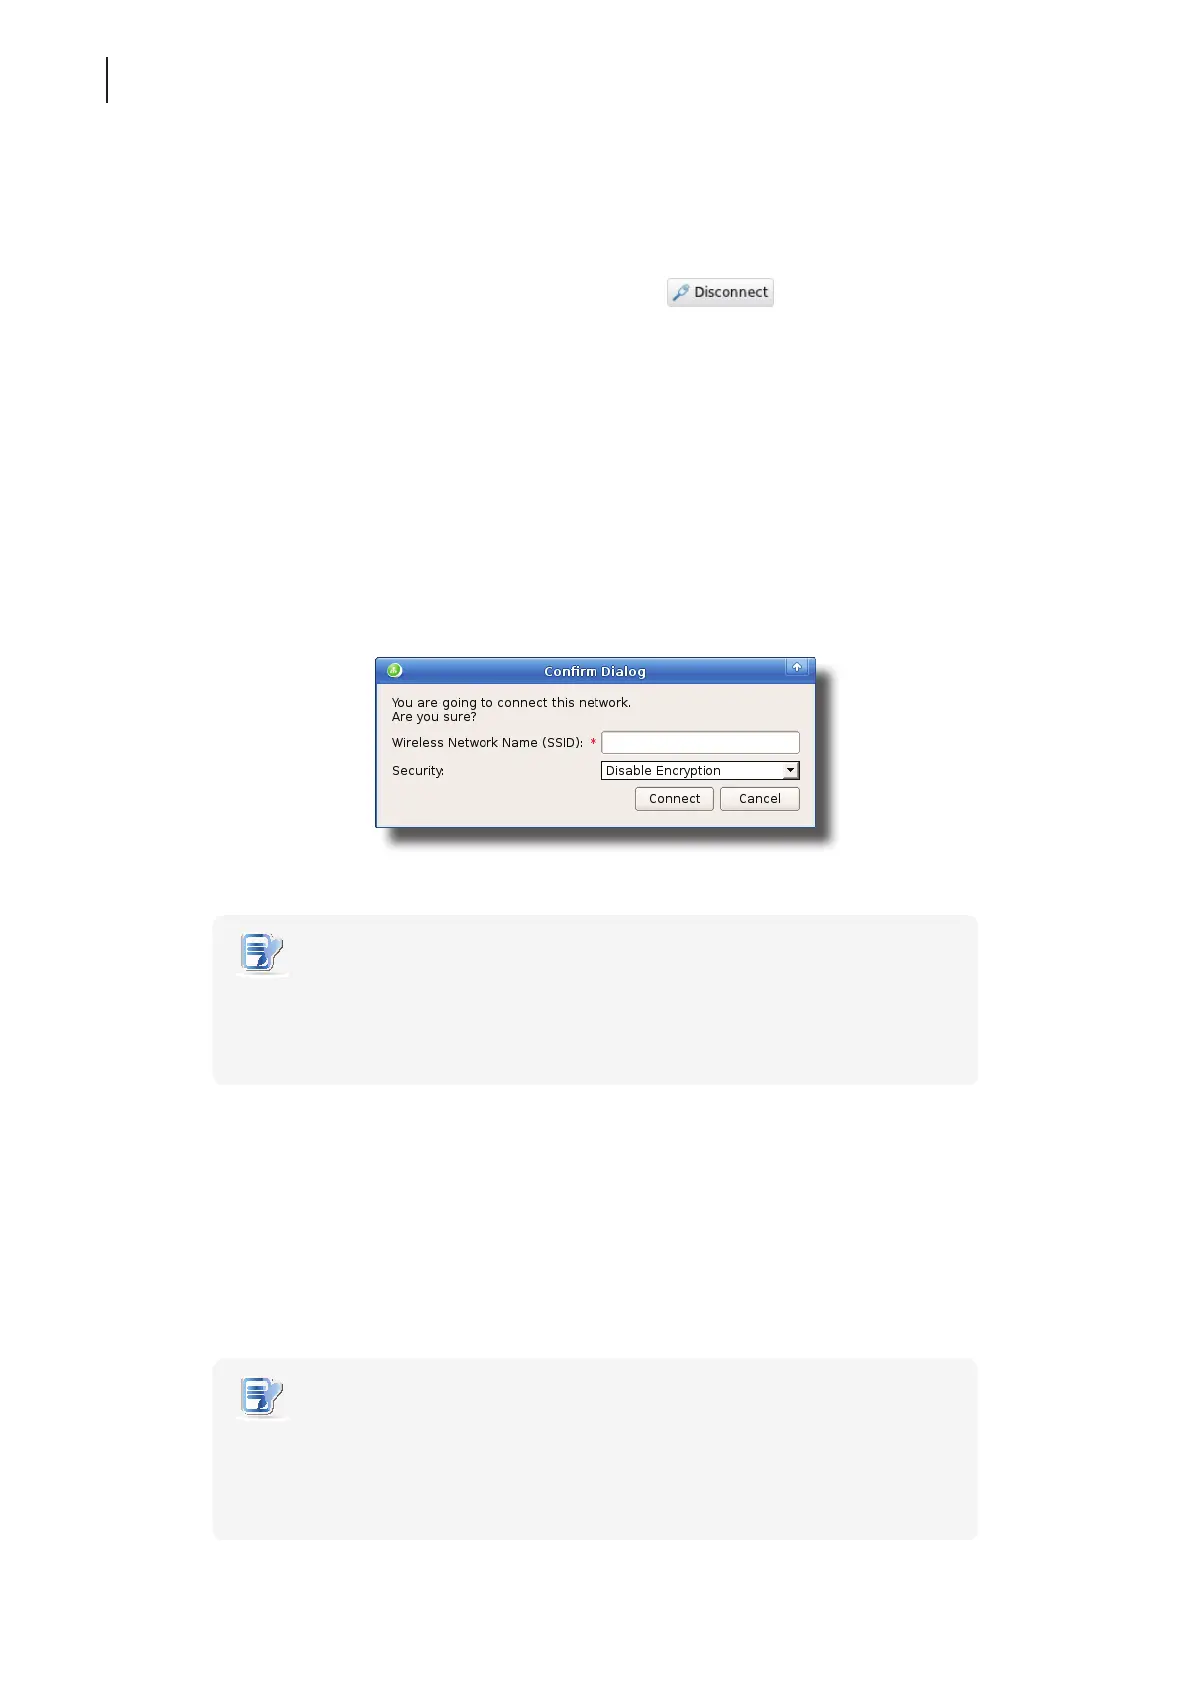
3. On the opened window, type the wireless network name (SSID), select the used wireless security method,
and then provide the required information.
4. Click Connect to create a wireless connection.
NOTE
• For instructions on how to congure the IP address settings, please refer to section
“4.5.3 Conguring Wired Network Settings” on page 92.
• The default is to use a dynamic IP address assigned by the DHCP server.
5. Upon completion, the added wireless network will be shown on the Wireless Network list and connected will
be shown on its Status column.
Deleting a Wireless Network
To delete a wireless network, please do the following:
1. On Atrust Client Setup, click Network > Wireless to open the Wireless Network list.
2. Click to check the desired wireless network, and then click Delete to remove the selected wireless network.
NOTE
• Your t180L/t180LB detects available wireless networks automatically and put the
discovered networks on the Wireless Network list. A deleted wireless network may
therefore appear again on the list, but the connection settings, including the stored
authentication data, will be removed.