Cube
®
Installation & Startup
1MANUL963 Belanger, Inc. * PO BOX 5470. * Northville, MI 48167-5470 * Ph (248) 349-7010 * Fax (248) 380-9681 6-41
Chapter 6 Frame and Carriage Assembly
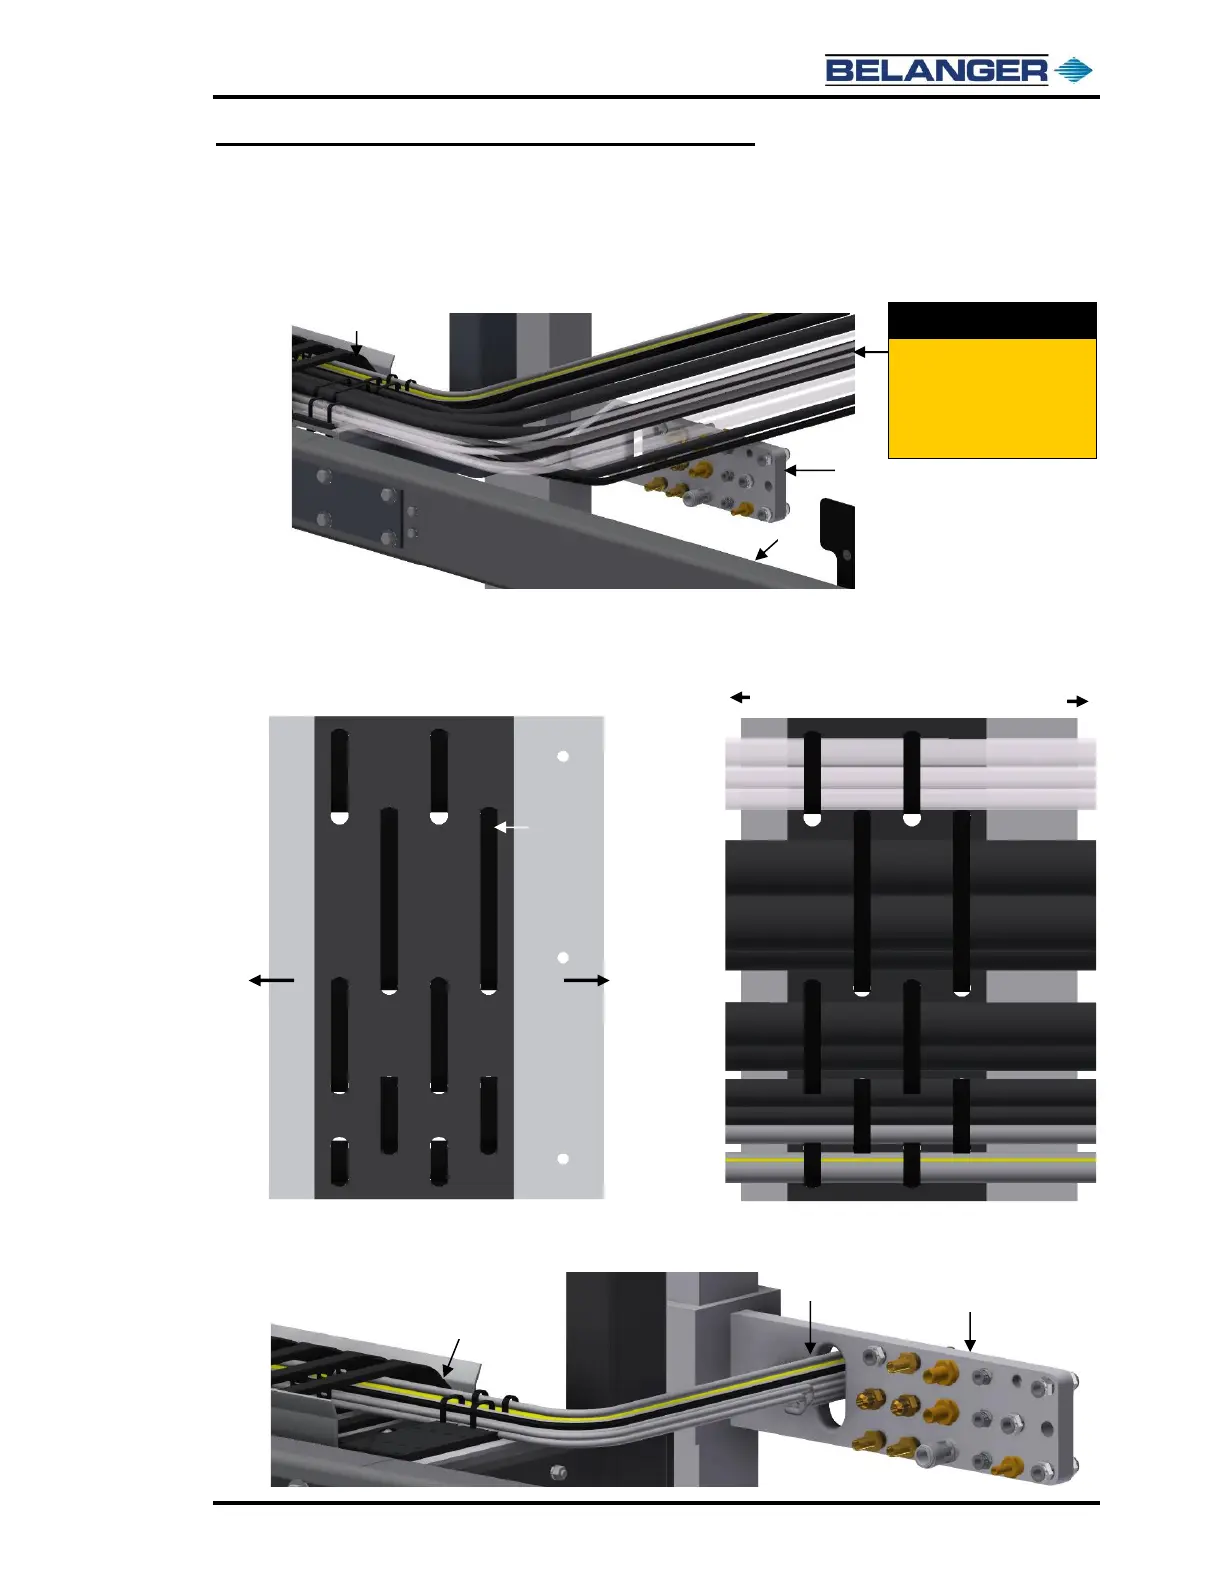
Connect the Carriage Utility Lines to the Utility Manifold
3) Before routing the electrical cables through or connecting the utility lines to the Utility Manifold
it is necessary to roll the Carriage back and forth on the Rails a few times so the lines settle
into place in the Cable Carrier. First, lay all the Utility Lines over the Utility Manifold, as shown
below.
4) Roll the Carriage back and forth on the Rails, from one end stop to the other, several times.
5) Secure all the Utility Lines to the Angle Mount Bracket by tightening all the black Cable Tie
Straps now. The images below of the Mount Bracket, from a top view, show what components
go through each set of tie straps.
6) Route all the Electrical Cables from the CAT Track Cable Carrier through the slot in the Utility
Manifold, as shown below.
Lay ALL the Utility Lines over
the Utility Manifold. Roll the
Carriage back and forth on
the Rails so the lines settle
into the Cable Carrier.


 To Next Page