M710 User Manual 7
Setup
Power
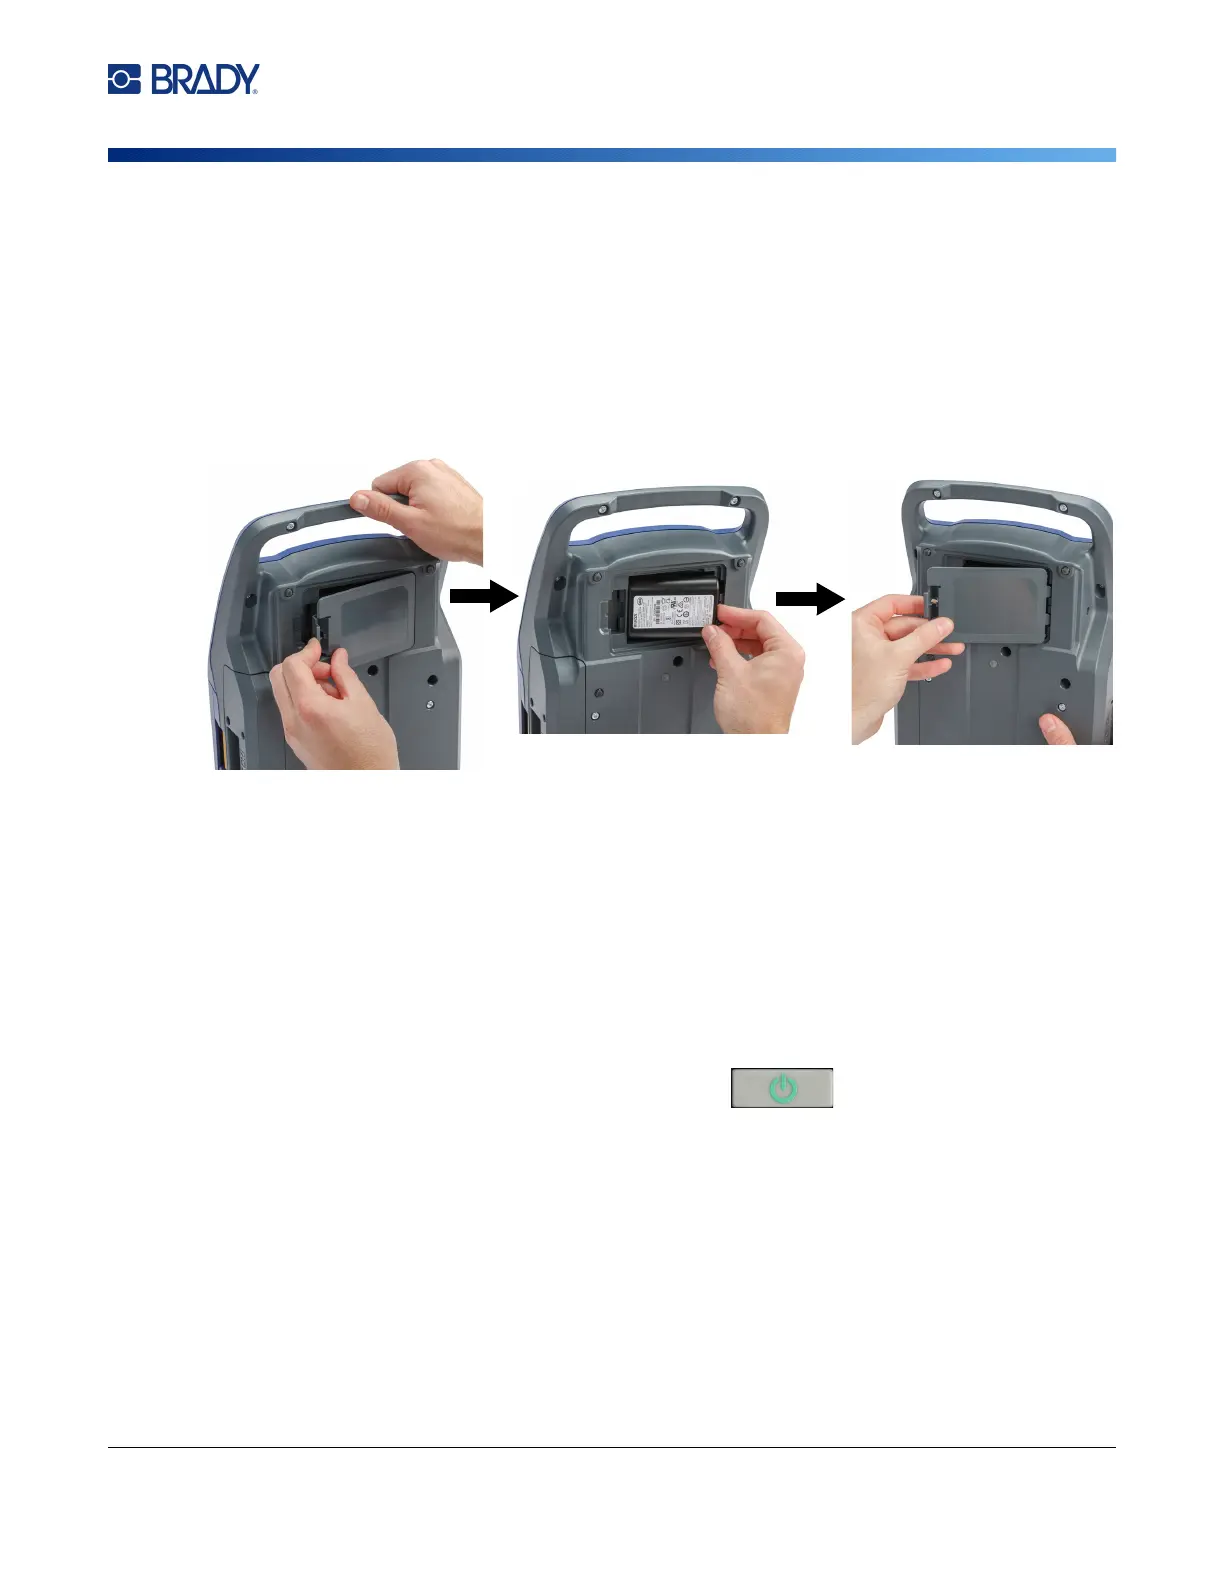
Installing the Battery
To install the battery:
Charging the Battery
To charge the battery:
1. With the battery installed in the printer, plug the printer in to an electrical outlet.
2. The first time that you charge the battery, allow it to charge for 3.5 hours.
Power On
To turn the printer on or off:
1. Press the power button on the front of the printer.
2. The first time you turn on the printer, choose a language in which to display screen items. See
“Printer Settings” on page 8.
Note: Whenever the printer is powered on, the system performs an initialization process. Part of
this process is recognizing the ribbon and label part installed. If the ribbon or label is not
installed, an error message displays. You can dismiss this error during initial setup or if you
wish to continue without the label and ribbon.
The detected ribbon and label information is used when designing labels. While you can
design labels without installing ribbon or label supply, if you choose not to install any, the
label design may not match the ribbon and label supply used to print.
1. Stand the printer up so you
can access the bottom.
Push to the right on the
battery cover release latch,
swing the cover open, and
lift it out.
2. With the battery label facing
outward, insert battery pegs into
the peg slots at the left of the
compartment, then push the
right end of the battery into
place.
3. Re-insert the tabs on the
battery cover into the right
side of the compartment
and snap the cover into
place.