M710 User Manual 65
Label Types
Terminal Block, Patch Panel, 66-Block
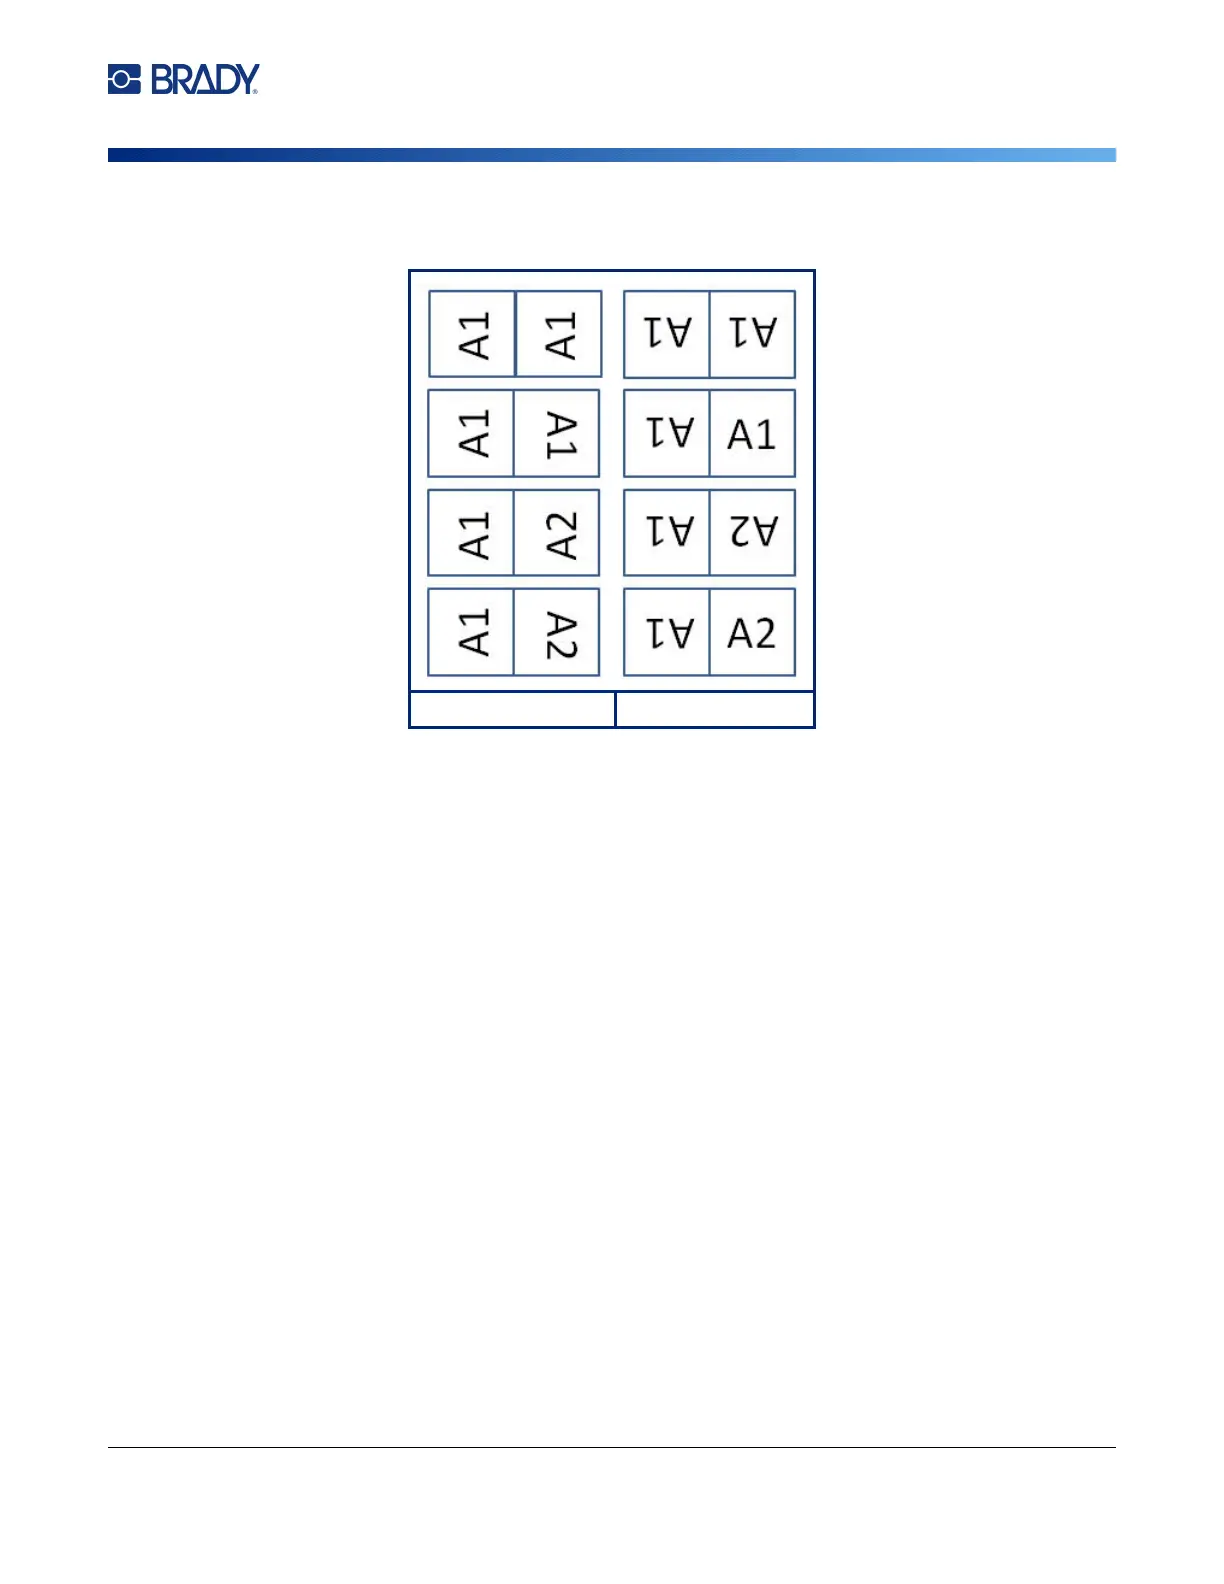
6. Rotate the data if desired. The provided layouts orient the text parallel to the wire or cable. If
you want the text rotated 90º, select the Rotate check box.
7. When finished, tap OK.
8. On the editing screen, enter the text that will display on the flag. Depending on the layout you
chose, you may have to navigate to the second area to enter all the text.
• If the layout chosen puts the same text element on both sides of the flag, the printer
automatically duplicates the entered text for the other area, rotating according to the predefined
layout.
• If the layout chosen uses different text on each side of the flag, enter the text in the first area and
then navigate to the second area and enter text. The upper right of the touchscreen indicates
which area is currently visible. Use the NEXT AREA and FN + PREV AREA keys to navigate
between areas. See
“Go to Label or Area” on page 44
.
9. Press PREVIEW to view the labels before printing.
Terminal Block, Patch Panel, 66-Block
Terminal Block, Patch Panel, and 66-Block label types are designed to be used with continuous label
supply. If continuous label supply is not installed, these label types do not display in the menu. To
maintain correct spacing or add to the label prior to cutting, you can choose to disable feeding to cut
after printing.
To create terminal block, patch panel, or 66-Block labels:
1. Press LABEL TYPE.
2. Select Terminal Block, Patch Panel, or 66-Block. The printer displays the settings screen for
terminal block, patch panel, or 66-Block labels. All three types contain the same settings.
Original Layout Rotation Applied