M710 User Manual 25
3 General Operation
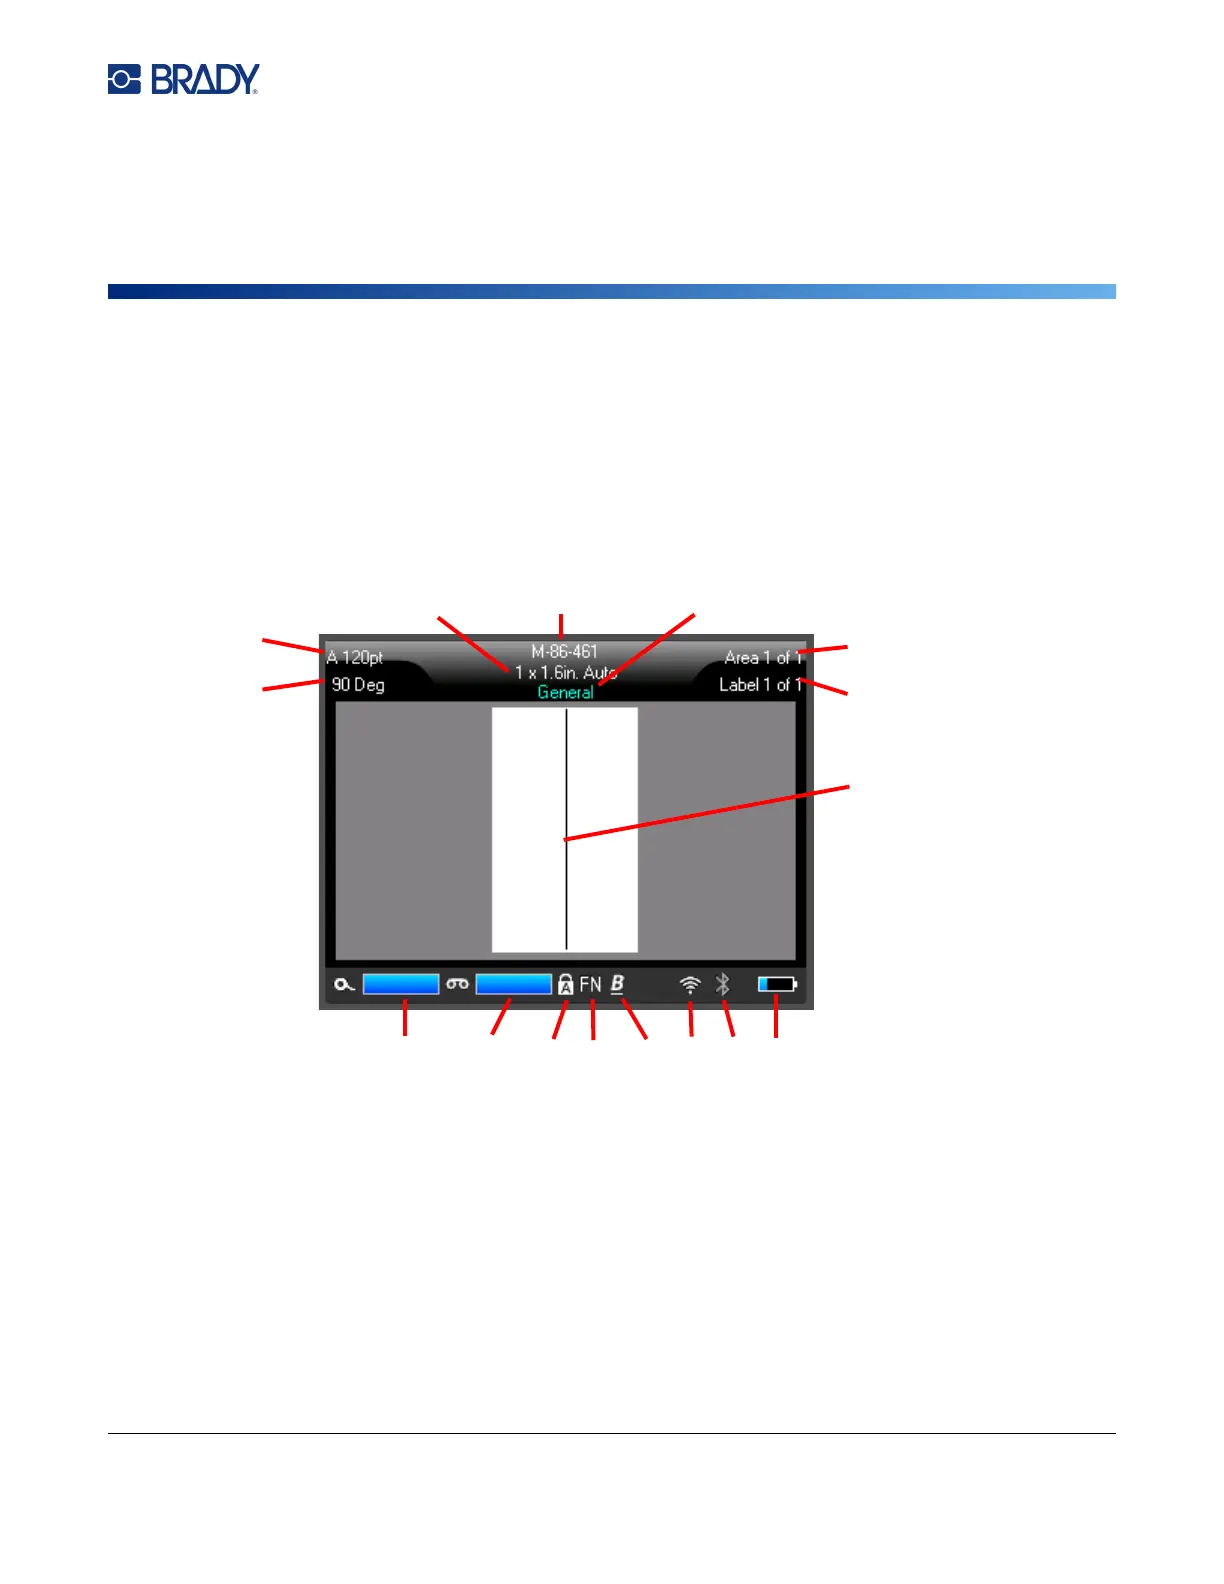
Using the Touchscreen
Use the printer’s touchscreen to create labels, configure settings, and check status, among other
functions. Touch the screen with your finger to make a selection.
The screen shows a representation of the loaded label supply and ribbon (or the last known supplies)
in the correct color. The screen displays one label at a time. For labels with multiple areas, only one
area displays at a time.
1. Label size. The word Auto after the label size indicates that a continuous label supply (as
opposed to pre-sized) is set to automatically size to the label contents.
2. Label supply. The part number of the installed label supply. If labels are not installed this
displays the label supply used last.
3. Label type. The printer provides tools for editing labels for specific purposes, such as wire
markers, terminal blocks, and vials. See Chapter 5: Label Types.
4. Area number. The total number of areas on the label and the area currently being edited. See
“Labels and Areas” on page 43.
5. Label number. The total number of labels in the file and the label currently being edited. For
information on navigating between labels see “Navigation and Selection Keys” on page 30.
6. Cursor. Marks the insertion point for data entry.